6-9
Performance Tests
Test 5. Amplitude Accuracy and Linearity
Test 5. Amplitude Accuracy and Linearity
Equipment
Amplitude linearity is performed using the following devices:
• 1550 nm DFB lasers
• Optical attenuator
• Agilent 11896A Polarization Controller
• Optical power meter
Procedure
1
Turn on the laser and allow it to warm up.
2
Connect the laser’s output to the optical attenuator’s input.
3
Connect the optical attenuator’s output to the polarization controller’s optical
input.
4
Connect the polarization controller’s optical output to the optical power meter.
5
Configure the optical power meter for 1550 nm.
6
Adjust the optical attenuator so that the power meter measures a power level
of 0 dBm.
7
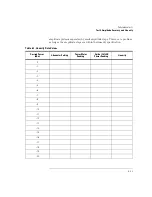
Enter the attenuator setting and the measured power level in the first row of
. Be sure to enter these values into the “Attenuator
Settings” and “Power Meter Readings” columns.
8
Enter the measured power on the following line:
Pwr: ____________
9
Change the attenuator in 1 dB steps as shown in
, and enter the
attenuator settings and power measurements.
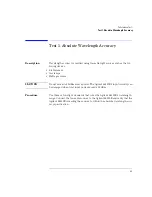
Polarization sensitivity
To ensure measurement accuracy, minimize the movement of any fiber-optic cables dur-
ing this procedure. Moving cables causes polarization changes which affect amplitude
measurements.
Summary of Contents for Agilent 86120B
Page 1: ...Agilent 86120B Multi Wavelength Meter User s Guide ...
Page 11: ...Contents 3 Contents Power Cords 8 16 Agilent Technologies Service Offices 8 18 ...
Page 12: ......
Page 38: ......
Page 68: ......
Page 100: ...4 18 Programming Monitoring the Instrument ...
Page 132: ......
Page 230: ......
Page 248: ...8 6 Reference Menu Maps Delta On Menu Delta Off Menu ...
Page 250: ...8 8 Reference Menu Maps System Setup Menu ...
Page 268: ......

