Chapter 5
243
Post-Repair Procedures
Configuring a Replacement CPU Assembly
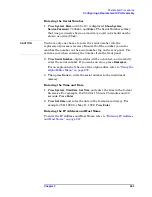
Entering the Serial Number
1. Press
System
,
More
until (2 of 3) is displayed,
Show System
,
Service Password
,
7378423
, and
Enter
. The Serial Number softkey
that was previously shown as inactive (grayed out) should now be
shown as active (black).
CAUTION
You have only one chance to enter the serial number into the
replacement processor memory. Ensure that the number you enter
matches the number on the serial number tag on the rear panel. Use
extreme care when entering the number from the front panel.
2. Press
Serial Number
—alpha editor will be activated—and carefully
enter the serial number. If you make an error, press
Backspace
.
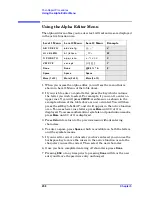
For an explanation of the use of the alpha editor, refer to
Alpha Editor Menu” on page 258
.
3. Then press
Done
to write the serial number to the instrument
memory.
Entering the Time and Date
1. Press
System
,
Time/Date
,
Set Time
, and enter the time in the format
hh.mm.ss. For example, 15.25.30 for 15 hours 25 minutes and 30
seconds. Press
Enter
.
2. Press
Set Date
and enter the date in the format mm.dd.yyyy. For
example 05.11.1999 for May 11, 1999. Press
Enter
.
Entering the IP Address and Host Name
To enter the IP Address and Host Name, refer to
Summary of Contents for E4406A VSA Series
Page 4: ...4 ...
Page 10: ...10 Contents ...
Page 11: ...11 1 Troubleshooting ...
Page 66: ...66 Chapter1 Troubleshooting How to Return Your Instrument for Service ...
Page 67: ...67 2 Block Diagrams ...
Page 119: ...Chapter 2 119 Block Diagrams Block Diagrams Block Diagrams ...
Page 120: ...120 Chapter2 Block Diagrams Block Diagrams ...
Page 122: ...122 Chapter2 Block Diagrams Block Diagrams ...
Page 124: ...124 Chapter2 Block Diagrams Block Diagrams ...
Page 125: ...125 3 Parts List ...
Page 164: ...164 Chapter3 Parts List Hardware ...
Page 165: ...165 4 Assembly Replacement ...
Page 169: ......
Page 170: ...170 Chapter4 Assembly Replacement Removal and Replacement Procedures ...
Page 227: ...Chapter 4 227 Assembly Replacement Front Frame Subassemblies Figure 4 39 Keypad Parts ...
Page 231: ...231 5 Post Repair Procedures ...
Page 262: ...262 Chapter5 Post Repair Procedures Automated Adjustments ...


