188
Chapter 8
Printing Measurement Results and Internal Data
Printing Measurement Graphs and Internal Data Lists
a.
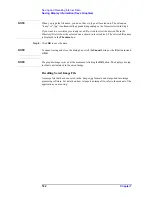
Attached your printer to the printer parallel port (see “3. Printer parallel port
(PRINTER, Parallel)” on page 29) on the rear panel of the E4991A.
For details on how to attach a printer to the port, see the appropriate instructions in your
printer’s manual.
NOTE
Do not attach a printer until you have installed the corresponding driver on the E4991A.
b.
Turn on your printer’s power.
Step 2.
To print a measurement graph, click inside the window of the desired trace (or press
)
to make its window active. The selected window’s frame will be red.
Step 3.
Right-click to open the shortcut menu and select
Display
, or just press
.
Step 4.
Click the
Print/Clipbd Menu
button.
Step 5.
Click to select the desired print operation button.
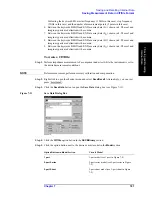
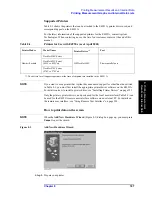
After clicking one of the above buttons, the
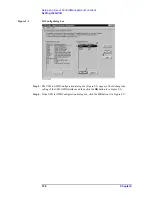
dialog box (Figure 8-4) opens.
Figure 8-4
Print Dialog Box
Step 6.
Confirm that
HP DeskJet 550C Printer
is selected in the
Name
box of the
Printer
section.
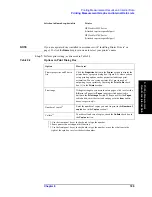
Print operation button
Function
Print Graph (Color)
Prints the graph in the active window in color.
Print Graph (Mono)
Prints the graph in the active window in black and
white.
Printer List Values
Prints a list of measurement values (Figure 8-1).
Print Operating Params
Prints a list of operating parameters (measurement
conditions) (Figure 8-2).
Selection in
Name
drop-down list
Printer
HP DeskJet 550C Printer
HP DeskJet 930C Series
(Attached to printer parallel port)
Summary of Contents for E4991A
Page 6: ......
Page 24: ...18 Contents ...
Page 80: ...74 Chapter3 Setting Measurement Conditions Averaging Measurement Results ...
Page 220: ...214 Chapter9 Setup and Use of Control Management Functions System Recovery ...
Page 338: ...332 AppendixB Probe Station Connection Kit Option 010 OPEN SHORT LOAD Calibration ...
Page 428: ...422 AppendixD Menu References Menu References ...
Page 482: ...476 AppendixI Messages Wait measuring comp standard ...


