250
Appendix D
Computer Virus Check
Computer Virus Check
Computer Virus Check
The E5052A should be protected against computer viruses. If you need to check the system
of E5052A for computer viruses, it’s recommended that an external PC installed anti-virus
software is used to access E5052A’s built-in drive (C and F) via LAN and perform virus
scan.
The E5052A has no virus function nor anti-virus software installed. The Windows
operating system installed in this instrument is customized for more effective operation.
Installing Windows-based software (including anti-virus software) for ordinary PCs into
this instrument may affect the behavior of the instrument during measurement.
Required equipment
•
E5052A (with keyboard and mouse).
•
An external PC installed anti-virus software such as “Norton AntiVirus
®
”.
•
A crossed LAN cable (It enables the peer-to-peer communication between the E5052A
and the PC.)
How to check the drive C and F of E5052A
The following is an example procedure to check the drive C and F of E5052A using the
external PC.
Step 1.
Set up the E5052A for file sharing.
1. Connect the E5052A to the PC using the crossed LAN cable.
2. Press
key.
3. Press
Misc Setup
-
Network Setup - Network Configuration
. The Network and
Dial-up Connections window will appear.
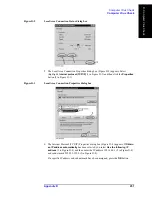
Figure D-1
Network and Dial-up Connections window
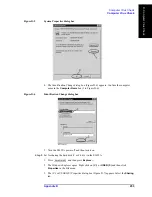
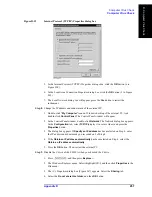
4. Double-click the Local Area Connection icon (1 in Figure D-1) in the Network and
dial-up connections window to enable the network connection function. The Local
Area Connection Status dialog box appears. Click the
Properties
button.
Summary of Contents for E5052A
Page 13: ...Contents 13 M 271 N 271 O 271 P 271 R 272 S 273 T 273 U 273 ...
Page 14: ...14 Contents ...
Page 22: ...22 Chapter1 General Information Required Equipment ...
Page 46: ...46 Chapter2 Performance Tests Individual Test Description Step 17 Turn off the power of AMP2 ...
Page 82: ...82 Chapter3 Adjustment Required Adjustment after Replacing Assembly ...
Page 218: ...216 Chapter6 Replacement Procedure A51 LCD Replacement Figure 6 27 A51 LCD Removal ...
Page 222: ...220 Chapter6 Replacement Procedure BNC Connector front Replacement ...
Page 244: ...242 AppendixB System Recovery Calibration of the Touch Screen ...
Page 250: ...248 AppendixC Firmware Update Firmware Update ...
Page 261: ...259 E Power Requirement E Power Requirement ...


