226
Appendix D
Computer Virus Check
Computer Virus Check
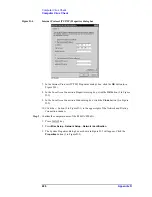
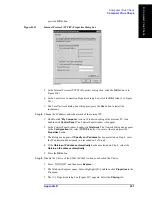
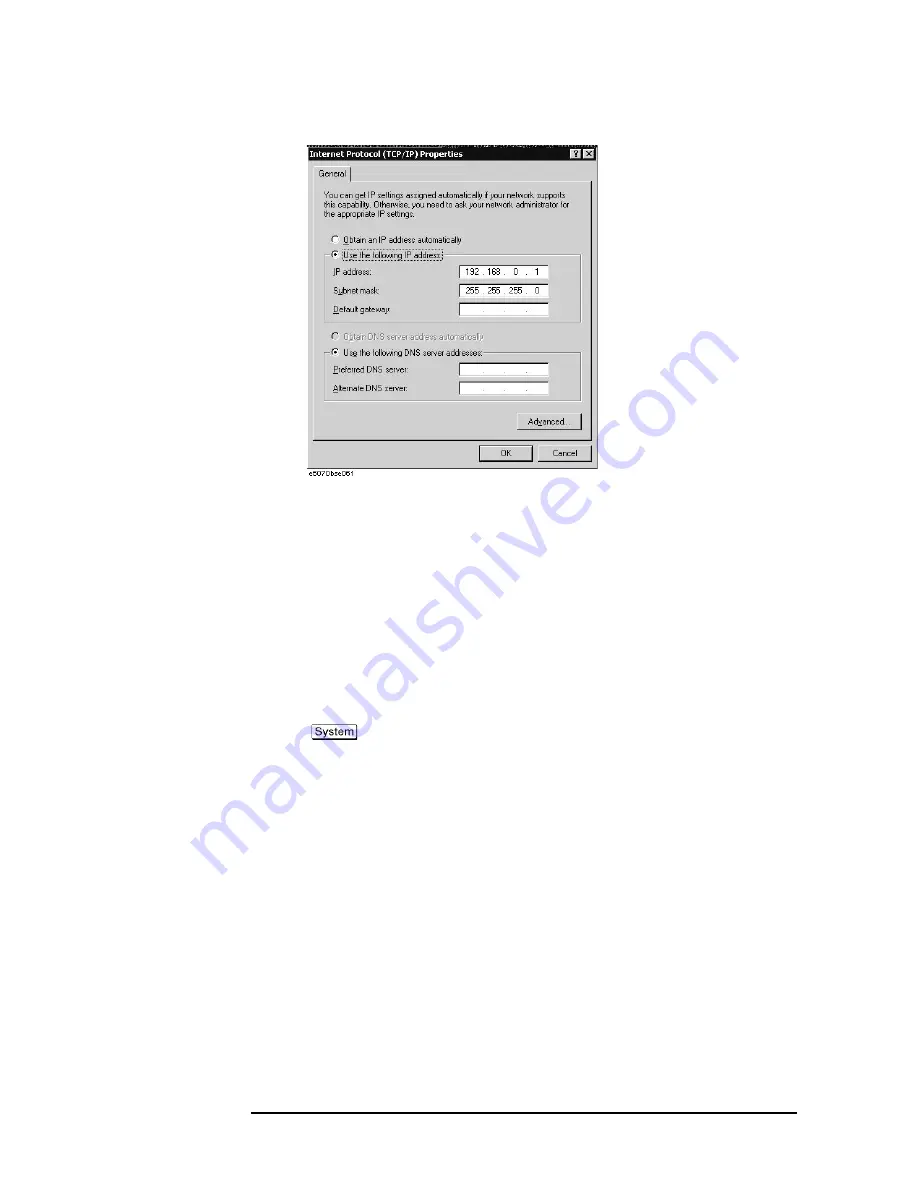
Figure D-4
Internet Protocol (TCP/IP) Properties dialog box
7. In the Internet Protocol (TCP/IP) Properties dialog vbox, click the
OK
button (6 in
Figure D-4 ).
8. In the Local Area Connection Properties dialog box, click the
OK
button (3 in Figure
9. In the Local Area Connection Status dialog box, click the
Close
button (3 in Figure
10. Click the
x
button (2 in Figure D-1) in the upper right of the Network and Dial-up
Connection window.
Step 2.
Confirm the computer name of the E5061A/E5062A.
1. Press
key.
2. Press
Misc Setup
-
Network Setup
-
Network Identification
.
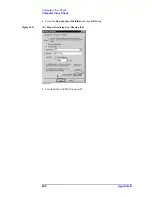
3. The System Properties dialog box as shown in Figure D-5 will appear. Click the
Properties
button (1 in Figure D-5).
Summary of Contents for E5061A
Page 142: ...142 Chapter5 Replaceable Parts Replaceable Parts List Front Panel Figure 5 9 Front Panel ...
Page 168: ...168 Chapter6 Replacement Procedure Front Panel Removal Figure 6 2 Front Panel Removal ...
Page 192: ...192 Chapter6 Replacement Procedure A51 LCD Display Replacement Figure 6 16 A51 LCD Removal ...
Page 194: ...194 Chapter6 Replacement Procedure LCD Backlight Replacement ...
Page 198: ...198 Chapter7 Post Repair Procedures Post Repair Procedures ...
Page 202: ...202 AppendixA Manual Changes Manual Changes ...
Page 218: ...218 AppendixB System Recovery Calibration of the Touch Screen ...
Page 233: ...233 E Power Requirement E Power Requirement ...


