230
Appendix D
Computer Virus Check
Computer Virus Check
Click
Tools
-
Map Network Drive
on the menu of the Explorer.
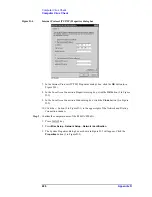
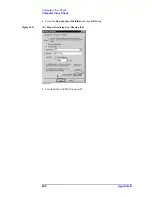
2. Select a suitable drive name, enter the network path as shown in Figure D-11, and then
press the
OK
button. For example, the network path is
\\C_NAME\S_NAME
.
Figure D-11
Map Network Drive Dialog Box
C_NAME
in the network path is the computer name of the E5061A/E5062A you
confirmed on 4 of Step2.
S_NAME
in the share name of the C or D drive of the E5061A/E5062A you enterd on 5
of Step 3.
3. The dialog box to enter the user name and the password appears. Enter the user name
agena
and then click the
OK
button.
4. The network path will appear on the PC’s Explorer. Confirm that the network path you
enter is connected to the PC.
5. Execute the anti-virus software on the PC, and the menu for the anti-virus software will
appear. Check the drive you entered on 2 of Step 5. For the operation of anti-virus
software, refer to its manual.
6. Check if the drives C and D are infected.
Step 6.
Disconnect the drives of E5061A/E5062A from the PC.
1. Click
Programs -Window Explorer
on the Start Menu to start up the PC’s Explorer.
Click
Tools
-
Disconnect Network Drive
on the menu of the Explorer. Disconnect
Network dialog box will appear.
2. Select Network Drive you checked, and press the
OK
button. The drive will disappear
from the Explorer.
NOTE
If no drive has been infected, proceed the next step.
If the drive C or D has been infected, replace the A27 HDD of the E5061A/E5062A.
Step 7.
Change the IP address and subnet mask of the E5061A/E5062A if you select
Use the
following IP address
and entered the IP address and subnet mask
on the 6 of Step 1.
1. Press
key.
2. Press
Misc Setup
-
Network Setup
-
Network Configuration
.
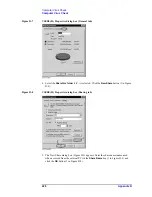
3. Double-click the Local Area Connection icon (1 in Figure D-1) in the Network and
Dial-up Connections window. The Local Area Connection Status dialog box (Figure
D-2) appears. Click the
Properties
button (2 in Figure D-2).
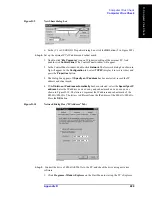
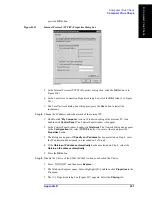
4. The dialog box (Figure D-12) appears. Select
Obtain an IP address automatically
and
Summary of Contents for E5061A
Page 142: ...142 Chapter5 Replaceable Parts Replaceable Parts List Front Panel Figure 5 9 Front Panel ...
Page 168: ...168 Chapter6 Replacement Procedure Front Panel Removal Figure 6 2 Front Panel Removal ...
Page 192: ...192 Chapter6 Replacement Procedure A51 LCD Display Replacement Figure 6 16 A51 LCD Removal ...
Page 194: ...194 Chapter6 Replacement Procedure LCD Backlight Replacement ...
Page 198: ...198 Chapter7 Post Repair Procedures Post Repair Procedures ...
Page 202: ...202 AppendixA Manual Changes Manual Changes ...
Page 218: ...218 AppendixB System Recovery Calibration of the Touch Screen ...
Page 233: ...233 E Power Requirement E Power Requirement ...


