Appendix D
229
Computer Virus Check
Computer Virus Check
D.
Comp
uter
V
iru
s Ch
eck
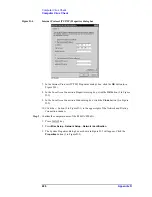
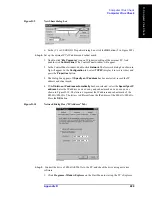
Figure D-9
New Share dialog box
6. In the (C:) or USERS(D:) Properties dialog box, click the
OK
button (2 in Figure D-8).
Step 4.
Set up the external PC’s IP address and subnet mask.
1. Double-click “
My Computer
” icon on Windows desktop of the external PC. And
double-click
Control Panel
. The Control Panel window will appear.
2. In the Control Panel window, double-click
Network
. The Network dialog box shown in
fig will appear. In the
Configuration
tab, select
TCP/IP
(display it in revers video) and
press the
Properties
button.
3. The dialog box appears. If
Specify an IP address
has been selected, record the IP
address and sbnet mask.
4. If the
Obtain an IP address automatically
has been selected, select the
Speccify an IP
address
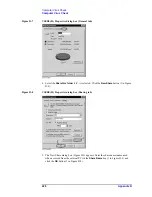
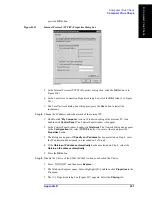
. Enter the IP address xxx.xxx.xxx.y and subnet mask xxx.xxx.xxx.xxx as
shown in Figure D-10. The letters x represent the IP address and subnet mask of the
E5061A/E5062A. The letter y is different from the IP address of the E5061A/E5062A.
Press the
OK
button.
Figure D-10
Network Dialog Box (“IP Address” Tab)
Step 5.
Connect the drive of E5061A/E5062A to the PC, and check the drive using anti-virus
software.
1. Click
Programs -Window Explorer
on the Start Menu to start up the PC’s Explorer.
Summary of Contents for E5061A
Page 142: ...142 Chapter5 Replaceable Parts Replaceable Parts List Front Panel Figure 5 9 Front Panel ...
Page 168: ...168 Chapter6 Replacement Procedure Front Panel Removal Figure 6 2 Front Panel Removal ...
Page 192: ...192 Chapter6 Replacement Procedure A51 LCD Display Replacement Figure 6 16 A51 LCD Removal ...
Page 194: ...194 Chapter6 Replacement Procedure LCD Backlight Replacement ...
Page 198: ...198 Chapter7 Post Repair Procedures Post Repair Procedures ...
Page 202: ...202 AppendixA Manual Changes Manual Changes ...
Page 218: ...218 AppendixB System Recovery Calibration of the Touch Screen ...
Page 233: ...233 E Power Requirement E Power Requirement ...


