Chapter 13
435
Setting and Using the Control and Management Functions
Configuring the Network
13
.Setting an
d Usin
g th
e
Co
ntro
l and
M
ana
ge
men
t
Fu
nctio
n
s
Step 6. When switching from disable to enable:
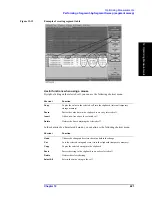
Double-click the Local Area Connection icon (1 in Figure 13-10) in the Network and
Dial-up connections window to enable the network connection function.
When switching from enable to disable:
Double-click the Local Area Connection icon (1 in Figure 13-10) in the Network and
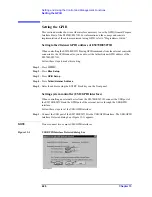
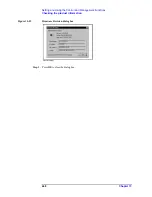
Dial-up Connections window. The Local Area Connection Status dialog box (Figure
13-11) appears. Click the
Disable
button (1 in Figure 13-11) to disable the network
connection function.
Figure 13-11
Local Area Connection Status dialog box
Step 7.
Click the
×
button (2 in Figure 13-10) in the upper right of the Network and Dial-up
Connections window.
Setting IP address
Follow these steps to set the IP address:
Step 1.
Press
.
Step 2.
Press
Misc Setup
.
Step 3.
Press
Network Setup
.
Step 4.
Press
Network Configuration
.
Step 5.
Double-click the Local Area Connection icon (1 in Figure 13-10) in the Network and
Dial-up Connections window. The Local Area Connection Status dialog box (Figure
13-11) appears. Click the
Properties
button (2 in Figure 13-11).
Summary of Contents for E5070B
Page 6: ......
Page 30: ...24 Contents ...
Page 34: ...28 Chapter1 Precautions Before contacting us ...
Page 286: ...280 Chapter6 Data Analysis Using the Equation Editor ...
Page 430: ...424 Chapter12 Optimizing Measurements Performing a Segment by Segment Sweep segment sweep ...
Page 538: ...532 Chapter15 Measurement Examples Executing Power Calibration ...
Page 634: ...628 AppendixB Troubleshooting Warning Message ...
Page 732: ...726 AppendixD Softkey Functions Trigger Menu ...
Page 740: ...734 AppendixE General Principles of Operation Data Processing ...
Page 760: ...754 AppendixF Replacing the 8753ES with the E5070B E5071B Comparing Functions ...

