Chapter 5
191
Replacement Procedure
Replacement Procedure for E5092A-020
5. Rep
lacem
ent
Proce
dur
e
SPDT Switch Assembly Removal
Tools Required
•
TORX screwdriver, T10, T15 and T20.
•
Box wrench 5.5mm
•
Torque wrench, 5/8 in.
Procedure
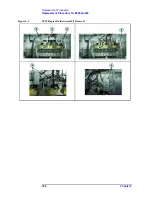
Refer to Figure 5-11 for this procedure.
Step 1.
Remove the outer cover as described in “Outer Cover Removal” on page 178.
Step 2.
Detach the front chassis as described in “Front Chassis Detachment” on page 179.
Step 3.
Remove the front frame as described in “Front Frame Removal” on page 180.
Step 4.
Remove the assembly board as described in “Main Board Removal” on page 184.
Step 5.
Remove the SP4T switch assembly as described in “SP4T Switch Assembly Removal” on
page 185.
Step 6.
Remove the SP4T raptor holder assembly as described in “SP4T Raptor Holder Assembly
Removal” on page 187.
Step 7.
Remove the SPDT switch drawer as described in “SPDT Switch Drawer Removal” on
page 189.
Step 8.
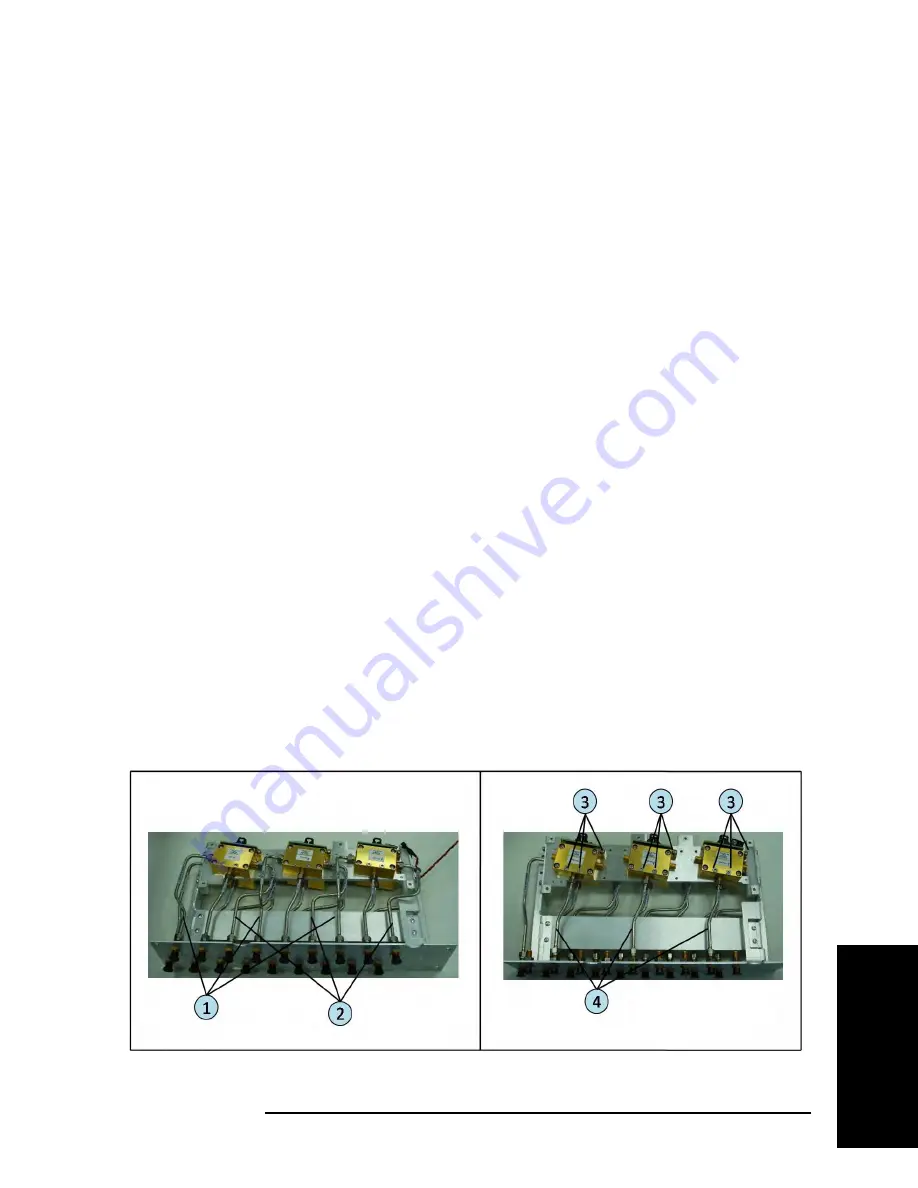
Remove the six semirigid cables (item 1 followed by item 2) connecting the SPDT switch
to the front panel.
Step 9.
Remove the three TORX T10 screw (item 3) securing each SPDT switch.
Step 10.
Remove the three semirigid cables (item 4) connecting the SPDT switch to the front panel.
Step 11.
Repeat Step 8 to Step 10 for the three SPDT switches on the other side of the SPDT drawer
assembly.
Figure 5-11
SPDT Switch Assembly Removal
Summary of Contents for E5092A
Page 10: ...4 ...
Page 140: ...134 Chapter2 Performance Tests E5092A Performance Test Record ...
Page 152: ...146 Chapter3 Troubleshooting Performance Test Failure Troubleshooting ...
Page 180: ...174 Chapter4 Replaceable Parts Replaceable Parts List for E5092A 020 ...
Page 205: ...199 B Power Requirement A Power Requirement ...


