7-14
Service Guide E8364-90038
Repair and Replacement Procedures
PNA Series Microwave Network Analyzers
Removing and Replacing Front Panel Subassemblies
E8362C, E8363C, E8364C
Replacing the USB Connector Board
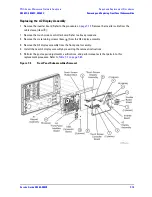
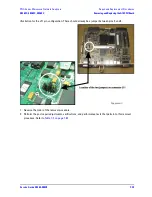
1. Remove the two retaining screws (item
⑩
) from the USB connector board.
2. Carefully unplug the USB connector board from the A3 front panel interface board and remove it from the
front panel assembly
3. Install the new USB controller board by reversing the removal instructions.
4. Perform the post-repair adjustments, verifications, and performance tests that pertain to this
replacement procedure. Refer to
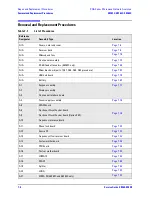
Table 7-2 on page 7-82
.
Replacing the A3 Front Panel Interface Board
1. Remove the round knob (RPG) from the front panel by gently pulling the knob forward.
2. Disconnect the inverter cable (item
③
) from the A3 front panel interface board.
3. Disconnect the touch screen controller cable (item
⑥
) from the A3 front panel interface board.
4. Remove the USB connector board. Refer to previous procedure.
5. Remove the nine retaining screws (item
) from the A3 front panel interface board.
6. Remove the A3 front panel interface board from the front panel assembly.
7. Note how the A1 keypad assembly is attached to the A3 front panel interface board to aid in installing it
on the new A3 front panel interface board.
8. Carefully remove the A1 keypad assembly from the A3 front panel interface board.
9. Install the A1 keypad assembly on the new A3 front panel interface board.
10. Reinstall the A3 front panel interface board by removing the removal instructions.
11. Perform the post-repair adjustments, verifications, and performance tests that pertain to this
replacement procedure. Refer to
Table 7-2 on page 7-82
.
Replacing the A1 Keypad Assembly
1. Remove the A3 front panel interface board as instructed above.
2. Note how the A1 keypad assembly is attached to the A3 front panel interface board to aid in installing
the new one.
3. Carefully remove the A1 keypad assembly from the A3 front panel interface board.
4. Install the new A1 keypad assembly on the A3 front panel interface board.
5. Reinstall the A3 front panel interface board by reversing the removal instructions.
6. Perform the post-repair adjustments, verifications, and performance tests that pertain to this
replacement procedure. Refer to
Table 7-2 on page 7-82
.
11
Summary of Contents for E8362C
Page 11: ...Service Guide E8364 90038 1 1 1 Safety and Regulatory Information ...
Page 21: ...Service Guide E8364 90038 2 1 2 General Product Information ...
Page 33: ...Service Guide E8364 90038 3 1 3 Tests and Adjustments ...
Page 81: ...Service Guide E8364 90038 4 1 4 Troubleshooting ...
Page 137: ...Service Guide E8364 90038 5 1 5 Theory of Operation ...
Page 171: ...Service Guide E8364 90038 6 1 6 Replaceable Parts ...
Page 257: ...Service Guide E8364 90038 7 1 7 Repair and Replacement Procedures ...
Page 341: ...Service Guide E8364 90038 8 1 8 General Purpose Maintenance Procedures ...


