29
Installing the Autosampler
Installing the Thermostatted Autosampler
6
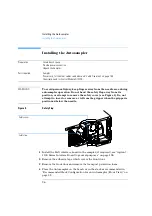
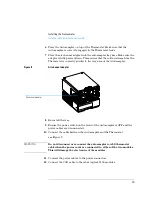
Place the Autosampler on top of the Thermostat. Make sure that the
Autosampler is correctly engaged in the Thermostat locks.
7
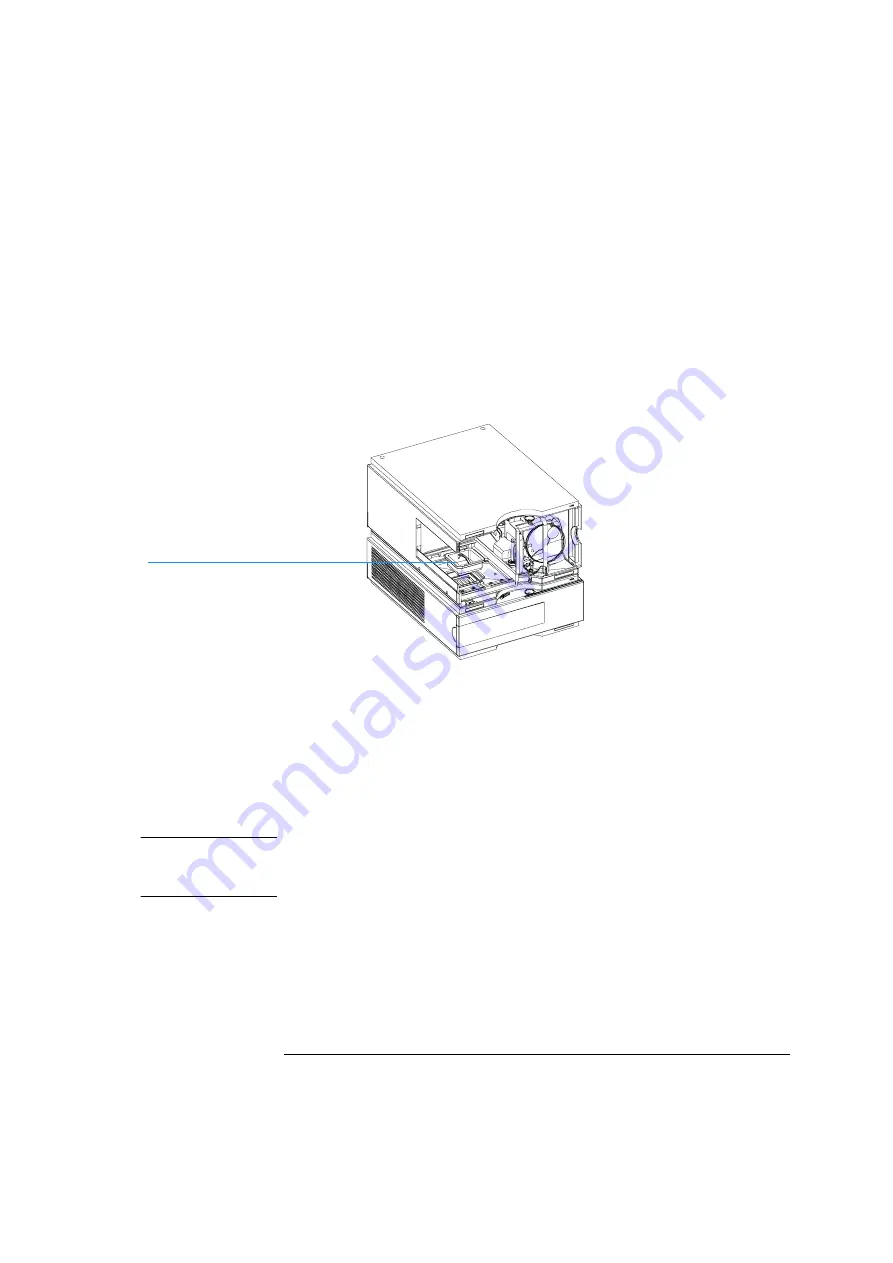
Place the air channel adapter into the autosampler tray base. Make sure the
adapter is fully pressed down. This assures that the cold airstream from the
Thermostat is correctly guided to the tray area of the Autosampler.
Figure 8
Air channel adapter
8
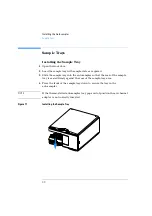
Re-install the tray
9
Ensure the power switch on the front of the Autosampler is OFF and the
power cables are disconnected.
10
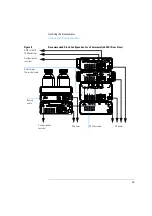
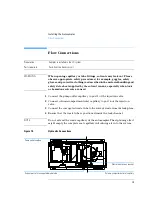
Connect the cable between the Autosampler and the Thermostat,
see Figure 9.
WA R N I N G
Do not disconnect or reconnect the autosampler to ALS thermostat
cable when the power cords are connected to either of the two modules.
This will damage the electronics of the modules.
11
Connect the power cables to the power connectors.
12
Connect the CAN cable to the other Agilent 1100 modules.
Air channel adapter
Summary of Contents for G1313A
Page 1: ...s1 Agilent 1100 Series Standard Micro and Preparative Autosamplers Reference Manual ...
Page 3: ...Reference Manual Agilent 1100 Series Standard Micro and Preparative Autosamplers ...
Page 12: ...12 Contents ...
Page 39: ...2 2 Optimizing Performance How to optimize the autosamplers to achieve best results ...
Page 93: ...93 Troubleshooting and Test Functions Step Commands ...
Page 216: ...216 Introduction to the Autosampler Electrical Connections ...
Page 244: ...244 Theory of Operation The Main Power Supply Assembly ...
Page 265: ...265 Introduction to the Control Module Diagnostics and Tests ...
Page 268: ...268 Introduction to the Control Module Diagnostics and Tests ...
Page 274: ...274 Specifications Performance Specifications ...
Page 275: ...10 Legal Safety and Warranty Information ...
Page 286: ...286 Agilent Technologies on Internet ...
Page 290: ...290 Index ...
Page 291: ......


