Front-Panel Controls
2
6000 Series Oscilloscope User’s Guide
77
2
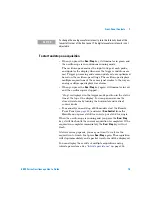
If you are triggering on analog channel events, turn the
Trigger Level knob to the trigger threshold to a level that your
waveform will cross.
3
To begin a single acquisition, press the
Single
key.
When you press
Single
, the display is cleared, the trigger
circuitry is armed, the
Single
key is illuminated yellow, and
the oscilloscope will wait until a trigger condition occurs
before it displays a waveform.
When the oscilloscope triggers, the single acquisition is
displayed and the oscilloscope is stopped (the
Run/Stop
key is
illuminated in red).
4
To acquire another waveform, press
Single
again.
Auto Single
Auto-trigger will generate a trigger for you if one is not found in
the predetermined time (about 40 ms) after you press
Single
. If
you want to make a single acquisition and you are not
particularly interested in triggering the acquisition (for
example, if you are probing a DC level), set the trigger mode to
Auto (see
) and press the
Single
key. If a trigger
condition occurs, it will be used; if a trigger doesn’t happen, an
untriggered acquisition will be taken.
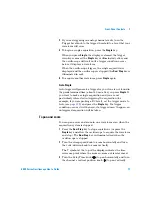
To pan and zoom
You can pan across and zoom-in on a waveform even when the
acquisition system is stopped.
1
Press the
Run/Stop
key to stop acquisitions (or press the
Single
key and allow the oscilloscope to acquire the waveform
and stop). The
Run/Stop
key is illuminated red when the
oscilloscope is stopped.
2
Turn the sweep speed knob to zoom horizontally and turn
the volts/division knob to zoom vertically.
The
∇
symbol at the top of the display indicates the time
reference point where the zoom-in/zoom-out is referenced.
3
Turn the Delay Time knob
(
)
to pan horizontally and turn
the channel’s vertical position knob (
) to pan vertically.
Summary of Contents for InfiniiVision DSO6014L
Page 2: ...Agilent Technologies Agilent 6000 Series Oscilloscopes User s Guide...
Page 59: ...58 6000 Series Oscilloscope User s Guide 1 Getting Started...
Page 109: ...108 6000 Series Oscilloscope User s Guide 2 Front Panel Controls...
Page 125: ...124 6000 Series Oscilloscope User s Guide 3 Viewing and Measuring Digital Signals...
Page 251: ...250 6000 Series Oscilloscope User s Guide 5 Making Measurements...
Page 287: ...286 6000 Series Oscilloscope User s Guide 6 Displaying Data Interpreting Decoded LIN Data...
Page 321: ...320 6000 Series Oscilloscope User s Guide 7 Saving and Printing Data...
Page 370: ......


