10
Agilent Intuvo 9000 GC Installation
1
Installing the GC
System installation
If installing an ALS, the ALS can be used for checkout. Also
refer to the ALS installation documentation.
When installed as part of a complete system including an
Agilent data system, first install the GC up to the checkout step.
Configure the new GC in the data system and open an online
instrument session. Use the data system to perform the
checkout test.
When installed as part of other complete systems, for example
in an Agilent GC/MSD or GC/MS system, see the installation
instructions for that system.
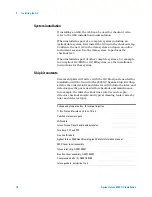
Ship kit contents
Several ship kits will arrive with the GC. Most parts needed for
installation will be found in the 9000 GC System Ship Kit. Ship
kits for the ordered inlet and detector will include the inlet- and
detector-specific parts needed for checkout and maintenance,
for example, the inlet checkout liner, inlet wrench, septa,
detector checkout sample, and typical cleaning tools (varies by
inlet and detector type).
Syringe and plunger button, for manual injection
1/8-in Nut and ferrule set, brass, 10/pk
Certified vial sample pack
LAN cable
Intuvo Torque Driver handle and extension
Torx keys, T10 and T20
Gas line ID labels
Agilent
Intuvo 9000 Gas Chromatograph Safety Information
manual
MSD Cover insert assembly
Intuvo inlet chip, G4581-60031
Bus front door assembly, G4581-60207
Compression bolts (2), G4581-60260
Intuvo gaskets, polyimide, 2/pk
Summary of Contents for Intuvo 9000
Page 1: ...Agilent Technologies Agilent Intuvo 9000 Gas Chromatograph Installation and First Startup...
Page 6: ...6 Agilent Intuvo 9000 GC Installation...
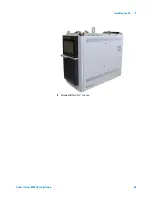
Page 25: ...Installing the GC 1 Agilent Intuvo 9000 GC Installation 25 3 Reinstall the GC covers...
Page 27: ...Installing the GC 1 Agilent Intuvo 9000 GC Installation 27 Turn on the GC...
Page 29: ...Installing the GC 1 Agilent Intuvo 9000 GC Installation 29...
Page 84: ...84 Agilent Intuvo 9000 GC Installation 1 Installing the GC 8 Close the GC front door...
Page 114: ...Agilent Technologies...


