SureScan System User Guide
24
•
Click the State cell and select
Add to queue last
to add the slide to the bottom of the scan
queue.
As each slide is added to the queue, its State indicates that it is in the queue and the order in
which the slide is scanned. (In queue 1, In queue 2, for example.) The status indicator light
changes to solid blue.
Step 6. Scan your slides
A
scan
refers to creating an image of the probes on a single slide.
1
If necessary, in the Scan Control main window, click
Close Door
.
Wait until the door closes and the Start Scan button is enabled.
2
In the Scan Control main window, click
Start Scan
to begin scanning the slides that were
added to the queue. The scanner scans the slides in their order in the scan queue. See
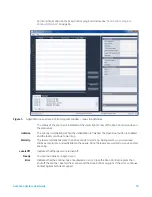
During a scan, you see the following:
•
The slot status indicator light for the current slide blinks green during the scan process, and
the scan progress (for example, Scanning 50%) is displayed in the slot State.
•
The remaining scan time and required disk space are displayed at the bottom of the Scan
Control main window. See
“Scan Control Program Window Reference”
•
Events during the scan are logged in the Scan Log and Status Log. See
Step 7. Remove the slides
When the Open Door button is enabled, you can unload the slide holders from the cassette and
then remove the slides from the slide holders. If the Open Door button is not available, you cannot
open the door. Check to make sure that the scanning process is finished.
1
In the Scan Control main window, click
Open Door
to open the scanner door.
2
Remove the slide holders from the cassette.
3
Remove the slides from the slide holders, as follows:
a
Hold the slide holder on the sides with the Agilent logo facing up.
b
Gently push in and pull up on the tabbed end of the clear plastic cover to open it.
c
Push up on the barcode end of the slide from underneath the slide holder to avoid
fingerprints on the sample area.
d
Grasp the slide from the sides and remove from the slide holder.

