Chapter 5
105
Setting Measurement Conditions
How to Set the Measurement Point
5
. Setting
Me
asur
eme
n
t
Conditions
How to add measurement points
The measurement point number 1 of each table (1 to 8) has data consisting of a frequency
of 1 MHz, averaging factor of 1, and oscillator level of -13.0 dBm as a preset state.
To add new measurement points to those already entered in the specified table, perform the
following steps.
Step 1.
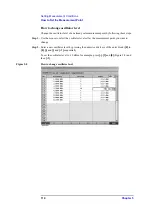
Use the mouse to select the cell one level below the already entered frequency cell (a
selected cell is called an active cell; it is enclosed in a thick-bordered box indicating that
the cell is selected for data entry (Figure 5-3)).
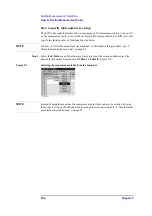
Figure 5-3
Selection of frequency cell for new measurement point to be added
NOTE
Selectable cells are displayed more brightly than other cells.
Step 2.
Press the numeric entry keys (
[0]
to
[9]
and
[.]
) and a unit key (
[G/n]
,
[M/
μ
]
,
[k/m]
or
[
×
1]
)
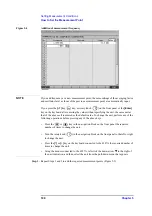
in the entry block sequentially to enter the frequency of the measurement point to be added.
To enter 2 MHz, for example, press
[2]
(Figure 5-4) and
[M/
μ
]
sequentially.
Summary of Contents for Twelfth 4287A RF LCR
Page 8: ...8...
Page 36: ...36 Chapter2 Installation Guide Preparation for Power Supply Figure 2 17 Power cable options...
Page 114: ...114 Chapter5 Setting Measurement Conditions Setting up dc resistance Rdc measurement...
Page 250: ...250 Chapter11 Setting and Using the Control and Management Facilities System Recovery...
Page 294: ...294 AppendixA Manual Changes Manual Changes...
Page 328: ...328 AppendixF Error Messages Undefined header...


