122
U1401A User’s and Service Guide
6
Maintenance
Fuse replacement
Replace any blown fuse in the instrument according to the
following procedures:
1
Power down the instrument and disconnect all the test
leads. Make sure that the charging adapter is also
removed.
2
Remove the battery cover and the batteries.
3
Loosen the three screws found on the bottom of the case
and remove the bottom cover.
4
Take out the circuit board as shown in
Figure 6- 3
.
5
Gently remove the defective fuse by prying one end of the
fuse loose and sliding it out of the fuse bracket.
6
Replace it with a new fuse of the same size and rating.
Make sure the new fuse is centered in the fuse holder.
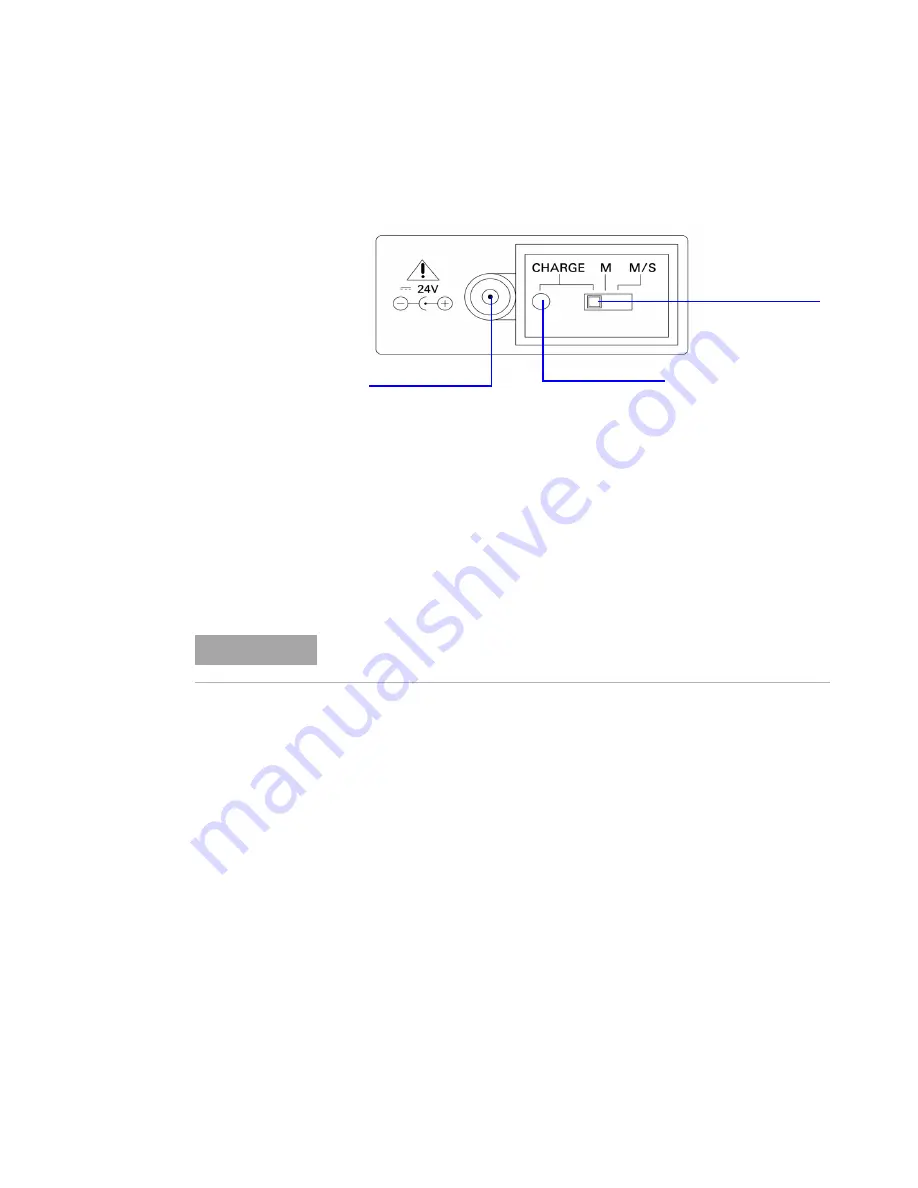
Figure 6-2
Recharging the batteries
External AC
adapter jack
Charging indication
Green: Fully charged
Yellow: Charging
Set slide switch
at the CHARGE
position
N O T E
This manual provides only the fuse replacement procedures, but not the
fuse replacement markings.
Summary of Contents for U1401A
Page 1: ...Agilent Technologies U1401A Handheld Multi Function Calibrator Meter User s and Service Guide ...
Page 16: ...XVI U1401A User s and Service Guide Contents ...
Page 46: ...26 U1401A User s and Service Guide 1 Getting Started ...
Page 64: ...44 U1401A User s and Service Guide 2 Calibrator Output Operations ...
Page 67: ...Making Measurements 3 U1401A User s and Service Guide 47 Figure 3 1 DC voltage measurement ...
Page 104: ...84 U1401A User s and Service Guide 4 Changing the Default Settings ...
Page 115: ...Application Examples 5 U1401A User s and Service Guide 95 Figure 5 5 Zener diode test ...
Page 146: ...126 U1401A User s and Service Guide 6 Maintenance ...


