11
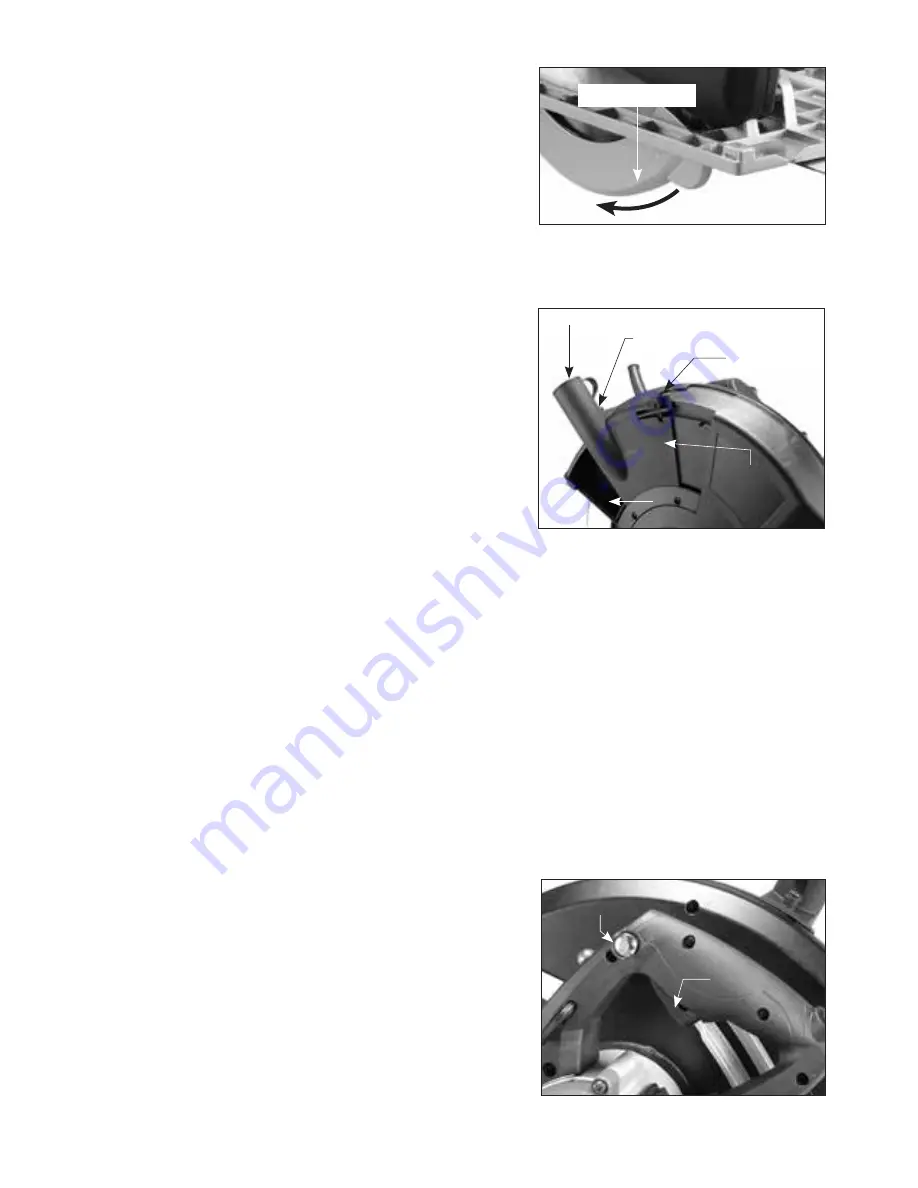
of the left hand without removing one's hand from the side
handle. After it begins, allow the guard to function automatically
as usual. See fig 6, 6-1
DUST COLLECTION SYSTEM
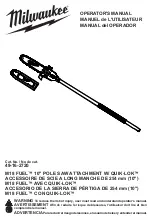
Dust collection should always be used to minimise dust. Attach an appropriate hose and vacuum cleaner
system to the dust extractor port on the machine. See fig 7
If a vacuum cleaner is not available, close the cap of the dust
port. There is a dust chamber which can collect a small amount
of dust or chips which is built into the upper blade guard. Clear
the dust chamber frequently to avoid it being overfilled. To clear
the dust chamber, push up on the clip and rotate the dust
chamber cover to the open position and dump out the dust.
Once finished clip the the cover back to the closed position.
STARTING AND STOPPING TOOL
Make sure that the power circuit voltage is the same as that shown on the specification plate of the machine
and that switch is “OFF” before connecting the tool to the power circuit.
Switching the machine on and off
Keep the machine steady during switching and during use by holding the main handle and the side handles
with both hands.
To switch on:
first push the lock release button , and then press the trigger switch .See fig 8
To switch off:
Release the trigger switch. After the machine has been switched
off, the saw blade will still rotate for a time.
Take care that parts of your body do not come into contact with
the saw blade while it is still rotating!
As soon as you remove the machine from the workpiece, always
allow the lower blade guard to close completely. In this way the
saw blade is again completely covered by the outer protective
cover.
Fig.6-1
Lower Blade Guard
Fig.7
Dust Port Cap
Dust Extractor Port
Clip
Dust Chamber Cover
Dust Chamber
Fig.8
Lock Release Button
Trigger Switch


