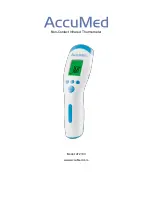
background image

8. Maintenance and Cleaning

1) The Sensor is the most important and fragile part of

the device, please take great care of it.

2) Clean the thermometer with cotton swabs soaked

with 70%-75% alcohol. Don’t submerge the

thermometer or any other liquid.

3) Clean the sensor with cotton swabs soaked with a

little of alcohol. Point the sensor down to prevent the

alcohol from penetrating inside.

4) Protect the product from direct sunlight, humidity,

dampness, dust and other contaminants.

5) Don’t clean the device with corrosive detergent,

diluents, gas and so on.

6) The LCD display is also sensitive part of the device,

please take great care of it too.

Summary of Contents for HTD8208C

Page 1: ...anual Infrared Ear Thermometer Model HTD8208C Please read this manual before operating this device Important safety information inside Please contact us via support agptek com when anything comes to your mind ...

Page 2: ...or purchase our products Please read this manual before you use it 1 Safety Information 1 2 Advantages 2 3 Description 3 4 Specifications 4 5 Measuring 4 6 Change Battery 6 7 Troubleshooting 7 8 Maintenance and Cleaning 9 ...

Page 3: ...ch the Sensor by fingers which is the most sensitive part of the device 5 In order to make sure the correct measuring results please clean the earwax and other things in the ear canal before measuring 6 Some people can t measure correctly for their oily ear canal or other factors 7 Don t drop open repair and revise the device 8 Keep this device away from large electromagnetic fields such as found ...

Page 4: ...e can t replace a physical examination by a doctor 2 Advantages Fast and accurate 2 seconds measuring time and the accuracy can be up to 0 2 0 3 Easy to use Operate with one button Three color backlight color alarm Sound alarm Without Ear cover 10 memories Green backlight Normal 34 37 3 93 2 99 1 Yellow backlight Slight Fever 37 4 38 99 3 100 4 Red backlight High Fever 38 1 42 9 100 6 109 2 2 ...

Page 5: ...mory button 4 Battery Cover 5 ABS Shell 6 Measuring button LCD Indicator 1 Digital Readout 2 Cry Indicator Fever 3 Smile Indicator Normal 4 Measuring Indicator 5 Ear temperature Indicator 6 Unit 7 Memories Indicator 8 Memories Number 9 Low battery Indicator 3 ...

Page 6: ...conds 5 Measuring Notes before measuring The correct measuring is very important please kindly pay attention to the notes bellow before measuring to avoid wrong measuring 1 If the people come from a different ambient temperature please wait more than 5 minutes before measuring 2 The ambient temperature should be stable don t measure the body temperature in front of fans air outlets of the air cond...

Page 7: ...urn on the thermometer LCD screen will display all the digits and signals And the thermometer will begin to self check 2 After self checking the LCD screen will display the last memory 3 After display the last memory the Unit begins to flash the thermometer is ready for measuring 4 If the baby is more than 1 year old please pull its ear up slightly if no please pull its ear back slightly 5 Gently ...

Page 8: ... memorized Clear memory When the thermometer is ON keep pressing on Memory button until the LCD screen display CLR and there will be a long beep sound then all the memories be cleared Change Units When the thermometer is ON keep pressing the ON Memory button and measuring button at the same time the Unit will be changed 6 Change Battery When the battery is low please change new batteries 1 Please ...

Page 9: ...nd other metal items which may cause short circuit 7 Troubleshooting Display Possible reasons Maintenance Suggestions The temperature is higher than42 9 109 2 Make sure the right measuring object The temperature is lower than34 0 93 2 Make sure the right measuring object Wrong operating ambient temperature Make sure the device is under 5 40 41 0 104 0 op erating conditions 7 ...

Page 10: ...and signals Low battery Please change new battery The operating ambient temperature is not stable Keep the device in stable operating ambient temperature more than 30 minutes before measuring Blank display Make sure the correct battery s installation and its positive and negative charges 8 ...

Page 11: ...ometer or any other liquid 3 Clean the sensor with cotton swabs soaked with a little of alcohol Point the sensor down to prevent the alcohol from penetrating inside 4 Protect the product from direct sunlight humidity dampness dust and other contaminants 5 Don t clean the device with corrosive detergent diluents gas and so on 6 The LCD display is also sensitive part of the device please take great ...

Reviews: