F08D/F10D
F08D/F10D
6-4
6-4
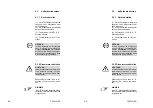
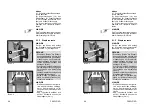
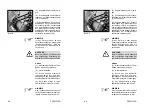
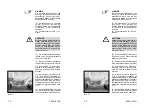
(8) Renverser la vanne de blo-
cage à boisseau sphérique (6-9/2).
(9) Retirer les capuchons de
protection des tuyaux flexibles du
godet multi-fonctions (6-9/1).
(10) Rabattre vers le haut les
clapets de protection des raccords
rapides du système d´échange ra-
pide (6-9/3) et connecter les tuyaux
flexibles hydrauliques du godet
multi-fonctions aux dispositifs du
système d´échange rapide (6-9) en
appuyant fortement.
TRES IMPORTANT
La machine étant équipée d´une
deuxième hydraulique accessoire
(en option), utiliser les deux
raccords extérieurs.
ATTENTION
Lors du raccordement, veiller à la
propreté et à un assemblage parfait
des raccords hydrauliques.
Démontage
(1) Déposer le godet multi-
fonctions sur le sol, dans une
position stable au renversement.
(2) Arrêter le moteur.
(3) Eliminer la pression des tuyaux
hydrauliques par des mouvements
circulaires du levier pour l´hy-
draulique accessoire (4-9/5).
(4) Le démontage se fait dans
l´ordre inverse à celui du montage.
TRES IMPORTANT
La plaque de fabrication se trouve
sur le dos du godet, à droite en-
dessous du support transversal
(6-9/4).
(8) Switch over the ball block valve
(6-9/2).
(9) Remove the protection caps
from the hoses of the multi-purpose
bucket (6-9/1).
(10) Swing up the protection caps
of the quick-change device (6-9/3)
and connect the hydraulic hoses of
the multi-purpose bucket with the
quick couplings of the quick-change
device by pushing them firmly in
(6-9).
NOTE
Use the two outer adapters if the
loader is equipped with a second
auxiliary hydraulic system (op-
tional).
CAUTION
When making connections, pay
attention that the hydraulic con-
nections are clean and complete.
Dismounting
(1) Place the multi-purpose
bucket firmly on the ground.
(2) Stop the engine.
(3) Remove the pressure from the
hydraulic lines by moving the hand
lever for the auxiliary hydraulics
(4-9/5) back and forth.
(4) Dismounting takes place in
reverse order of mounting.
NOTE
The type plate is on the rear of the
bucket, on the right beneath the
cross arm (6-9/4).
Summary of Contents for AF 100
Page 61: ...F08D F10D F08D F10D Beschilderung Beschilderung Signalisation Signalisation Signs Signs ...
Page 76: ...F08D F10D F08D F10D 2 8 2 8 Schriftzug Lärmarme Baumaschine Schriftzug Lärmarme Baumaschine ...
Page 104: ...F08D F10D F08D F10D Beschreibung Beschreibung Description Description Description Description ...
Page 177: ...F08D F10D F08D F10D Wartung Wartung Entretien Entretien Maintenance Maintenance ...
Page 219: ...F08D F10D F08D F10D Störung Ursache und Abhilfe Störung Ursache und Abhilfe ...
Page 222: ...F08D F10D F08D F10D Dérangements causes et remèdes Dérangements causes et remèdes ...
Page 225: ...F08D F10D F08D F10D Malfunctions causes and remedies Malfunctions causes and remedies ...
Page 228: ...Anhang Anhang Appendice Appendice Appendices Appendices ...
Page 229: ......
Page 230: ......
Page 237: ......
Page 242: ...F08D F10D F08D F10D A 10 3 A 10 3 ...
Page 243: ...F08D F10D F08D F10D B 10 3 B 10 3 ...
Page 244: ...F08D F10D F08D F10D C 10 3 C 10 3 ...
Page 245: ...F08D F10D F08D F10D D 10 3 D 10 3 ...
Page 246: ...F08D F10D F08D F10D E 10 3 E 10 3 ...
Page 247: ...F08D F10D F08D F10D F 10 3 F 10 3 ...

