F08D/F10D
F08D/F10D
8-6
8-6
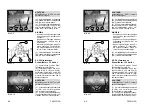
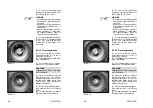
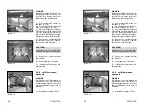
(5) Verser l'huile dans le trou du
bouchon du dispositif de transla-
tion hydraulique (8-9/4) jusqu'á ce
que l'huile atteigne l'orifice (8-9/1).
REMARQUE
- Le pont et l'engrenage distribu-
teur n'ont pas un reservoir d'huile
commun.
- La quantité d'huile nécessaire est
indiquée dans le plan d'entretien
(chapitre 8.4).
- Quelques minutes plus tard, le
niveau d'huile commence à
baisser. Faire l'appoint d'huile
jusqu'à ce que le niveau prescrit
soit atteint et reste constant.
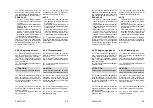
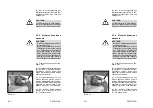
(6) Dévisser le bouchon du pont
(8-9/3 et 8-10/1), de l'engrenage
distributeur (8-9/1) et du dispositif
de translation hydraulique (8-9/4)
et laisser s'écouler l'huile.
8.2.5.3 Engrenage planét.
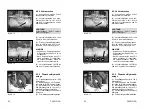
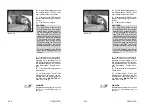
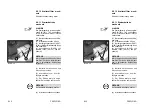
(1) Placer la machine de manière
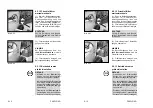
que le bouchon (8-11/flèche) se
trouve dans la position 6 heures.
(2) Placer un collecteur d'huile
avec une gouttière d'écoulement
sous la machine.
(3) Dévisser les bouchons et laisser
s'écouler l'huile.
ATTENTION
Evacuer proprement l'huile usagée.
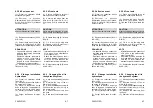
(4) Placer la machine de manière
que le repère "OIL LEVEL"
soit à l'horizontale et que le bouchon
se trouve au-dessus à droite du
repère (8-12/flèche).
(5) Verser l'huile dans le trou du
bouchon jusqu'à ce que le niveau
atteigne l'orifice.
(6) Revisser le bouchon avec un
nouveau joint.
(5) Verser l'huile dans le trou du
bouchon du dispositif de transla-
tion hydraulique (8-9/4) jusqu'á ce
que l'huile atteigne l'orifice (8-9/1).
REMARQUE
- Le pont et l'engrenage distribu-
teur n'ont pas un reservoir d'huile
commun.
- La quantité d'huile nécessaire est
indiquée dans le plan d'entretien
(chapitre 8.4).
- Quelques minutes plus tard, le
niveau d'huile commence à
baisser. Faire l'appoint d'huile
jusqu'à ce que le niveau prescrit
soit atteint et reste constant.
(6) Dévisser le bouchon du pont
(8-9/3 et 8-10/1), de l'engrenage
distributeur (8-9/1) et du dispositif
de translation hydraulique (8-9/4)
et laisser s'écouler l'huile.
8.2.5.3 Engrenage planét.
(1) Placer la machine de manière
que le bouchon (8-11/flèche) se
trouve dans la position 6 heures.
(2) Placer un collecteur d'huile
avec une gouttière d'écoulement
sous la machine.
(3) Dévisser les bouchons et laisser
s'écouler l'huile.
ATTENTION
Evacuer proprement l'huile usagée.
(4) Placer la machine de manière
que le repère "OIL LEVEL"
soit à l'horizontale et que le bouchon
se trouve au-dessus à droite du
repère (8-12/flèche).
(5) Verser l'huile dans le trou du
bouchon jusqu'à ce que le niveau
atteigne l'orifice.
(6) Revisser le bouchon avec un
nouveau joint.
(5) Fill oil into the plug of the
hydraulic drive (8-9/4) until the oil
reaches the opening (8-9/1).
NOTE
- The axle arch and the distribu-
tion gear do not have a common
oil reservoir.
- Information about the quantity of
oil is given in the maintenance plan
(chapter 8.4).
- After a few minutes, when the oil
level has lowered, top up the oil
until the oil level reaches the
marked level and remains stable.
(6) Replace the plugs for the axle
arch (8-9/3 and 8-10/1), the distri-
bution gear (8-9/1) and the hydraulic
drive (8-9/4).
8.2.5.3 Planetary gear
(1) Move the loader so that the
plug (8-11/arrow) is positioned at
6 o'clock.
(2) Place an oil drain vessel with a
drain channel underneath the gear.
(3) Unscrew the drain plug and let
the oil drain out.
CAUTION
Waste oil must be disposed of in such
a way that it will not cause pollution.
(4) Move the loader until the
marking line “OIL LEVEL” is
horizontal and the plug is located
above the top right of the marking
line (8-12/arrow).
(5) Fill in oil via the plug bore until
the oil level reaches the opening.
(6) Use a new gasket when
replacing the plug.
Summary of Contents for AF 100
Page 61: ...F08D F10D F08D F10D Beschilderung Beschilderung Signalisation Signalisation Signs Signs ...
Page 76: ...F08D F10D F08D F10D 2 8 2 8 Schriftzug Lärmarme Baumaschine Schriftzug Lärmarme Baumaschine ...
Page 104: ...F08D F10D F08D F10D Beschreibung Beschreibung Description Description Description Description ...
Page 177: ...F08D F10D F08D F10D Wartung Wartung Entretien Entretien Maintenance Maintenance ...
Page 219: ...F08D F10D F08D F10D Störung Ursache und Abhilfe Störung Ursache und Abhilfe ...
Page 222: ...F08D F10D F08D F10D Dérangements causes et remèdes Dérangements causes et remèdes ...
Page 225: ...F08D F10D F08D F10D Malfunctions causes and remedies Malfunctions causes and remedies ...
Page 228: ...Anhang Anhang Appendice Appendice Appendices Appendices ...
Page 229: ......
Page 230: ......
Page 237: ......
Page 242: ...F08D F10D F08D F10D A 10 3 A 10 3 ...
Page 243: ...F08D F10D F08D F10D B 10 3 B 10 3 ...
Page 244: ...F08D F10D F08D F10D C 10 3 C 10 3 ...
Page 245: ...F08D F10D F08D F10D D 10 3 D 10 3 ...
Page 246: ...F08D F10D F08D F10D E 10 3 E 10 3 ...
Page 247: ...F08D F10D F08D F10D F 10 3 F 10 3 ...


