background image

Aibot X6 V2, Care and Transport

67

4

Care and Transport

4.1

Transport

Transport in a road 
vehicle

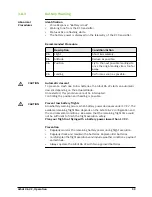
Never carry the product loose in a road vehicle, as it can be affected by shock 
and vibration. Always carry the product in its transport container, original pack-
aging or equivalent and secure it.

Shipping

When transporting the product by rail, air or sea, always use the complete orig-
inal Aibot X6 V2 packaging, transport container and cardboard box, or its equiv-
alent, to protect against shock and vibration.

4.2

Storage

Product

Respect the temperature limits when storing the equipment, particularly in 
summer if the equipment is inside a vehicle. Refer to "3.2 General Limitations" 
for information about temperature limits.

4.3

Cleaning and Drying

General

Only use a damp microfibre cloth to clean the Aibot X6 V2. Do not use strong 
detergent on carbon fibre parts. Use a brush to remove loose dust. 

Damp products

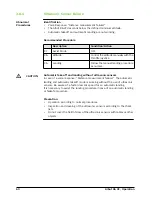
Dry the product, the transport container, the foam inserts and the accessories 
at a temperature not greater than 40


°C and clean them. Do not repack until 

everything is completely dry. 

Cables and plugs

Keep plugs clean and dry. Blow away any dirt lodged in the plugs of the 
connecting cables. 

Airflow Inlets

Keep airflow inlets of the motors and of the battery charger clean. Blow away 
any dirt lodged at the airflow inlets. 

4.4

Maintenance Plan

Maintenance Plan

Before each flight

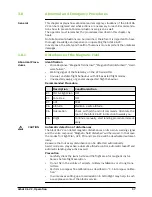
Refer to "3.1 General ground handling".

Every 10 flights:

Check landing gear.

Check motors are properly fastened.

Every 30 flights:

Check camera mount.

Basic cleaning.

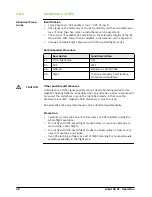
A special check is always required after collision, shipping or hard landings. 

Summary of Contents for Aibot X6 V2

Page 1: ...Aibot X6 V2 User Manual Version 5 4 English...

Page 2: ...ave the following meanings Trademarks CompactFlash and CF are trademarks of SanDisk Corporation Bluetooth is a registered trademark of Bluetooth SIG Inc All other trademarks are the property of their...

Page 3: ...re contained in AiProFlight User Manual RC Transmitter User Manual All instructions required for a safe use of the RC Trans mitter All functions and controls are product specific and explained in the...

Page 4: ...lobal Positioning System G S Ground Speed HDG Heading in Degrees HGH PREC High Precision GNSS ICAO International Civil Aviation Organization INC Inclination ISA International Standard Atmosphere LiPo...

Page 5: ...17 2 3 4 Telemetry Menu 17 2 3 5 Controls 18 2 4 Battery charger 20 2 5 Battery 20 3 Operation 21 3 1 General ground handling 21 3 1 1 Charging the Batteries 21 3 1 2 Transfer software to the Aibot X...

Page 6: ...de 49 3 6 6 After Landing Assist Mode 50 3 6 7 Dynamic Position Hold 50 3 6 8 Waypoint Flight 51 3 6 9 Dynamic Point of Interest 52 3 6 10 Coming Home 53 3 7 Normal Procedures Manual Mode 54 3 7 1 Man...

Page 7: ...V2 Table of Contents 7 4 3 Cleaning and Drying 67 4 4 Maintenance Plan 67 4 5 Service Intervals 68 5 Accessories 69 5 1 Camera Gimbal 69 5 2 On top Mount 69 5 3 Camera Connection 70 5 4 Live Video Pa...

Page 8: ...AUTION and NOTICE are standardised signal words for identifying levels of hazards and risks related to personal injury and property damage For your safety it is important to read and fully understand...

Page 9: ...or conversion of the product Use after misappropriation Inadequate safeguards at the working site Use with accessories from other manufacturers without the prior written explicit approval of Aibotix...

Page 10: ...Aibotix training requirements Know the purpose of the product and has read and understood the instruc tions in the user manual Be familiar with all known hazards up to the assembly level described in...

Page 11: ...humans Do not fly above dangerous places DANGER Crash due to interfering signals Interfering signals can lead to malfunction of the device Risk of serious injuries and damages because of falling devi...

Page 12: ...rning appears DANGER Crash due to mental fatigue of the operator The operation of the Aibot X6 V2 causes considerable mental fatigue Failure to observe these precautions may cause the operator to lose...

Page 13: ...ecautions CAUTION Components may get hot during operation and stay hot after operation Risk of burning injuries Precautions Avoid touching hot components Wait until hot components cool down after oper...

Page 14: ...the manufacturer CAUTION Disturbances caused by electromagnetic radiation can result in erroneous measurements Although the product meets the strict regulations and standards which are in force in th...

Page 15: ...2 2 Aibot X6 V2 2 2 1 General General The Aibot X6 V2 is an unmanned aerial vehicle It comes with six electric powered rotor blades The Aibot X6 V2 is operated by a ground control unit and is able to...

Page 16: ...ash landing of the system Charging Charging the RC transmitter with the included charger may take up to 15 hours Do not use third party chargers or plugs designed for other battery types The RC transm...

Page 17: ...f the Aibot X6 V2 near both antennas from the receiver 8 After holding the bind button on the Aibot X6 V2 for at least 3 seconds press SET on the RC transmitter while continuing to hold the bind butto...

Page 18: ...18 Aibot X6 V2 Description of the System 2 3 5 Controls Joysticks Sliders a Yaw b Throttle c Pitch d Roll a Camera zoom function if equipped b Manual camera pitch function c Not used...

Page 19: ...r OFF e 2 way switch lockable CARE FREE ON or OFF Assisted Orientation of the Aibot X6 V2 f 2 way switch POI ON or OFF Dynamic definition of a Point of Interest flight g 2 way switch FLIGHT PLAN ON or...

Page 20: ...arged battery Only use the batteries provided by Aibotix Technical data Safety Read and follow the enclosed Battery Safety Sheet The Aibot X6 V2 can only be operated with two batteries Never operate t...

Page 21: ...our batteries at once A power supply unit powers the battery charger All needed cables are included CAUTION Risk of short circuit Precautions First attach the charging cable to the battery charger the...

Page 22: ...Aibot X6 V2 Connection To run a software update the Aibot X6 V2 can be connected to a computer by the provided cable After an update perform a test flight in a safe area and without payload Refer to...

Page 23: ...nlets of the motor 6 Loosely screw on the nuts by hand 7 Grab and hold the propeller with one hand 8 Fasten the screw nut with the provided torque wrench with your other hand Repeat the previous steps...

Page 24: ...ift the battery cover to open the battery compartment 2 Loosen the strap fastener 3 Insert the batteries and tighten the strap fastener 4 Connect the batteries with the Aibot X6 V2 5 Make sure the bat...

Page 25: ...ite Requirements The takeoff and landing area must meet the following requirements The takeoff site has to be a flat and hard surface area Maximum allowed slope for takeoff is 15 All vegetation for ex...

Page 26: ...on A compass calibration is necessary if the magnetic field has changed in its strength Changes in the magnetic field may be caused by changing the launch site It is not recommended to perform a calib...

Page 27: ...he right joystick in the upper right corner 9 Check if all Status LEDs have gone over to their regular state 10 The compass calibration is successful if no errors occurred Default threshold values The...

Page 28: ...ge of the RC transmitter is strongly depending on external conditions antennas or the condition of the sending and receiving devices RC transmitter Graupner MC 32 Wi232 optional wireless computer conn...

Page 29: ...n ICAO conditions for International Standard Atmosphere ISA Never exceed the maximum takeoff weight as it may cause an overload of the Aibot X6 V2 CAUTION Limited operation time The flight time of the...

Page 30: ...mitation It is only allowed to operate the Aibot X6 V2 under Visual Flight Rules VFR under daylight conditions 3 2 9 Wind Limitation Never operate the Aibot X6 V2 when wind speed is above the followin...

Page 31: ...the operator to lose concentration and lead to an accident Precautions Do not fly longer than two hours without taking a rest Do not fly with poor health 3 2 12 Flight execution in rain Limitation Fli...

Page 32: ...c Rear LEDs d Left LED LED color Description Front LEDs flashing green Rear LEDs flashing red Normal operation Front and Rear LEDs Normal operation Right and Left LEDs flashing blue Signal lost Front...

Page 33: ...operator Trigger stopped Interval trigger stopped by operator Waypoint Flight activated Operator started waypoint flight Waypoint Flight complete Flight plan has been completed Switch off the flight...

Page 34: ...PS fix lost GPS fix has been lost and GPS has been deacti vated by the system Follow the emergency procedure for magnetic field disturbance 3 8 1 Disturbance of the Magnetic Field Warning Magnetic fie...

Page 35: ...detected after camera trigger Check connection of hot shoe adapter camera settings and interval time Message can be deactivated in Aibot settings if no hot shoe adapter is used Cannot start the engine...

Page 36: ...nually Fluctuations in air pressure may cause automatic adjustments of the flight level Pay attention to cross ventilation and avoid opening doors or windows while flying indoors Safety Features The A...

Page 37: ...Magnetic Compass Precautions Be aware that sensors may provide wrong data and always be ready to take over manual control It is important to consider some additional aspects Make sure that the ultras...

Page 38: ...tion of one or more of the following sensors Pressure Sensor Ultrasonic Sensor GPS Magnetic Compass Precautions Be aware that sensors may provide wrong data and always be ready to take over manual con...

Page 39: ...left right can be controlled with the right joystick GPS Dynamic Posi tion Hold PH The position of the Aibot X6 V2 is controlled with GPS guidance The influence of the wind is compensated automaticall...

Page 40: ...Safety Features The Aibot X6 V2 has a GPS cage mode for training purposes In GPS cage mode a virtual cage around the Aibot X6 V2 is built The cage is specified by a radius minimum altitude and maximum...

Page 41: ...RC transmitter gives a warning signal beep blinking LEDs as soon as the battery voltage drops below a preset value Refer to the AiProFlight user manual for details The procedure of the Automatic Safe...

Page 42: ...ProFlight user manual for further information on the configuration All procedures interrupt automatically once the communication link is re estab lished or if the Battery failsafe conditions are reach...

Page 43: ...ur flight executions The procedures are recommended but not obligatory Some situations may require adaption to the published procedures Remember also to prepare your mission waypoint flight plan gener...

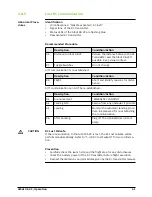
Page 44: ...dition Joysticks and toggle switches without damages and free moving Antenna without kinks or damages Battery fully charged Payload Camera Check weight and balance Cables and connections without damag...

Page 45: ...condition of propellers and screws tightened Only use the provided torque wrench X6 Motor temperature Checked X6 Payload Fixed and configured RC Power ON RC Select RF ON RC RC battery voltage Check re...

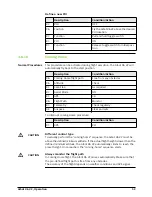
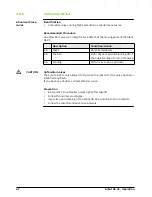
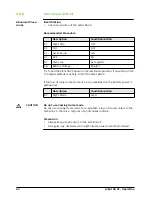
Page 46: ...Condition Action RC Telemetry display Select Refer to 2 3 4 Telemetry Menu for more information RC LiPo batteries voltage Check at the telemetry display that the batteries are fully charged 21 0 V RC...

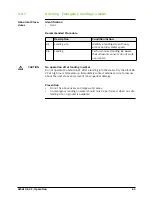
Page 47: ...V2 is free from any obstacles It may be necessary to control the position of the Aibot X6 V2 manually with the RC transmitter while performing an automatic takeoff When the automatic takeoff procedure...

Page 48: ...n his own turbulences Risk of serious injuries and damages because of falling device Precautions Avoid a straight vertical descent Descend in spiral movements or in a zig zag motion Be aware of the do...

Page 49: ...des when flying near ground 3 6 5 Abort Landing Assist Mode Normal Procedures It may be necessary to control the position of the Aibot X6 V2 manually with the RC Transmitter while abort an automatic l...

Page 50: ...ower OFF X6 Motor temperature Maintain a motor cool down phase of at least 5 minutes in a shady cool place At temperatures above 25 C a cool down phase of at least 15 minutes is recommended The cool d...

Page 51: ...6 V2 will automatically activate Position Hold It is possible to perform the Waypoint Flight again CAUTION Always monitor the flight path Make sure that the pre defined waypoints are free from any obs...

Page 52: ...POI To interrupt the POI flight To continue the POI flight You will be informed with a voice message when the last waypoint is reached CAUTION Always monitor the flight path In POI flight the pitch a...

Page 53: ...e sequence starts CAUTION Always monitor the flight path In Coming Home flight the Aibot X6 V2 moves automatically Make sure that the pre defined flight path is free from any obstacles The accuracy of...

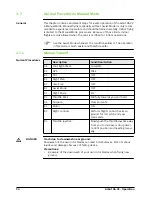
Page 54: ...afer 3 7 1 Manual Takeoff Normal Procedures DANGER Crash due to downwash near ground Downwash of the own rotor blades can lead to turbulences Risk of serious injuries and damages because of falling de...

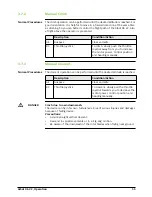
Page 55: ...downwash The device can fly in his own turbulences Risk of serious injuries and damages because of falling device Precautions Avoid a straight vertical descent Descend in spiral movements or in a zig...

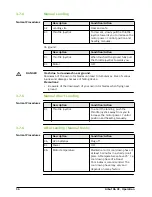
Page 56: ...l the throttle joystick towards you to decrease the motor power Control position and heading manually Description Condition Action RC Throttle Joystick When touched the ground fully pull the throttle...

Page 57: ...Automatic detection of disturbances The Aibot X6 V2 can detect magnetic disturbances on its own A warning signal and the voice response Magnetic field disturbed will be issued In that case the modes...

Page 58: ...ce Especially when no advice like a voice response will be issued the disturbance cannot be identified clearly In that case the abnormal procedure magnetic field disturbance must be used Be aware that...

Page 59: ...nder 17 9 V The available remaining flight time depends on the Aibot X6 V2 configuration and the environmental conditions Be aware that the remaining flight time could not be sufficient to finish the...

Page 60: ...utomatic takeoff mode is working without the use of ultrasonic sensors Be aware of a faster descent speed for an automatic landing It is necessary to assist the landing procedure in case of an automat...

Page 61: ...k the launch site and the flight area for any disturbances Check the battery power of the RC transmitter before flight execution Respect the limitations and procedures given by the RC transmitter manu...

Page 62: ...wed to fly when the reason for the noise has been identified and fixed If you have any doubts contact Aibotix service Prevention Be sensitive to unfamiliar noises right after takeoff Follow the normal...

Page 63: ...temperature Immediately contact Aibotix service to discuss about the next steps and prevent consequential damage Prevention Do not fly above rivers and large water areas An emergency landing on water...

Page 64: ...lished or the battery power is getting low CAUTION Do not use Coming Home mode Do not use Coming Home mode to re establish a loss of visual contact to the Aibot X6 V2 There is a high risk of a potenti...

Page 65: ...n far away from you or in a low altitude Status LEDs of the Aibot X6 V2 must be visible at any time Use the Care Free mode to prevent orientation problems Description Condition Action RC Flight Plan O...

Page 66: ...he telemetry screen 3 8 11 Incident Report If something unexpected happens during flight land immediately and contact Aibotix service to determine the cause Fill in the Incident report found on the US...

Page 67: ...limits 4 3 Cleaning and Drying General Only use a damp microfibre cloth to clean the Aibot X6 V2 Do not use strong detergent on carbon fibre parts Use a brush to remove loose dust Damp products Dry t...

Page 68: ...ntervals For professional maintenance Aibotix offers various service and repair plans which guarantee proper flight condition We highly recommend these service plans when purchasing the Aibot X6 V2 Co...

Page 69: ...compensator Be careful when using long lenses Never adjust the black nuts of the roll and pitch axes During takeoff and landing the camera must always be in a horizontal position The best images resul...

Page 70: ...e hot shoe adapter to your camera if available Refer to AiProFlight user manual for further information about georeferencing images 5 4 Live Video Package Installation To set up the Live Video Package...

Page 71: ...Aibot X6 V2 Accessories 71 3 Attach the antenna to the landing gear Step Description...

Page 72: ...Aibotix Ludwig Erhard Stra e 14 34131 Kassel Germany Phone 49 561 473949 0 www aibotix com Original text 848404 5 4 0en Printed in Switzerland 2016 Leica Geosystems AG Heerbrugg Switzerland...

Reviews: