9
8
PRE-USE CHECK AND HOIST SETUP
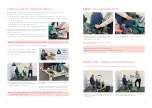
Before each time the Kera sit2sit is used it should be checked for safety. This safety check process
doubles as the routine to setup the Kera sit2sit to engage the user.
The following steps should be completed before each time the Kera sit2sit is used. If any of the steps
fail or a fault is found, the Kera sit2sit should not be used and suitable technician should be consulted
to assess the following:
•
Check for any visible faults or wear of the Kera sit2sit or Backstrap
•
Check that the wheels roll smoothly and freely
•
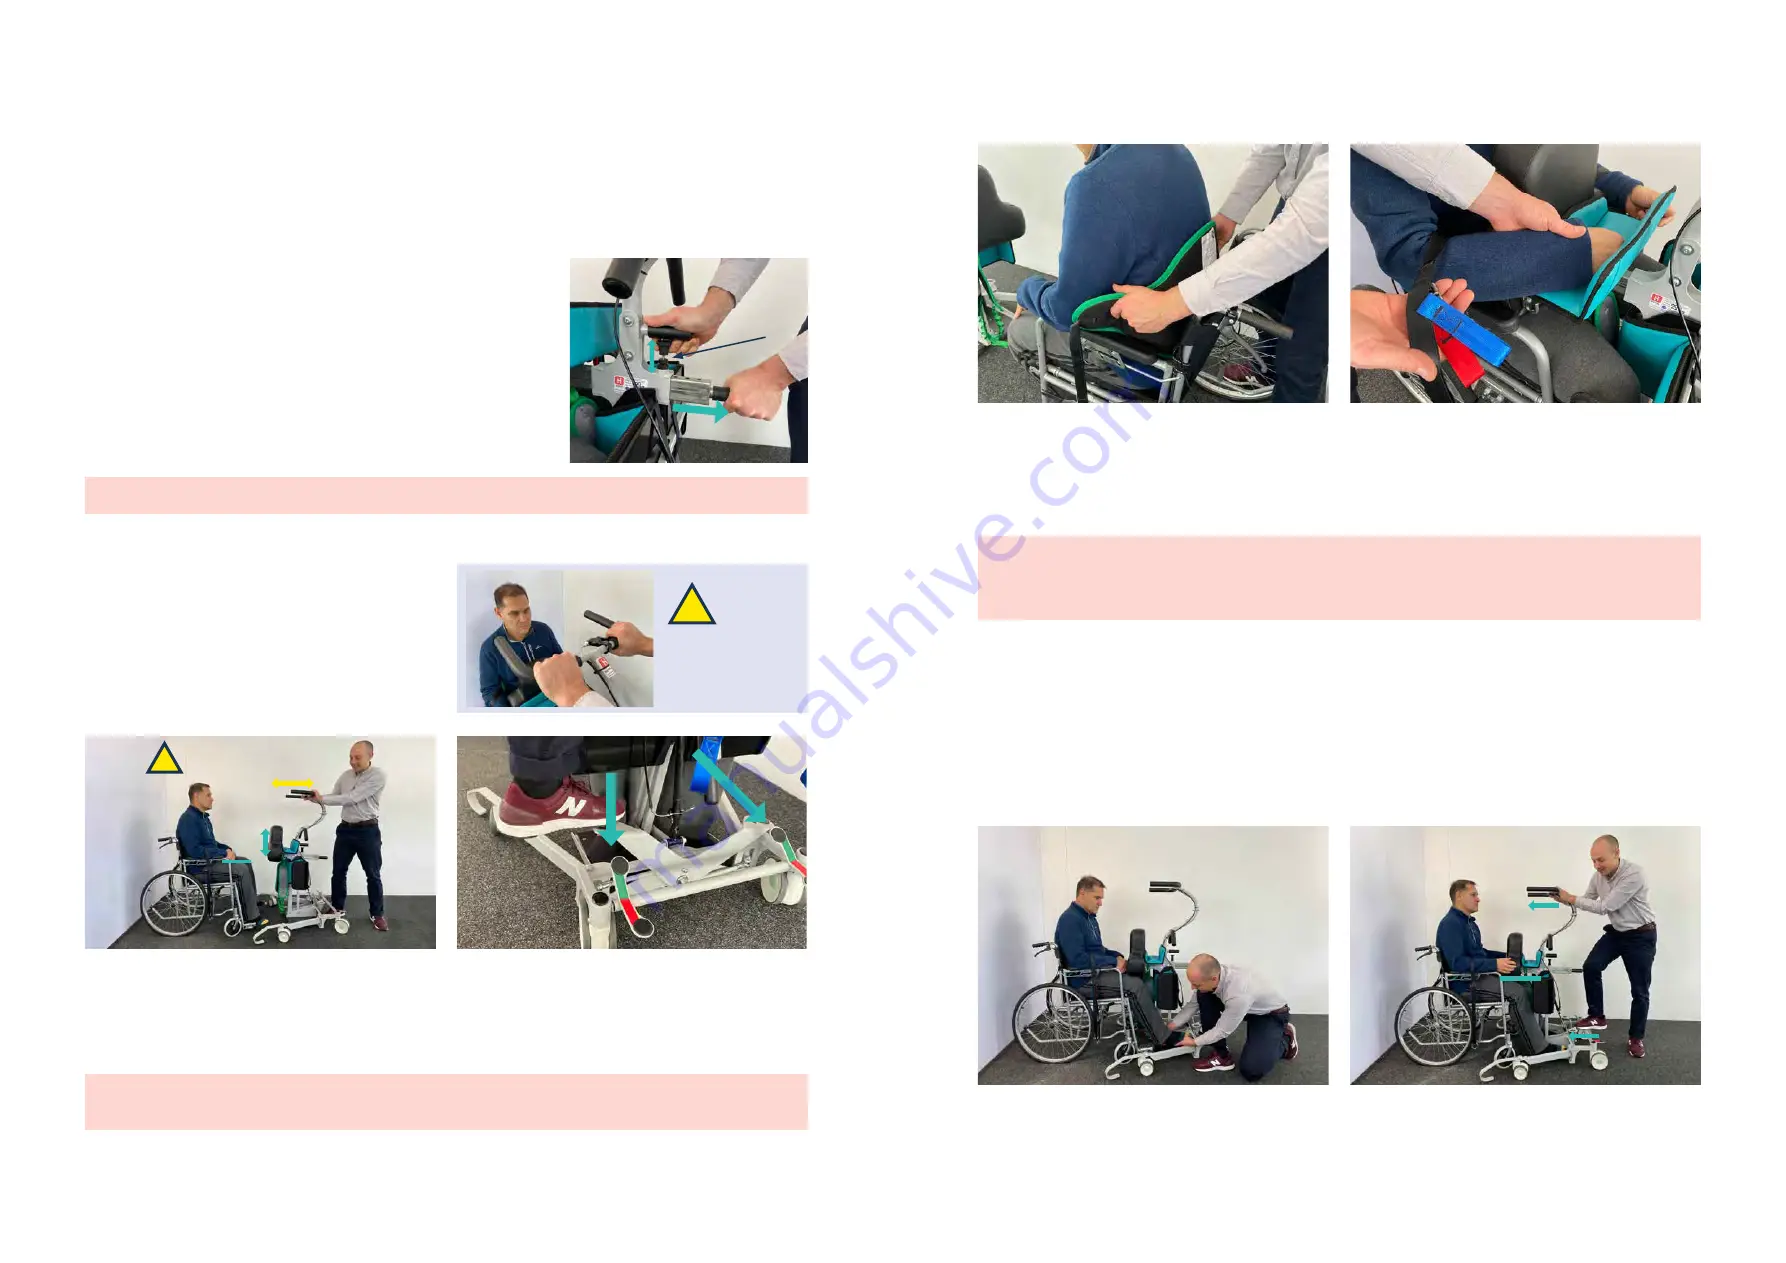
Check that the Chestpad Slider moves freely and is pulled toward you
Pull the index pin up and ensure the Chestpad slider moves easily
backward and forward. Release the index pin and check that the
slider is locked in place.
For setup, pull the Chestpad slider all the way towards you and
release the index pin, ensuring that the slider is locked in position.
Index pin
TIP: Release the index pin and pull the slider until you hear the pin click into one of the holes
•
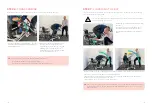
Check the caregiver handle locks and the Chestpad is above knees
Squeeze and hold the lock lever and check that
the caregiver handle can move freely through its
range of motion and locks in position when the
lock lever is released.
SQUEEZE
LEVER
Squeeze and hold
Lock Lever when
moving handle
SQUEEZE
LEVER
For setup, hold the lock lever and move the
caregiver handle until the Chestpad is just above
the knees and thighs of the user
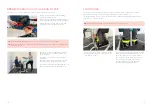
Check that the legs are spread open to fit around
the chair
To spread the legs of the Kera sit2sit, press down
with your foot on the end of the Leg Spreader
Lever. This ensures the legs will fit around a chair
TIP: Stand to the side of the Kera to ensure you can comfortably and stably put your weight
on the Leg Spreader Lever
STEP 1:
FIT THE BACKSTRAP
Lean the user forward just enough to position
the Backstrap, low on their back so that it sits just
above the belt or waist band
Have the user lean back in their chair to keep
the Backstrap in place
One at a time, bring the straps underneath
the arms of the user
TIP: Check the label is facing out and upward
TIP: If needed, loosen the user’s belt or waistband at this stage
STEP 2:
FEET, KNEES AND APPLY BRAKE
The following steps should be followed when moving the Kera sit2sit up to the seated user:
1. Ask the user to or assist with placing their feet
on to the Footplates (if Footboxes are in use –
see Page 17)
2. Move the Kera sit2sit toward the user using
the moving handles and your foot


