5
Installation Procedures
We recommend installing AT-1 following these steps:
1. Equipment mounting.
2. Manufacturing and testing of wiring harness or selection of standard accessories.
3. Wiring harness and interconnect installation.
4. Antenna installation.
5. Post installation configuration, checkout, and documentation.
5.1 Equipment Mounting
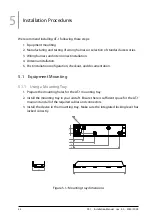
5.1.1 Using a Mounting Tray
1. Prepare the mounting holes for the AT-1 mounting tray.
2. Install the mounting tray in your aircraft. Ensure there is sufficient space for the AT-1
main unit and all of the required cables and connectors.
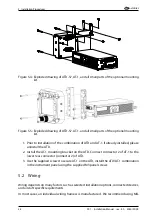
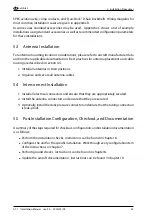
3. Install the device in the mounting tray. Make sure the integrated locking lever has
locked correctly.
$
$
%
%
&
&
'
'
(
(
)
)
/58&UDGGOH
*(:,&+7
$
%/$77921
0$6667$%
=(,&+181*615
%(1(1181*
b1'(581*
=(,&+181*1,&+76.$/,(5(1
:(5.672))
'$780
6,*1$785
1$0(
(17*5$7(1
81'6&+$5)(
.$17(1
%5(&+(1
2%(5)/b&+(1*h7(
:(111,&+7$1'(56'(),1,(57
%(0$6681*(16,1',10,//,0(7(5
2%(5)/b&+(1%(6&+$))(1+(,7
72/(5$1=(1
/,1($5
:,1.(/
48$/,7b7
352'8.7,21
*(1(+0,*7
*(35h)7
*(=(,&+1(7
'ĂƌƌĞĐŚƚǀŝŽŶŝŬ'ŵď,
ůĨƌĞĚͲEŽďĞůͲ^ƚƌ͘ϮĚ
ͲϱϱϰϭϭŝŶŐĞŶͬ'ĞƌŵĂŶLJ
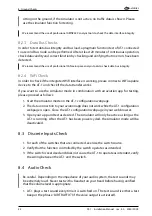
Figure 5.1.: Mounting tray dimensions
32
AT-1
·
Installation Manual
·
rev. 4.0
·
2020/01/09

