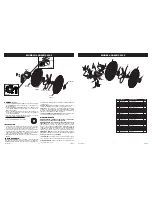
INSTALLATION
1. Locate a stud behind wall. If stud cannot be found, special types
of mounting anchors are available at your hardware store.
2. Secure Mounting Plate to wall with Screws supplied (#8 X 1 1/4"
Wood Screws). Make sure flange is pointing up as shown in
exploded view above.
3. Fan is now ready to hang on Mounting Plate.
MODEL 4CH64F/9018F
Rev. M 10/09
2
2084046
Rev. M 10/09
7
2084046
ASSEMBLY
(Figure 1)
1. Put
Rear Grill
on
Motor
by aligning the tab on the
Rear Grill
with the groove on the
Motor
.
(Detail 1)
2. Fully seat
Rear Grill
on
Motor
and secure with
Plastic Nut
turning Clockwise.
3. Slide
blade
onto
Motor Shaft
. (Align groove on blade hub with
pin on motor shaft.)
(Detail 2)
4. To secure
blade
, screw
Spinner
onto Shaft
Counter Clockwise
until tight on
blade
hub.
5. Snap
Front Grill
into place.
Motor
Detail 1
Rear
Grill
Plastic
Nut
blade
Spinner
Front
Grill
Ornament
OPERATION
VARIAbLE OSCILLATION:
Pull oscillation knob on the rear of the
motor up. Turn fan head to left, right, or straight ahead. Push
oscillation knob down and fan will oscillate about the set angle.
MAINTENANCE
WARNING:
ALWAYS UNPLUG THE CORD FROM OUTLET
bEFORE MOVING OR SERVICING THIS FAN.
WARNING:
DO NOT IMMERSE FAN IN WATER!
CLEANING:
Use a soft cloth moistened with a mild soap solu-
tion, such as liquid dish washing detergent. Dry ALL PARTS COM-
PLETELY before reassembling. After any maintenance or servicing,
completely reassemble unit as described in this instruction manual
before reconnecting to the power supply.
CAUTION:
Do not use gasoline, benzine, thinner, harsh
cleaners, etc. as they will damage the Fan. NEVER USE
ALCOHOL OR SOLVENTS.
LUbRICATION:
Precision bearings are sealed at the factory for
life and will not require any further lubrication.
STORAGE:
Store the Fan, with these instructions, in a cool, dry
place.
VERTICAL ANGLE:
To adjust vertical angle, tilt fan head up or
down, as desired.
SPEED:
Speed is controlled by a pull-cord switch. The speed setting
is shown by switch knob on front cover. (Off-High-Med-Low-Off)
POWER SUPPLY CORD:
Plug power supply cord into a wall outlet
(AC 120Volts, 60 Hz).
KEY PARTE NO.
DESCRIPCIÓN
CANT.
1
2
3
3
4
5
6
9
7
8
11
12
20
19
16
18
17 18
15
13
14
21
22
23
24
25
26
10
Detail 2
Groove
Pin
MODELO 4CH64F/9018F
1
2060316B
Placa de Montaje
1
2
2090003
Tornillo para Madera #8 X 11/4"
2
3
02090045A
Tornillo #8 X 3/4" PPH Tipo 25
6
4
02090272
Pie de Hule
2
5
2060202
Placa Posterior para Colgar
1
6
2010554
Cubierta del Cable del Interruptor 1
7
2090008
Tornilla #8 X 1/2"
2
8
02055047
Interruptor con Cadenilla de Tiro 1
9
7091854
Plastico Protector
2
10 2010512P
Cuerpo
1
11 2090539
Buje de la Cadenilla de Tiro
1
12 02090744
Pendiente
1
13 02035054
Conjunto del Motor
1
14 02010162B
Placa de Trinquete
1
15 02090518
Resorte de Elevación
1
16 02090521A
Eje de Elevación
1
17 02090033
Tuerca Hexagonal
1
18 02010548A
Botones H.C.
2
19 2010131
Perilla del Interruptor
1
20 02050009FPB
Conjunto del Cable
1
21 2096112
Parrilla Posterior
1
22 2010359
Tuerca de Protección
1
23 2010033
Aspa
1
24 2010093
Rotador
1
25 02096103
Parrilla Anterior
1
26 02010381A
Ornamento
1


