www.airkinglimited.com
6728023 Rev. G 5-14
4 of 12
Troubleshooting Guide
Trouble
Probable Cause
Suggested Remedy
1. Fan does not operate when the switch is on.
1a. A fuse may be blown or a circuit tripped.
1a. Replace fuse or reset circuit breaker.
1b. Connector plug from motor is not plugged in. 1b. Turn off power to unit. Remove Grill and plug motor into receptacle
in housing. Restore power to unit.
1c. Wiring is not connected properly.
1c. Turn off power to unit. Check that all wires are connected.
1d. Motor has stopped operating.
1d. Replace motor.
2. Fan is operating, but air moves slower than normal.
2.
Obstruction in the exhaust ducting.
2.
Check for any obstructions in the ducting. The most common are bird nests
in the roof cap or wall cap where the fan exhausts to the outside.
3. Fan is operating louder than normal.
3a. Motor is loose.
3a. Turn off power to unit. Remove grill and check that all screws are fully
tightened. Restore power to unit.
3b. Fan blade is hitting housing of unit.
3b. Call your dealer for service.
SECTION 7
Setting the Humidistat
This fan is equipped with a humidity sensor that automatically turns the fan on when humidity
is above set point and off when humidity is at or below set point. If the fan is operating too
long or not enough, first check to see the humidity sensor set point. In cases where the
ambient humidity level of the room rises higher than the preset level, the fan will turn on even
if the room is not occupied. This helps prevent conditions that lead to mold growth.
CAUTION:
MAKE SURE POWER IS SWITCHED OFF AT SERVICE PANEL BEFORE
SERVICING THE UNIT.
1.
To set the desired humidity level of the room, remove the grill and locate the
dehumidistat dial located on the wire compartment cover.
2.
Set the dial to the relative humidity you want the fan to maintain usually between 50 &
80%. Moist climates will require higher settings than dry climates. When the humidity
level of the room is below this setting the fan will remain off. When the humidity level
rises about this setting the fan will turn on and run until the humidity level falls below
this setting.
3. Reinstall the grill and restore power.
SECTION 8
Use and Care
CAUTION:
MAKE SURE POWER IS SWITCHED OFF AT SERVICE PANEL BEFORE
STARTING INSTALLATION.
1.
Cleaning the Grill:
Remove grill and dislodge reflector from grill by sliding the reflector
notches from beneath the lens clips on grill. Use a mild detergent, such as dishwashing
liquid, to clean then dry with a soft cloth. NEVER USE ANY ABRASIVE PADS OR SCOURING
POWDERS. Completely dry grill before reinstalling. Clean reflector using a dry cloth. Refer
to instructions in
Section 6
Completing the Installation
, to reinstall reflector and grill.
2.
Cleaning the Fan Assembly:
Wipe all parts with a dry cloth or gently vacuum the fan.
NEVER IMMERSE ELECTRICAL PARTS IN WATER.
CAUTION:
ALLOW BULBS TO COOL BEFORE REPLACING.
3.
Changing the Lamp:
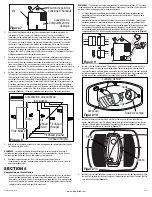
Disconnect power to the unit. Remove grill by pulling downward
on grill and squeezing grill springs together to release from housing
(Figure 12)
. Remove
Reflector from grill by sliding the reflector notches from beneath the lens clips on grill.
(Figure 11).
Fluorescent Bulb:
Remove lamp by gently twisting the lamp base counterclockwise while
applying outward pressure. Installation is the reverse of removal. Replace with Air King
model 26SBL or a compatible GU24 26 watt self ballasted lamp.
Night Light:
Unscrew night light bulb from socket and replace with a 4 watt maximum type
C7 (candelabra base) night light bulb.

