5
MN-282
Installing the RideControl System
NORMAL RIDE HEIGHT
This is defined as the distance between the bottom edge of the wheel well to the center
point of the wheel with the vehicle in an “as delivered condition” (without a load, i.e. tool box,
camper, etc.) measurements should be taken before beginning the installation. The distance
from the bottom edge of the wheel well to the center point of the wheel should be recorded.
All of our kits are designed to be installed and operated at normal ride height.
1. Raise axle or lower frame until leaf spring is in the normal ride height (no load)
position.
2.
Check the distance between the center of the hub and the bottom edge of the wheel well
to ensure that it is at the normal ride height measurement taken above. If not, raise the
frame or lower the axle as necessary to restore the original distance. The vehicle must
be at normal ride height before installing the upper bracket.
ASSEMBLING THE INSTALLATION TOOL
1.
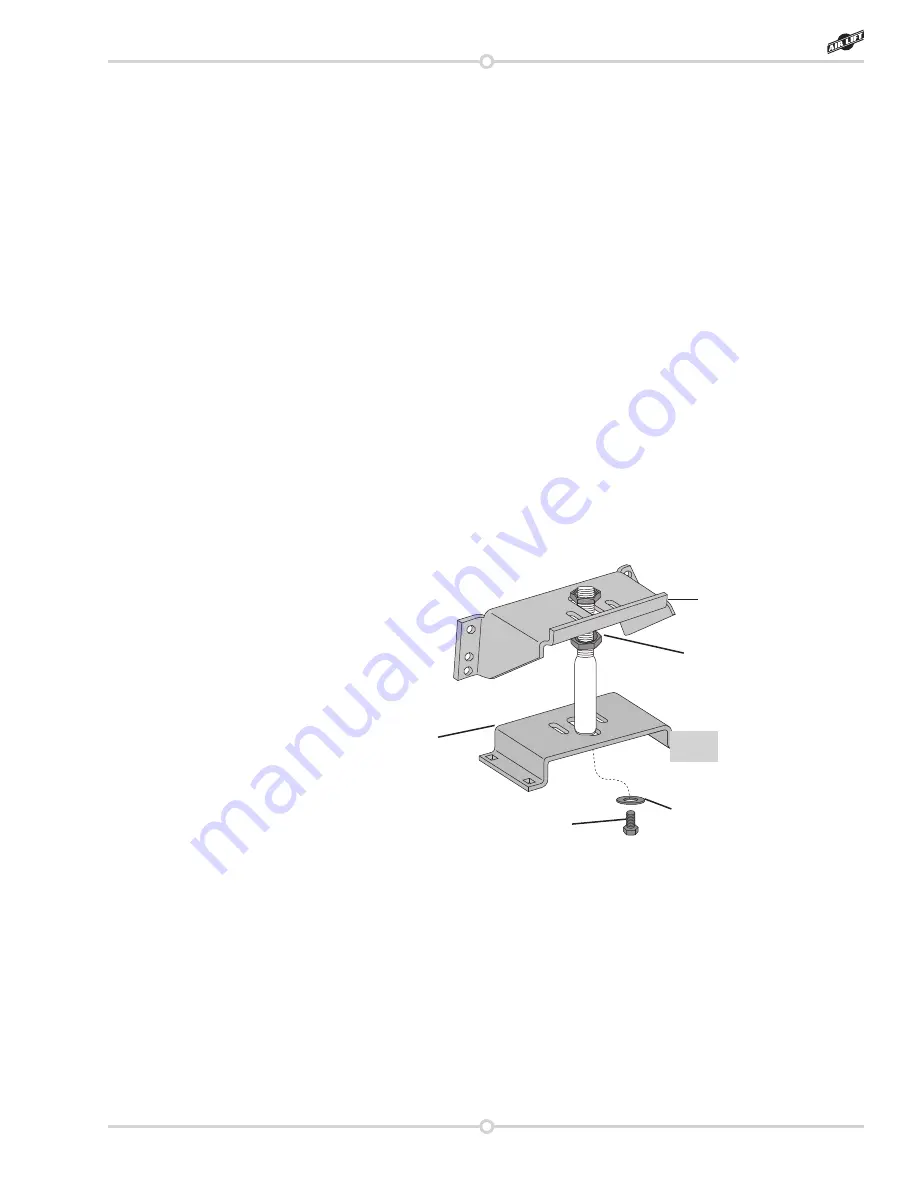
Assemble the upper and lower bracket to the alignment tool. This tool is designed to help
you properly install the kit for correct height and alignment. The range of adjustment to
attain the correct mounted height is determined by the upper threaded section of the
tool. The kit may be mounted anywhere in that range (fig. 3).
2.
Place the upper bracket “legs down” onto the threaded end of the tool resting on the
bottom nylon nut. Then thread a second nylon nut onto the tool to hold the bracket in
place. Leave loose for later adjustment. (fig. 3).
3. Use the ½” x 7/8” hex head bolt and flat washer to attach the lower bracket to the bottom
of the installation tool with the open edge of the lower bracket toward the legs of the
upper bracket. Leave loose enough to adjust in and out (fig. 3).
ATTACHING THE ASSEMBLY
1.
Set the assembly on the leaf spring centered over the axle.
2.
Using the slot in the lower bracket, push the upper bracket against the frame rail. Use
the nylon nuts on the threaded portion of the installation tool to adjust the upper bracket
so that the flanges of the upper bracket are flat against the frame rail and at least four
mounting holes are on the flat middle section of the frame rail. Do not drill any holes
on the upper or lower radiused edge of the frame rail. You must also allow at least 1.5”
above the upper bracket for air fitting clearance. The brackets can be mounted anywhere
within the threaded range of the installation tool.
Upper bracket
Lower bracket
Nylon nut
Flat washer
Hex head bolt
fig. 3
RideControl


