FR
EN
13
C5. SOUDAGE TIG
C5. TIG WELDING
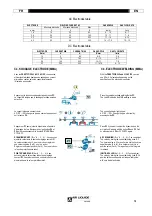
Sélectionner le soudage TIG en appuyant sur le bouton P1. Vous pouvez également
changer le type de courant en appuyant encore sur le bouton de sélection (AC, MIX,
DC-, DC+). Pour DC+ rester appuyé sur le bouton.
Suivant le mode sélectionné vous pouvez ajuster les paramètres en choisissant la
fonction CYCLE P3. Quitter cette fonction en appuyant encore sur le même bouton.
En même temps vous pouvez voir le diamètre d’électrode recommandé.
Select TIG welding by pressing the TIG button P1. You can change the current type
by pressing the selection button again (AC, MIX, DC-, DC+). Selecting DC+ requires
holding down the button.
According to selected current mode you can adjust parameters by using CYCLE P3
–function. Quit from CYCLE P3 –function by pressing CYCLE P3 –button. At the
same time you can see recommended diameter for electrode.
AC TIG
Recommandé pour le soudage aluminium. Vous pouvez auster par exemple la
balance et la fréquence du courant alternatif avec la fonction CYCLE P3 et les
flèches. Les paramètres suivants peuvent être réglés :
AC TIG
Intended for welding aluminium. You can adjust, for example, the balance and
frequency of the alternating current with the CYCLE P3 and arrow buttons. The
following welding parameters can be adjusted:
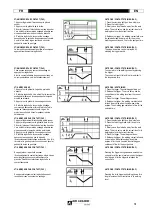
A. Balance (bAL -50 … 0, réglage usine –25%)
Pour une valeur de -25 à 0 de la balance casse la couche d’alumine plus
efficacement mais échauffe l’électrode plus que la pièce.
Pour une valeur de -50 à -25 de la balance augmente l’énergie et la pénétration dans
la pièce, mais diminue le décapage de l’alumine.
Si vous souhaitez augmenter la température de l’électrode pendant le soudage avec
un bout arrondi, ajustez la balance dans le positif, et si vous souhaitez diminuer la
température de l’électrode pendant le soudage et conserver un bout affuté, ajustez la
balance à -50.
Au réglage usine, l’électrode reste affutée.
Une électrode affutée produit un arc étroit permettant un bain étroit et une meilleure
pénétration qu’avec une électrode arrondie. Un arc étroit est très utile pour une
soudure en angle.
Une électrode arrondie produit un arc large, qui favorise aussi le décapage de
l’alumine sur une plus grande largeur.
A. Balance (bAL -50 … 0, factory setting –25%)
For a value of -25 to 0 value breaks up aluminium oxide more effectively but heats
the electrode more than the work piece.
For a value of -50 to -25 value increases heat generation and penetration in the
base metal, while decreasing etching of alumina.
If you wish to increase electrode temperature when welding with a blunt-headed
electrode, adjust the balance in the positive direction, and if you wish to decrease
electrode temperature when welding with a sharp electrode, adjust the balance
to -50.
At the factory setting, the electrode tip remains almost sharp.
A sharp electrode allows welding with a narrower arc, achieving a narrower weld
and deeper penetration than with a blunted electrode. Narrow welding is especially
useful when fillet welding.
Welding with a blunted electrode produces a wide arc, which also promotes the
stripping of alumina on a larger width.
B. Fréquence (FrE 50 … 250 Hz, réglage usine 60 Hz)
Augmenter la fréquence produit un arc plus stable et étroit.
B. Frequency (FrE 50 … 250 Hz, factory set 60 Hz)
Raising the frequency will make the arc slightly more stable and narrow.
C. Sélection de la forme d’onde, sinus ou carrée (Sinus/SquArE)
La forme d’onde influe sur le bruit de l’arc, et sur la pénétration. Une forme
sinusoïdale produit un bruit plus faible, alors qu’une forme carrée procure une
meilleure pénétration (réglage usine).
C. Selection of AC waveform, sine or square wave (SinuS/SquArE)
The waveform affects the noise level and penetration of the arc. A sine waveform
generates a lower noise level, while a square wave has better penetration (factory
setting).
D. Temps de hot start en 2T (H2t 0.1 s…5.0 s, réglage usine 1 s)
Temps de préchauffage pour la fonction 2 temps. La pièce peut être préchauffée (hot
start) avec un courant AC ou DC. Le temps sélectionné ici est calculé pour des
courants DC.
D. Hot Start time for the 2T function (H2t 0.1 s…5.0 s, factory set 1 s)
Pre-heating timer for the 2T switch function. The work piece can be pre-heated (Hot
Start) with both AC and DC currents. The time set here remains in effect for DC TIG
current types.
C6. COMPOTIG (MIX) ET THIN
C6. COMPOTIG (MIX) AND THIN
a) SOUDAGE COMPOTIG (courant mixte AC/DC)
Avec un courant mélangé, la fréquence et la balance
du courant alternatif sont
déterminés par les réglages faits en courant AC.
On accède à ces réglages en appuyant sur la touche
CYCLE P3, puis sélectionner le paramètre avec les
flèches
P4
et
P5
.
a) COMPOTIG WELDING (mixte current AC/DC)
With mixed current frequency and balance of
alternating current are determined by adjustments
made for AC-current.
These settings are accessible by pushing the
CYCLE P3 pushbutton and then selecting a
parameter by means of
P4
and
P5
arrows.
1.
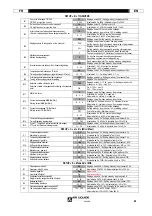
Temps AC (AC 10 ... 90 %, réglage usine 50 %)
2.
Temps de cycle (CYc 0.1 ... 1.0 s, réglage usine 0.6 s)
3.
Courant DC (DC(-) 50 ... 150 %, réglage usine 100 %)
4
. Balance (bAL -50 … 0 … +10 %, réglage usine –25 %)
5
. Fréquence (FrE 50 … 250 Hz, réglage usine 60 Hz)
6.
Sélection de la forme d’onde, sinus ou carrée (Sinus/SquArE)
7.
Temps de hot start en 2Temps (H2t 0.1 s…5.0 s, réglage usine 1.0 s).
Réglage possible seulement en fonction 2 T et 4T LEVEL. Augmenter le courant DC
favorise la pénétration mais diminue l’effet de décapage.
1.
AC-time (AC 10 ... 90 %, factory set 50 %)
2.
Cycle time (CYc 0.1 ... 1.0 s, factory set 0.6 s)
3.
DC-current (DC(-) 50 ... 150 %, factory set 100 %)
4.
Balance (bAL -50 … 0 … +10 %, factory set –25 %)
5
. Frequency (FrE 50 … 250 Hz, factory set 60 Hz)
6.
Selection of AC waveform, sine or square wave (SinuS/SquArE)
7.
Hot Start time for the 2T function (H2t 0.1 s …5.0 s, factory set 1.0 s).
Can be seen only on the 2T and 4T LEVEL function. Growing DC-current increases
penetration but decreases etching effect.
b) Fonction THIN
La fonction THIN est un mode d’agrafage de haute qualité, rapide et sans
déformation.
Pour accéder à la fonction, faire un appui long sur spot pulsé SYN.
P8
.
- Réglage du courant avec le bouton
R1
- Réglage du pré-gaz et post-gaz en appuyant sur les flèches
P4
et
P5
- Réglage du temps de l’impulsion (de 1 à 200ms) en appuyant sur CYCLE P3
- En mode AC, réglage du nombre d’impulsion (de 1 à 5ms) en appuyant sur la flèche
P5
après avoir appuyé sur le bouton CYCLE P3.
b) THIN function
The THIN function is a method of high quality and rapid joining without any
distortion.
To select this function push and hold the spot pulse SYN.
P8
.
- Setting of the current by means of the
R1
pushbutton
- Setting of the pre-gas and the post-gas by means of
P4
and
P5
arrows
- Setting of the pulse time (from 1 to 200 ms) by pushing CYCLE P3
- Setting of the pulse number (from 1 to 5ms) in the AC mode by pushing
P5
arrow
after previous pushing CYCLE P3 pushbutton.
Summary of Contents for SAF-FRO PRESTOTIG 240 AC/DC
Page 112: ...112 D3 PIECES DE RECHANGE COOLERTIG 2 D3 6 5 18 4 19 3 2 20 8 11 12 1 16 9 10 17 7 13 14 15 ...
Page 113: ...113 SCHEMA PRESTOTIG 240 AC DC ...
Page 114: ...114 D3 PIECES DE RECHANGE PRESTOTIG 310 AC DC D3 14 6 12 3 1 17 2 7 15 4 under 13 16 33 9 ...
Page 116: ...116 SCHEMA PRESTOTIG 310 AC DC P R E S T O T I G 3 1 0 A C D C ...
Page 117: ...117 DESCRIPTION DU PANNEAU DE REGLAGE DU PRESTOTIG 240 310 AC DC voir page 6 ...
Page 118: ...118 DESCRIPTION DU PANNEAU DE REGLAGE voir page 6 ...
Page 119: ......
Page 120: ......
Page 121: ......


