4.
Web Management
AirLive AirMax4GW User’s Manual
98
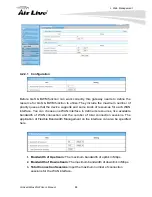
4.2.3.2.3 Tunnel List and Status
1.
Add:
You can add one new IPSec tunnel with Site to Site scenario by clicking
the “Add” button.
2.
Delete:
Delete selected tunnels by checking the “Select” box at the end of
each tunnel list and then clicking the “Delete” button.
3.
Refresh:
To refresh the Tunnel List & Status each 2 seconds by clicking on
the “Refresh” button.
4.
Tunnel:
Check the “Enable” box to activate the IPSec tunnel.
5.
Edit:
You can edit one tunnel configuration by clicking the “Edit” button at
the end of each tunnel list.
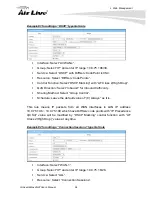
4.2.3.2.4 Tunnel Configuration
1.
Tunnel Name:
Enter the name of tunnel.
2.
Interface:
Decide the WAN Interface to establish the tunnel.
3.
Tunnel Scenario:
Support “Site to Site”, “Site to Host”, “Host to Site”, “Host
to Host” and “Dynamic VPN”. Select one from them.
4.
Operation Mode:
Default is “Always on” and other options depend on
product models.
5.
Encapsulation Protocol
: Default is ESP and other options depend on
product models.
6.
Keep-alive:
Check “Enable” box to keep alive the tunnel. By default,
keep-alive
method is “Ping IP” and other options depend on product models. Input the
IP address of remote host that exists in the opposite side of the VPN tunnel
(Ex. You can input the LAN IP address of remote Business Security
Gateway). The Interval is specified with the time interval between two ping
requests, and by default, it is 30 seconds. Now, the device will start to ping
remote host when there is no traffic within the VPN tunnel. If the device can't
get ICMP response from remote host anymore, it will terminate the VPN
tunnel automatically.


