22
en
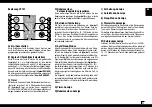
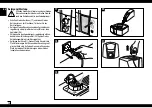
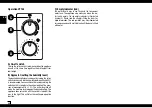
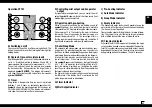
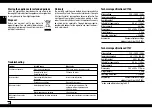
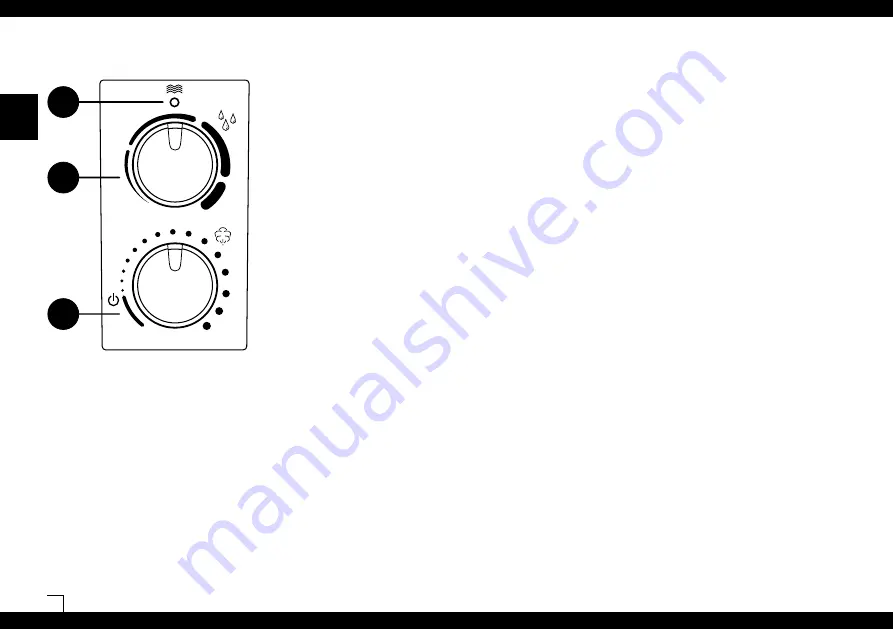
C) Empty indicator (red)
The water level is easy to see, thanks to the transparent
water tank. The appliance also alerts you when the wa
-
ter tank is empty. The red empty indicator is illuminated
(symbol C). Please read the chapter «Filling the tank» for
more information. The red symbol C may stay illuminated
for some seconds with a refilled tank until the base is filled
with water.
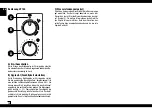
A) On-off switch
Turning the rotary switch clockwise switches the appliance
on and at the same time regulates the mist output from
low to high.
B) Hygrostat (setting the humidity level)
The desired humidity level can be set by turning the rotary
switch clockwise. A relative humidity between 40 and 60%
is recommended. You can achieve this level by rotating the
switch until it is roughly in the vertical position. The accu
-
racy of measurement is +/- 5%. The unit will switch off
when the moisture level exceeds the desired setting. The
appliance does not switch off if the switch is turned all the
way to the right. This activates the continuous operation
function.
Operation U7145
A
B
C
Summary of Contents for U7145
Page 1: ...U7145 U7147 ...
Page 2: ......
Page 4: ...4 ...
Page 5: ...5 de Gebrauchsanweisung ...
Page 7: ...7 de 3 7 9 2 5 1 6 4 8 ...
Page 15: ...15 de 39 29 30 31 32 33 34 36 38 35 37 40 ...
Page 17: ...17 en Instructions for use ...
Page 19: ...19 en 3 7 9 2 5 1 6 4 8 ...
Page 27: ...27 en 39 29 30 31 32 33 34 36 38 35 37 40 ...
Page 29: ...29 fr Instructions d utilisation ...
Page 31: ...31 fr 3 7 9 2 5 1 6 4 8 ...
Page 39: ...39 fr 39 29 30 31 32 33 34 36 38 35 37 40 ...
Page 41: ...41 it Istruzioni per l uso ...
Page 43: ...43 it 3 7 9 2 5 1 6 4 8 ...
Page 51: ...51 it 39 29 30 31 32 33 34 36 38 35 37 40 ...
Page 53: ...53 nl Gebruiksaanwijzing ...
Page 55: ...55 nl 3 7 9 2 5 1 6 4 8 ...
Page 63: ...63 nl 39 29 30 31 32 33 34 36 38 35 37 40 ...
Page 65: ...65 es Instrucciones para el uso ...
Page 67: ...67 es 3 7 9 2 5 1 6 4 8 ...
Page 75: ...75 es 39 29 30 31 32 33 34 36 38 35 37 40 ...
Page 77: ...77 hu Használati útmutató ...
Page 79: ...79 hu 3 7 9 2 5 1 6 4 8 ...
Page 87: ...87 hu 39 29 30 31 32 33 34 36 38 35 37 40 ...
Page 89: ...89 pl Instrukcja obsługi ...
Page 91: ...91 pl 3 7 9 2 5 1 6 4 8 ...
Page 99: ...99 pl 39 29 30 31 32 33 34 36 38 35 37 40 ...
Page 101: ...ru 101 Инструкция по эксплуатации ...
Page 103: ...ru 103 3 7 9 2 5 1 6 4 8 ...
Page 111: ...ru 111 39 29 30 31 32 33 34 36 38 35 37 40 ...
Page 114: ...ru 114 ...
Page 115: ...se 115 Bruksanvisning ...
Page 117: ...se 117 3 7 9 2 5 1 6 4 8 ...
Page 125: ...se 125 39 29 30 31 32 33 34 36 38 35 37 40 ...
Page 127: ...fi 127 Käyttöohje ...
Page 129: ...fi 129 3 7 9 2 5 1 6 4 8 ...
Page 137: ...fi 137 39 29 30 31 32 33 34 36 38 35 37 40 ...
Page 139: ...dk 139 Brugsanvisning ...
Page 141: ...dk 141 3 7 9 2 5 1 6 4 8 ...
Page 149: ...dk 149 39 29 30 31 32 33 34 36 38 35 37 40 ...
Page 151: ...no 151 Bruksanvisning ...
Page 153: ...no 153 3 7 9 2 5 1 6 4 8 ...
Page 161: ...no 161 39 29 30 31 32 33 34 36 38 35 37 40 ...
Page 163: ......

