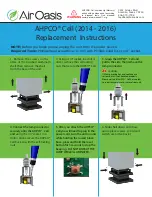
AHPCO® Cell (2014 - 2016)
Replacement Instructions
3401 Airway Blvd.
Amarillo, Texas 79118
806-373-7788
feedback@airoasis.com
®
NOTE: Before you begin please unplug the unit from it's power source.
Phillips head screwdriver or drill with Phillips head bit or 1/4” socket.
Required Tools:
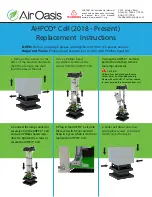
1. Remove the screws on the
sides of the brushed aluminum
shell then remove the shell
from the base of the unit.
6. Slide shell down onto base
and replace screws. (Cord and
switch are to the back.)
2. Using a 1/4” socket, in a drill or
driver, remove the self-locking
nuts that secure the AHPCO
®
Cell.
5. After you attach the AHPCO®
Cell you will need to plug in the
power cord, turn the unit on and
while holding the lowest black
base, press and hold the reset
button for 3 seconds to stop the
beeping. DO NOT LOOK AT THE
LAMP WHILE ILLUMINATED.
4. Connect the lamp connector
securely onto the AHPCO® Cell
and
using the 1/4” socket, in a
drill or driver, secure the AHPCO
®
Cell back on with the self-locking
nuts.
3. Grasp the AHPCO® Cell and
pull to the side, then remove the
lamp connector.
CAUTION
UV lamp may be hot and could cause
serious burns if not handled properly.
Please wait until AHPCO® Cell has cooled
to room temperature to remove from unit.
WARNING
AHPCO® Cell contains Hg (Mercury)
and should be disposed of according
to disposal laws. Find disposal
centers at www.earth911.org.

