AIR TORQUE
The 4th Generation
Maintenance
4)
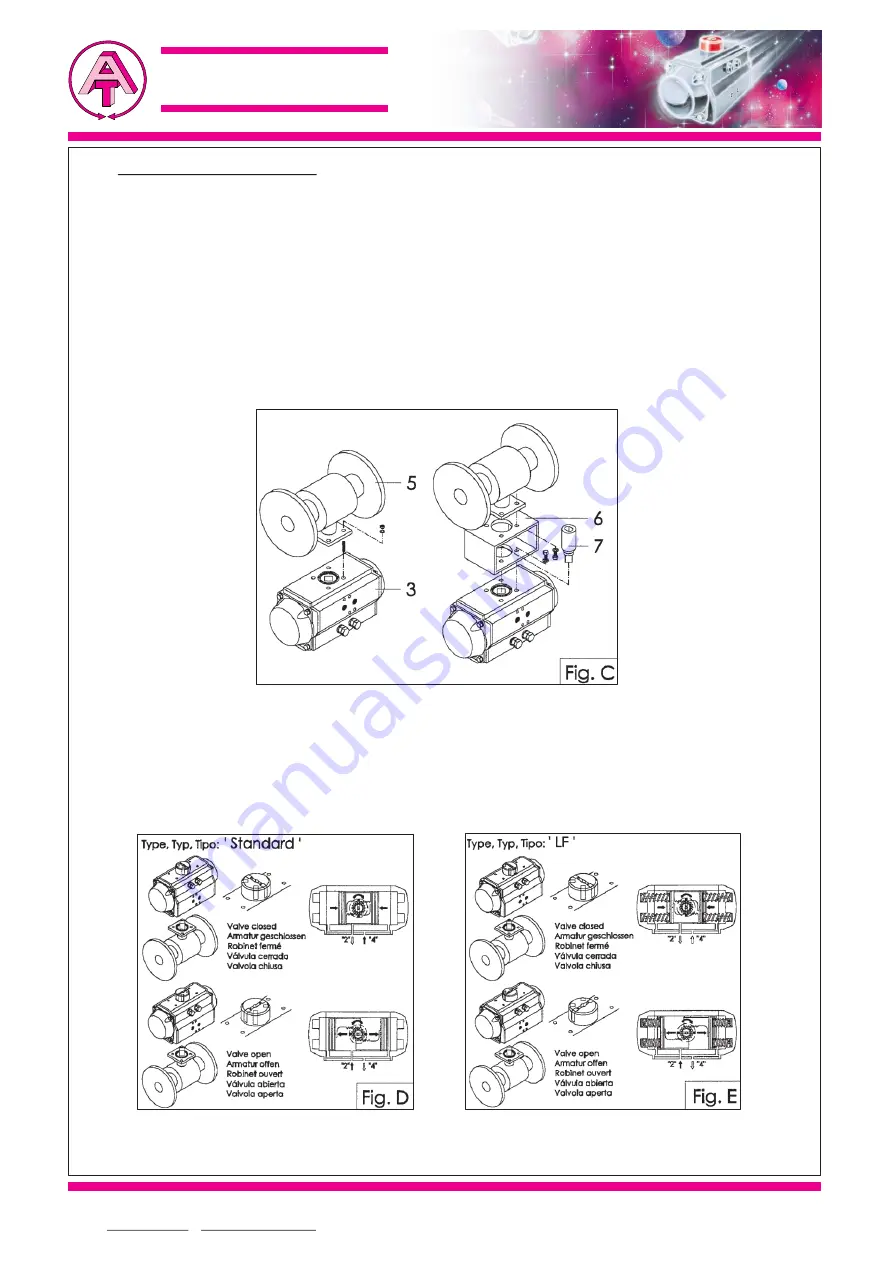
Assembly of Valve Figure C:
Before proceeding with the assembly of a valve onto an actuator be sure that the actuator
operates in the desired direction of rotation and both actuator / valve are correctly orientated.
Important : When using a spring return actuator for a fail safe operation, ensure that when air or
electricity failure occurs the direction of rotation is correct for your application.
Fit the valve 5 onto the actuator 3. Ensure that the actuator is in normal position (closed posi-
tion). There are two types of valve assembly onto the actuator :
-Direct-mount : Fit the square of the valve 5 directly into the square of the actuator 3 and bolt
together through the valve ISO pad (max. tightening torque see table above).
-Bracket-mount : Mounting with a bracket 6 and coupling 7, the bracket is bolted to the actua-
tor / valve to join them together and the coupling is used to connect the actuator output drive
to the valve stem (max. tightening torque see table).
1)Mounting alternatives :
2)Valve mounting with Actuator Type STANDARD (Clockwise to close) Figure D :
5.4.3) Valve mounting with Actuator Type LF (Clockwise to open) Figure E :
Via Alla Campagna n.1 * I - 24060 Costa di Mezzate (BG)
Phone: 0039-035-682299 * Fax: 0039-035-687791
e-mail: info@airtorque.it * http://www.airtorque.it
Modifications reserved. Date 02.2000.
No guarantee for accuracy.
Older data sheets are invalid.
Maintenance
905e


