4
Setup Section
1.
Keyboard:
Click this icon to enable or disable the virtual keyboard. When enabled, you can click these keys to
input notes, or view notes being played on an external MIDI device.
2.
Tempo:
Displays the current plugin tempo. To change the tempo:
•
Click the number and use your keyboard to input a new value.
•
Click and drag the tempo value up or down using your cursor.
•
Click the
Tap
button at regular intervals.
3.
Settings:
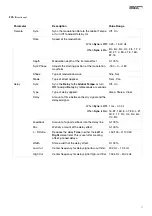
Click this icon to open the Settings window, where you can set the following parameters:
•
Output:
Click this drop-down menu to select an audio hardware driver in your computer system. Click the
Test
button to play a test tone for checking your audio output settings. (Careful! You should lower the
volume on your audio system beforehand.)
•
Sample Rate:
Click this drop-down menu to select the desired sample rate for your project. This depends
on the available sample rates of the type of MPC hardware you are using or of your audio interface (i.e.,
select
96000 Hz
only if your interface allows a 96 kHz sample rate).
•
Audio Buffer Size:
Click this drop-down menu to set your audio system’s latency. Lower values result in a
more immediate playing response but also more CPU consumption. If you are working with larger projects,
this may cause audible clicks and pops. Higher values are more CPU-friendly but can produce more delay
between pressing a pad and hearing the corresponding sound. The ideal audio buffer size also depends on
your computer’s CPU performance. Experiment with this to find the best setting for your system.
•
Active MIDI Inputs:
Displays available MIDI input devices. To enable a device, check the box next to its
name.
•
Bluetooth MIDI:
Click this icon to open your system’s Bluetooth settings menu, where you can select a
Bluetooth-enabled MIDI device to control the plugin.
4.
Menu:
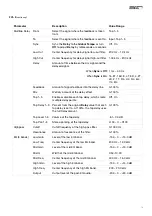
Click this icon to open the menu, where you can find the following options:
•
Scale:
Click here to select a value to scale the plugin window to a new size.
•
Load Preset:
Click here to load a saved preset.
•
Save Preset:
Click here to save the current preset.
•
Open User Guide:
Click here to open this User Guide.
•
About:
Click here to view plugin version information.
5.
Preset:
Click this drop-down menu to view the list of included plugin presets. You can also click the up and
down arrows next to this field to move to the previous or next preset.
1
3
4
2
5


