Continued...
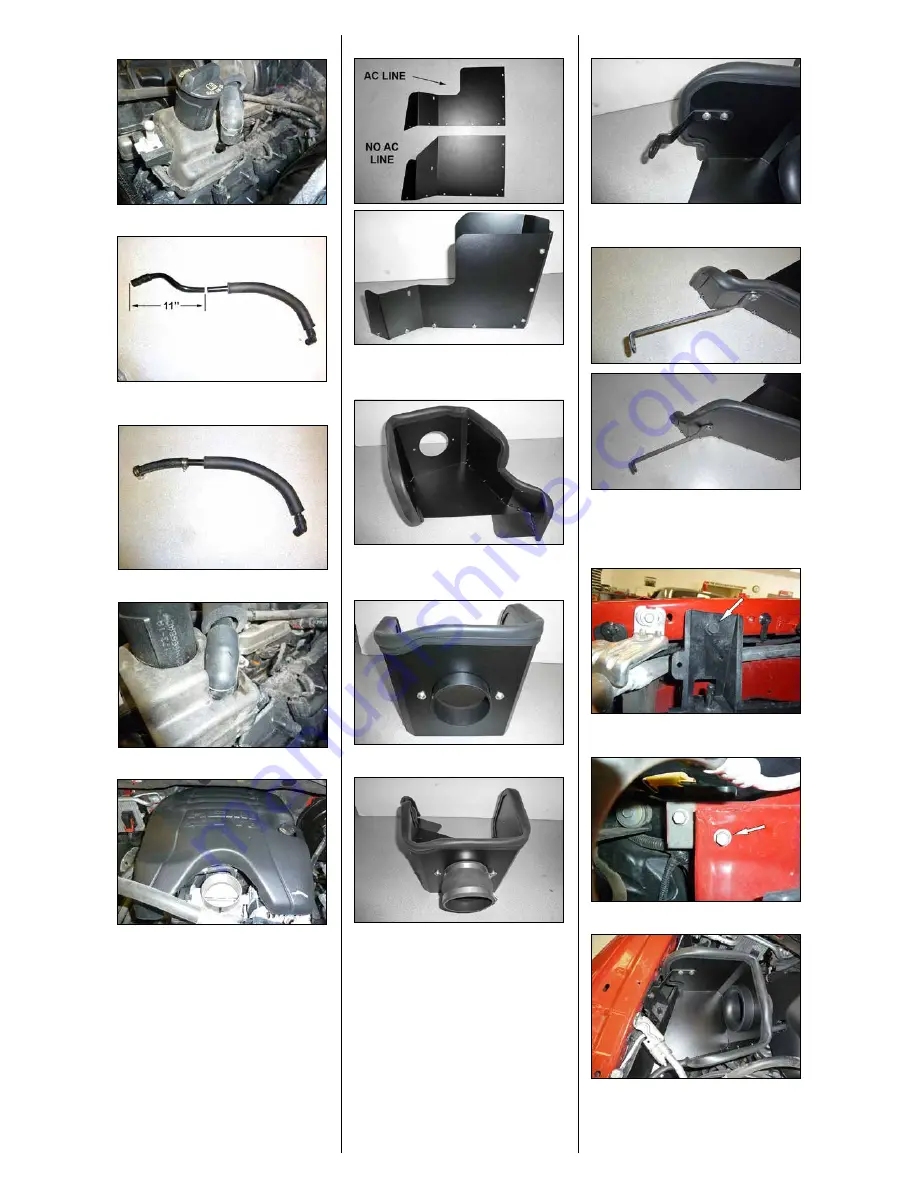
7. Disconnect the crank case vent hose from the valve
cover port.
8. Measure 11” from the air filter end of the crank case
vent tube and then trim the crank case vent tube as
shown.
9. Install the provided silicone crank case vent hose onto
the cut end of the factory crank case vent tube as shown.
10. Install the crank case vent assembly onto the valve
cover port.
11. Reinstall the engine cover onto the mounting studs
and route the crank case vent hose through the opening.
12. Some vehicles may have an AC line obstructing
installation. Choose the appropriate heat shield wall for
the AC line configuration and attach to the heat shield as
shown using the provided hardware.
13. Install the provided edge trim onto the heat shield as
shown.
NOTE: Some trimming of the edge trim will be
necessary.
14. Install the provided filter adapter onto the heat shield
as shown and secure with the provided hardware.
15. Install the silicone hump hose onto the filter adapter
and secure with the provided hose clamp.
16. Install the heat shield mounting bracket (083127)
onto the heat shield using the provided hardware.
NOTE: Do not completely tighten at this time.
17. Install the heat shield mounting bracket (083103-
1A) onto the heat shield using the provided hardware.
NOTE: Do not completely tighten at this time.
NOTE: When using the cut out heat shield wall,
place the provided spacer between the bracket and
heat shield and use the longer bolt.
18. Remove the front air box mounting bracket bolt
shown.
NOTE: This bolt will used in a later step.
19. Remove the front fender mounting bolt shown.
NOTE: This bolt will used in a later step.
20. Install the heat shield assembly into the vehicle and
secure with the bolts removed in steps #18 and #19. Do
not completely tighten at this time.


