background image

9

 USE WHITE VINEGAR 

FOR CLEANING

Regular Cleaning (perform when refilling tank)

1. 

Turn off the unit and unplug it from the outlet. 

2. 

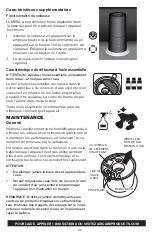
Lift off the water tank and empty any remaining 


water from the tank and base. 

3. 

Rinse the water tank and demineralization filter  


under the faucet flow.

4. 

Wipe dry all parts with a soft, clean cloth or paper  


towel and reassemble the unit.

Weekly Maintenance

1. 

Lift off the tank and empty any remaining water 

from the tank and base, noting cautions on the 

previous page.

2. 

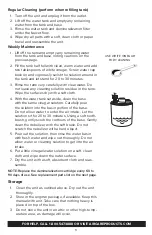
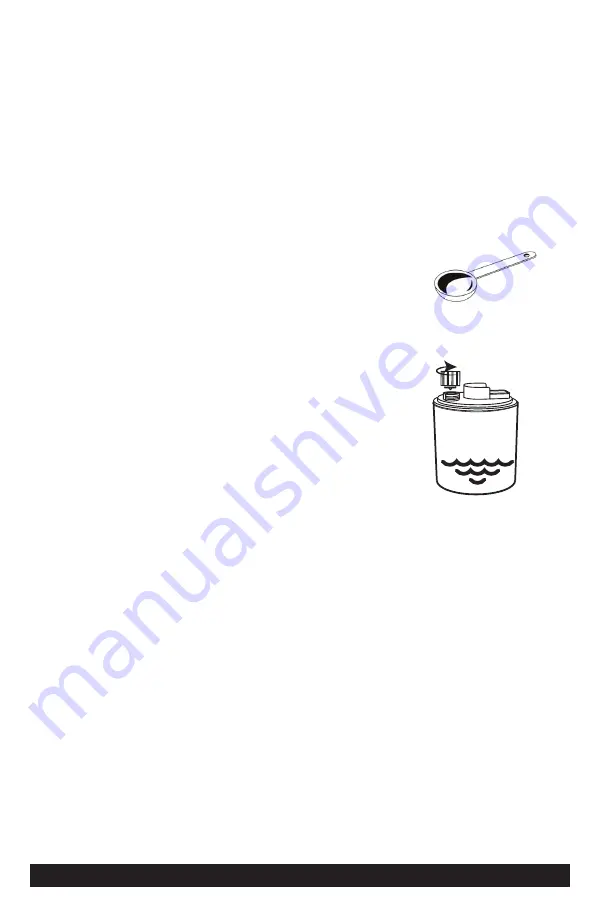
Fill the tank half full with clean, warm water and add 

two tablespoons of white vinegar. Screw water cap 

back on and vigorously swish the solution around in 

the tank and let stand for 20 to 30 minutes.

3. 

Rinse the tank very carefully with clear water. Do 

not leave any cleaning solution residue in the tank. 

Wipe the surfaces dry with a soft cloth.

4. 

With the water tank set aside, clean the base  

with the same vinegar solution. Carefully pour  

the solution into the basin portion of the base. 

Do not allow water to enter the air intake.  Let the 

solution sit for 20 to 30 minutes. Using a soft tooth- 

brush, gently scrub the contours of the base. Gently 

clean the nebulizer with the soft brush. Do not 

scratch the nebulizer with a hard object. 

5. 

Pour out the solution, then rinse the water basin  

with fresh water and wipe out thoroughly. Do not  

allow water or cleaning solution to get into the air 

intake.

6. 

Put a little vinegar/water solution on a soft, clean  

cloth and wipe down the outer surface.

7. 

Dry the unit with a soft, absorbent cloth and reas-

semble.

NOTE: Replace the demineralization cartridge


every 60 to 

90 days of use. See replacement parts list on the next page.

Storage

1.  Clean the unit as outlined above. Dry out the unit 

 thoroughly.

2.  Store in the original package, if available. Keep this  

  manual with unit. Take care that nothing heavy is  

   placed on top of the box.

3.  Do not store the unit in an attic or other high-temp- 

  erature area, as damage will occur.

FOR HELP, CALL 1.800.547.3888 OR VISIT AIRCAREPRODUCTS.COM

Summary of Contents for ESSENTIALS MESA

Page 1: ...ervoir 6 Locate Place for Your Humidifier 6 Operation 7 Maintenance 8 General 8 Regular Cleaning 9 Weekly Maintenance 9 Storage 9 Replacement parts and accessories 10 Troubleshooting 11 Warranty 12 se...

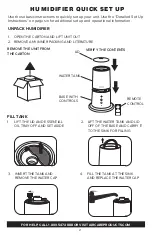
Page 2: ...ING AND LITERATURE UNPACK HUMIDIFIER REMOVE THE UNIT FROM THE CARTON FILL TANK 2 LIFT THE WATER TANK AND LID OFF OF THE BASE AND CARRY IT TO THE SINK FOR FILLING FOR HELP CALL 1 800 547 3888 OR VISIT...

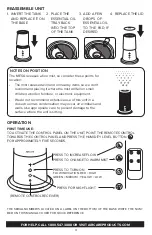
Page 3: ...it is sitting THE SERIAL NUMBER IS LOCATED ON A LABEL ON THE BOTTOM OF THE BASE WRITE THE NUM BER ON THIS MANUAL COVER FOR QUICK REFERENCE REASSEMBLE UNIT 1 INVERT THE TANK AND REPLACE IT ON THE BASE...

Page 4: ...humidifier while unit is running 5 Under no circumstances should you touch the nebulizer upon starting It will cause you pain 6 Do not put foreign objects inside the humidifier 7 Do not allow unit to...

Page 5: ...never using an ultrasonic humidifier Use distilled or purified water to reduce contaminants being released into the air Demineralization cartridges DC1003PK are avail able for purchase See page 10 CAU...

Page 6: ...g the humidifier see Essential Oil Diffuser under Additional Features Locate Place for Your Humidifier NOTE Ultrasonic humidifiers release a fine mist that can cause condensation on surfaces Please ta...

Page 7: ...e to increase flow or press the power button on the unit Each time the button is pressed the color indication of the power button will change A red power button indicates high flow A yellow power butt...

Page 8: ...aning your humidifier regularly helps eliminate odors and bacterial growth and helps maintain the performance by reducing mineral build up on the nebulizer Do not leave water in the water tank or base...

Page 9: ...e vinegar solution Carefully pour the solution into the basin portion of the base Do not allow water to enter the air intake Let the solution sit for 20 to 30 minutes Using a soft tooth brush gently s...

Page 10: ...cement demineralization cartridges 3 pack DC1003PK 7 Remote control 1B73115 8 Essential oils call or visit website for current list of available oils _ Manual not shown 1B73231 Use the chart to identi...

Page 11: ...rrect level Make sure nebulizer is not damaged Strange smell coming from unit If first time use this is normal and will dissipate shortly The humidifier may be growing bacteria Clean unit according to...

Page 12: ...of cartridges or pads We are not responsible for any incidental or consequential damage from any malfunction accident misuse alterations unauthorized repairs abuse including failure to perform reasona...

Page 13: ...idificateur 14 15 Lire avant d utiliser 16 Informations g n rales 17 Comment fonctionnement les humidificateurs ultrasons 17 MISES EN GARDE concernant les additifs dans l eau 17 Configuration d taill...

Page 14: ...UR ET LA DOCUMENTATION D BALLEZ L HUMIDIFICATEUR RETIREZ L APPAREIL DU CARTON REMPLISSEZ LE R SERVO 2 SOULEVEZ LE R SERVOIR D EAU ET LE COUVERCLE DE LA BASE PUIS PORTEZ LE DANS L VIER POUR LE REMPLIR...

Page 15: ...POUR AUGMENTER LE FLUX APPUYEZ POUR CHANGER EN BRUME CHAUDE APPUYEZ POUR ALLUMER INDICATION DE FLUX ROUGE LEV VERT MOYEN JAUNE FAIBLE APPUYEZ POUR UN CLAIRAGE NOCTURNE R CEPTEUR T L COMMANDE POUR L AI...

Page 16: ...er votre humidificateur lorsque celui ci est en marche 6 En aucun cas vous ne devez toucher le nebulizer au d marrage Vous en seriez bless 7 Ne mettez pas de corps trangers l int rieur de l appareil 8...

Page 17: ...onctionnent selon le principe de l oscillation haute fr quence des mol cules d eau jusqu ce qu elles soient d com pos es en particules ultrafines 1 5 m Cela se fait par un oscillateur parfois appel at...

Page 18: ...ez le logo AIRCARE sur les boutons situ s l avant 5 Si vous souhaitez ajouter des huiles essen tielles avant de d marrer l humidificateur reportez vous la section Diffuseur d huiles essentielles sous...

Page 19: ...uyez sur le bouton d humidit de a t l commande pour augmenter le d bit ou bien appuyez sur le bouton d alimentation de l appar eil Chaque fois que vous appuyez sur le bouton les couleurs du bouton d a...

Page 20: ...ns toute la zone Toute huile essentielle recommand e pour les diffuseurs convient cet appareil MAINTENANCE General Nettoyer r guli rement votre humidificateur aide liminer les odeurs et la croissance...

Page 21: ...ec un chiffon doux 4 Avec le r servoir d eau mis de c t nettoyez la base avec la m me solution de vinaigre Versez d li catement la solution dans la cuvette de la base Ne laissez l eau p n trer dans l...

Page 22: ...r d eau 1B73181 5 Bouchon de r servoir d eau 1B73114 6 Cartouche de d min ralisation le paquet contient 3 DC1003PK 7 T l commande 1B73115 8 Huiles essentiels appelez ou visitez le site Web pour la lis...

Page 23: ...bouton est r gl sur un niveau suffisant V rifiez que l transducteur n est pas endom mag Une odeur bizarre mane de l appareil Si la premi re utilisation c est normal et se dissipera sous peu Des bact...

Page 24: ...el ou cons cutif r sultant du mauvais fonctionnement d un accident d une mauvaise utilisation de modifications de r parations non autoris es y compris du d faut d entretien r gulier de l appareil de l...

Page 25: ...nfiguraci n r pida del humidificador 26 27 L a antes de usar 28 Informaci n general 29 C mo funcionan los humidificadores ultras nicos 29 Precauciones Relacionadas Con Aditivos Del Agua 29 Configuraci...

Page 26: ...NE EL TANQUE EN EL FRE GADERO Y VUELVA A COLOCAR LA TAPA DE AGUA CONFIGURACI N R PIDA DEL HUMIDIFICADOR Use estas instrucciones b sicas para configurar su unidad r pidamente Si desea consultar informa...

Page 27: ...RA AUMENTAR EL FLUJO PRESIONE PARA CAMBIAR A ROC O CALIENTE PRESIONE PARA ENCENDER INDICACI N DE FLUJO ROJO ALTO VERDE MEDIO AMARILLO BAJ PRESIONE PARA ENCENDER LA LUZ NOCTURNA RECEPTOR DEL CONTROL RE...

Page 28: ...d est en funcionamiento 6 En ninguna circunstancia debe tocar el oscilador cuando se pone en marcha Le producir dolor 7 No coloque objetos extra os dentro del humidificador 8 No permita que la unidad...

Page 29: ...midificador ultras nico Use agua destilada o purificada para minimizar los contaminantes que se liberan al aire Los cartuchos de desmineralizaci n n mero de parte DC1003PK est n disponibles para su co...

Page 30: ...ites esenciales antes de que el humidificador comience a funcionar lea la secci n de Difusor de aceites esenciales bajo Caracter sticas adicionales DETERMINE UNA UBICACI N PARA EL HUMIDIFICADOR Una ve...

Page 31: ...ica flujo alto Si el bot n para encender est amarillo indica flujo medio Si el bot n para encender est verde indica flujo bajo Configurar la temperatura del roc o 1 La unidad MESA tiene opciones de ro...

Page 32: ...mendado para difusores MANTENIMIENTO General Limpiar el humidificador con regularidad ayuda a eliminar olores y a evitar el desarrollo de bacterias y tambi n contribuye a mantener su rendimiento ptimo...

Page 33: ...a un lado usando la misma soluci n de vinagre Vierta la soluci n en el rea de la cuenca de la base cuidadosa mente No permita que el agua entre a la toma de aire Permita que la soluci n repo se por 2...

Page 34: ...1B73181 5 Tapa del tanque de agua 1B73114 6 Cartuchos des desmineralizacion envase de 3 DC1003PK 7 Control remoto 1B73115 8 Aceites esenciales Llame o visite el sitio web para la lista de aceites dis...

Page 35: ...Verifique que la perilla est colocada en el nivel correcto Aseg rese de que el oscilador no est da ado De la unidad emana un olor extra o Pueden haberse desarrollado bacterias en el humidificador Lim...

Page 36: ...n no autorizada maltrato incluidos la falta de mantenimiento el desgaste normal y los casos en que la tensi n de conexi n supere en un 5 la especificada en la placa del fabricante Las alteraciones inc...

Reviews: