
6
3. START UP - USER’S MANUAL SOLO AIRLINER-RS
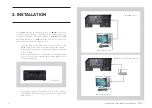
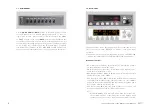
The SOLO incorporates a mini-computer at the back that is to be connec-
ted to the MFS / P3D / X-Plane computer using the previously mentioned
LAN cable 3.
It is important to note that in no case should you access or manage the
SOLO mini-computer.
• Activate the SOLO like is indicated in Chapter 2.
• Startup the MFS/P3D or X-Plane software.
•
To establish the connection between the MFS / P3D / X-Plane com-
puter and the SOLO you must to execute the file "VFConnect3.
exe" from the MFS/P3D desktop computer or “VFConnect-Xplane.
exe” if you are using X-Plane (see Chapter 2).
• If you have the Windows FireWall activated, a warning permis-
sion to communicate with networks appears, you must to click
"Allow Access".
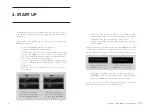
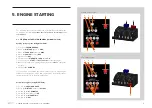
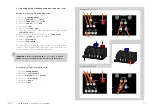
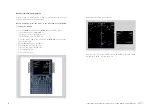
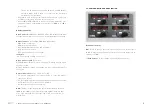
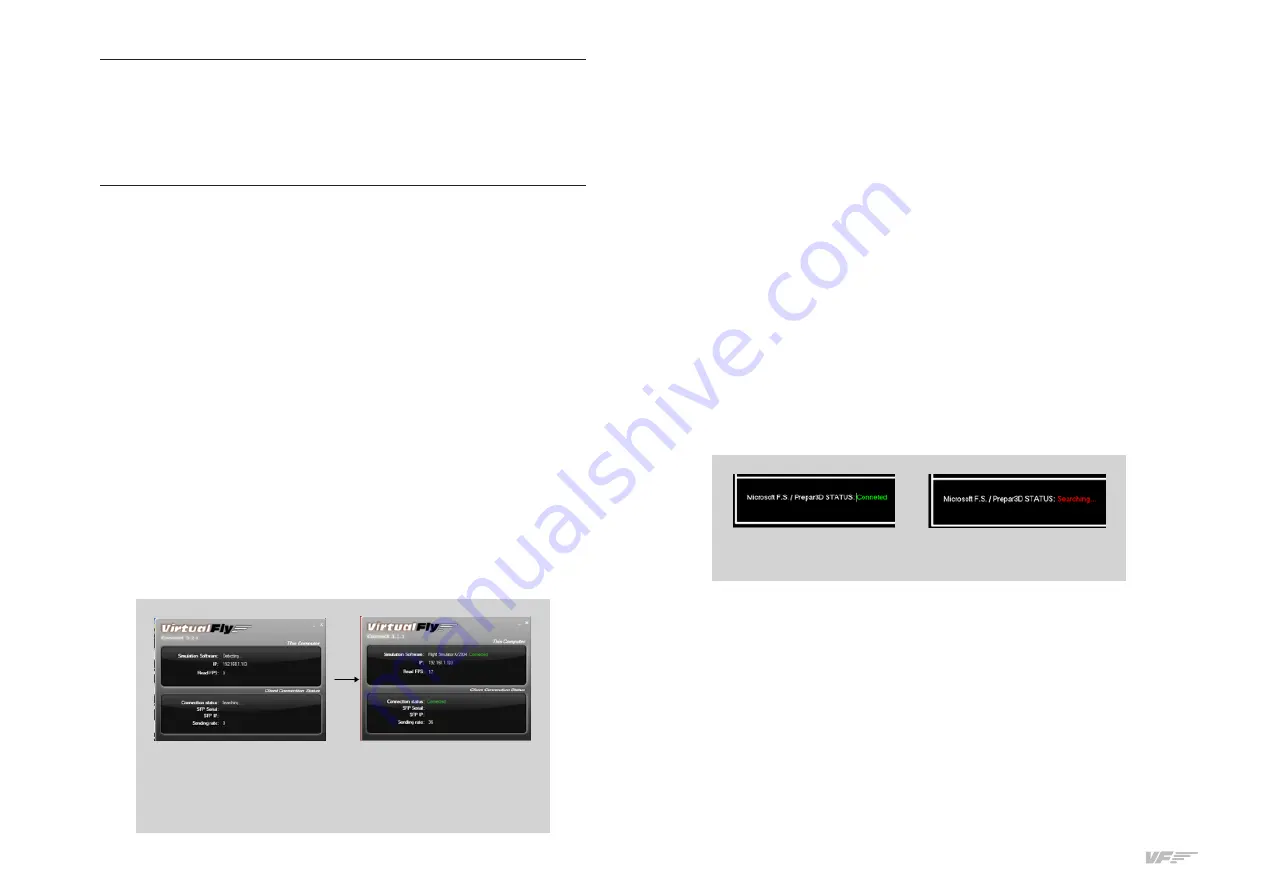
• Once the connection is established, you should see an image
like the right:
• At the top “This Computer” indicates if the software Flight
Simulator MFS / P3D / X-Plane is detected. Only "Connected" will
appear when you have initiated MFS / P3D / X-Plane.
• At the bellow “Client Connection Status” indicates the connection
with the SOLO.
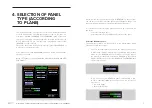
From this moment we can already appreciate if the SOLO and the MFS
/ P3D / X-Plane computer are communicating. In the bellow part of the
“SELECT PANEL TYPE” window you will see one of the following messages.
•
Connected
: Everything is ready, you can already begin to fly.
•
Searching…
: There is a communication failure between the MFS/
P3D and the SOLO, look at Chapter 8 "Troubleshooting".
If not get the connection after review Chapter 8, please contact the
VirtualFly Technical support: "support@virtual-fly.com".
3. START UP
In this case the plugin is
searching the MFS / P3D /
X-Plane and to the SOLO
panel
In this case the plugin is
connected to MFS / P3D /
X-Plane and to the SOLO
panel
In this case the MFS and
SOLO are connected
In this case the MFS and
SOLO are not connected