
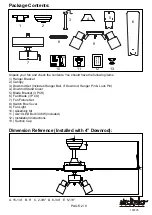


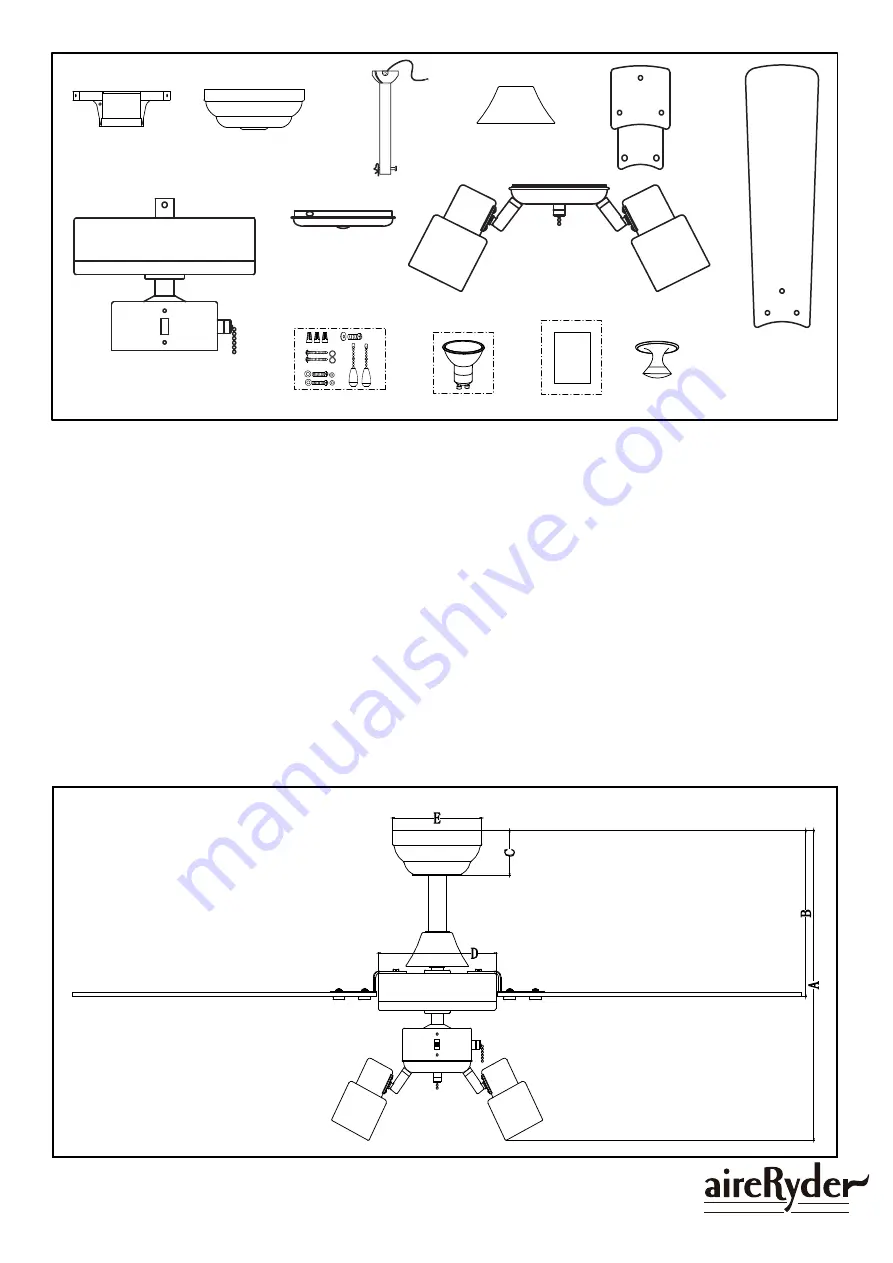
Unpack your fan and check the contents. You should have the following items.
1.) Hanger Bracket
2.) Canopy
3.) Downrod Set (Includes Hanger Ball, 4” Downrod, Hanger Pin & Lock Pin)
4.) Downrod Stand Cover
5.) Blade Bracket (3 PCS)
6.) Fan Blade (3 PCS)
7.) Fan Fixture Set
8.) Switch Box Cover
9.) Fan Light
10.) Assembly Kit
11.) GU10 LED Bulb 3X6W (included)
12.) Installation Instructions
13.) Suction Cap
Package Contents:
Dimension Reference (Installed with 4” Downrod):
A. 15-1/4” B. 8” C. 2-3/8” D. 6-3/4” E. 5-1/8”
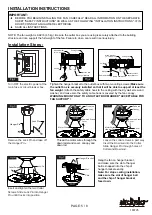
Install
ation
Inst
ru
ctions
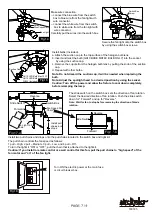
1
5
6
8
7
9
2
3
4
X10
10
11
12
13
F A N C O
180725
PAGE: 2/ 9


