background image


Cleaning 


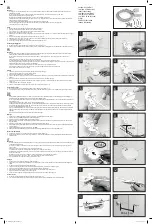
Press on the spray trigger

 (2)


Figure 4

, and place the water or the mixture on the 

surface to be cleaned by directing the spray (10) in its direction. You can turn around 
the device by grasping handle 

B

, and then you can rub your smooth surface with 

either one of the 2 wipes. 
 
Once this is done you return your hand to handle 

A

 and suck the water through the 

scraping joint

 (4)

 by scraping up and down while maintaining the suction control 

(1)

 at 

on position 

Figure 5

. It is not necessary to press too hard on the device during the 

finishing scraping operation.


Sometimes a slight grip is necessary to achieve best 

results. 


  Do not project spray to eyes with or without product, or on surfaces of 

electronic components, such as plug, switch, cable, stereo equipment, computer 
screen, or household appliances. 
 

Replacing the water tank 


The dust and dirt is left on the cloth and the residual water is sucked for recycling. 
Generally, it is not necessary to change the water in the tank too often during use. You can, 
depending on the state of cleanliness of the surfaces. Recycled water may have a little 
color but will not affect the result of expected cleanliness. 


Summary of Contents for AFW900

Page 1: ...Instruction Manual Window Wiper AFW900 Read carefully before use ...

Page 2: ...her liquid Never leave the appliance unattended when plugged Never leave packing materials plastic bags polystyrene etc within reach of children as these are sources of potential danger Do not connect the device to an outlet whose voltage is not in accordance with the manufacturer s instructions listed on the nameplate on the charger or on the device Use only original wipes Always unplug the appli...

Page 3: ...of any support to be cleaned After each use empty and rinse the tank 6 never forget to wash the small filter 8 and put it back Only use the appliance on smooth solid flat surfaces that are able to withstand moisture Do not add additives dangerous goods as caustics or acids or cleaning products not originally intended for the same type of cleaning Only use clear and pure water PARTS OF THE APPLIANC...

Page 4: ...fill the tank with clean water by slightly tilting the appliance head down Figure 2 to facilitate the exit of air The appliance must be disconnected from the charger during all operations Then replace the clean filter and cap After each use empty and rinse the tank 6 never forget to wash the small filter 8 and put it back Never place the appliance under the tap to fill the tank without first unplu...

Page 5: ...not necessary to press too hard on the device during the finishing scraping operation Sometimes a slight grip is necessary to achieve best results Do not project spray to eyes with or without product or on surfaces of electronic components such as plug switch cable stereo equipment computer screen or household appliances Replacing the water tank The dust and dirt is left on the cloth and the resid...

Page 6: ...charger socket In case of unexpected loss or destruction of your charger do not use any other charger than the original Contact your supplier immediately Otherwise any other charger with the same characteristics would likely destroy your device Never attempt to repair the cable from your charger If it is damaged replace it Before you connect your charger make sure the voltage of your power outlet ...

Page 7: ...ty Clean the flexible seal Replace clean wipe Replace the scraping joint Service assistance Reduce the dosage Change water in tank All these solutions are basic elements to perform before any requests for technical assistance For all other possible problems contact your dealer or the manufacturer Specifications subject to technical modifications Nominal power of the appliance 8 Watts Nominal LITHI...

Reviews: