background image

19 

6.2. Wireless 


6.2.1 Wireless > Basic Wireless Settings 


Wireless Configuration - Manual 
 

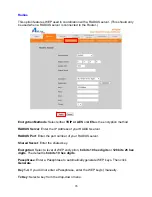
To configure the Wireless settings, click on 

Manual


Summary of Contents for AR725W

Page 1: ...Dual Band Wireless N Router Model AR725W User s Manual Rev 1 0 ...

Page 2: ...y 33 6 3 1 Security Firewall 33 6 3 2 Security VPN Passthrough 34 6 4 Access Restrictions 35 6 4 1 Access Restrictions Internet Access Policy 35 6 5 Applications Gaming 39 6 5 1 Applications Gaming Single Port Forwarding 39 6 5 2 Applications Gaming Port Range Forwarding 40 6 5 3 Applications Gaming Port Range Triggering 41 6 5 4 Applications Gaming DMZ 42 6 5 5 Applications Gaming QoS 43 6 6 Admi...

Page 3: ...ter Power Adapter Ethernet Cable Cat 5 Manual CD Quick Installation Guide If any item contained is damaged or missing please contact your local dealer immediately Also keep the box and packaging materials in case you need to ship the unit in the future 1 2 Features Built in dual band 5 2 4GHz switchable AP More channels less interference ideal for wireless congested area Highest wireless data rate...

Page 4: ...le connect one end of the cable to your computer s Ethernet port and connect the other end to one of the LAN ports of the router Step 3 Power on the DSL Cable modem and wait for the lights on the modem to settle down Step 4 Plug the power adapter to the router and connect to an outlet or power strip Step 5 Power on your computer Step 6 Make sure the INTERNET WIRELESS and the LAN port that the comp...

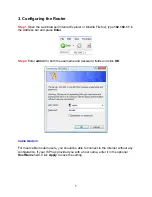
Page 5: ... bar and press Enter Step 2 Enter admin for both the username and password fields and click OK Cable Modem For most cable modem users you should be able to connect to the Internet without any configuration If your ISP has provided you with a host name enter it in the optional Host Name field Click Apply to save the setting ...

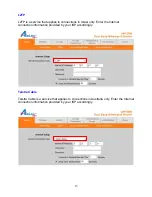
Page 6: ...ect Enabled and click on the Clone My PC s MAC button Click Apply to save the setting If you have trouble connecting to the Internet please refer to Section 4 Verifying Connection DSL For DSL users follow the steps below to configure the router Step 1 Select PPPoE from the drop down menu ...

Page 7: ... Apply to save the setting You should be able to connect to the Internet now with the wired computer If you have trouble connecting to the Internet please refer to Section 4 Verifying Connection Connect each of your wired computers to an available LAN port on the Router with an Ethernet cable and then restart the computer These computers should be able to connect to the Internet immediately ...

Page 8: ...outer and wait for the lights on the router to settle down Step 4 Turn on the computer Step 5 Log in to the router and select the Status tab Step 6 Verify that the Internet IP Address Default Gateway and at least one of the DNS fields have valid numbers assigned to them instead of all 0 s If you see all 0 s click on the IP Address Renew button for Cable Modem users or the Connect button for DSL us...

Page 9: ...sh a wireless connection to the router Please refer to your wireless network card s manual on how to configure these settings SSID default Network Mode BGN Mixed Authentication Open System Channel 6 WEP disabled If you want to change the router s wireless and security settings log in to the router and select the Wireless tab Click Apply to save the settings after you make changes ...

Page 10: ...uter s settings Simply log in to the router using your computer s web browser 6 1 Setup 6 1 1 Setup Basic Setup This is the default screen when you log in to the router s web configuration utility You can setup your Internet connection here as well as configuring the Network and DHCP settings and selecting your Time Zone ...

Page 11: ... This is for most cable modem users Usually you should be able to connect to the Internet without changing any configuration If your ISP has provided you with a host name enter it in the optional Host Name field Click Apply to save the setting PPPoE Usually DSL service provider uses PPPoE for Internet connection You will need to provide username and password given by your ISP to connect to the Int...

Page 12: ...ic IP address Subnet Mask Default Gateway and DNS server addresses for Internet connection PPTP Point to Point Tunneling Protocol PPTP is a service that applies to connections in Europe only Enter the Internet connection information provided by your ISP accordingly ...

Page 13: ...s in Israel only Enter the Internet connection information provided by your ISP accordingly Telstra Cable Telstra Cable is a service that applies to connections in Australia only Enter the Internet connection information provided by your ISP accordingly ...

Page 14: ...168 1 1 the Starting IP Address must be 192 168 1 2 or greater but smaller than 192 168 1 253 The default Starting IP Address is 192 168 1 100 Maximum Number of Users Enter the maximum number of PCs that you want the DHCP server to assign IP addresses to This number cannot be greater than 253 The default is 50 Client Lease Time The Client Lease Time is the amount of time a network user will be all...

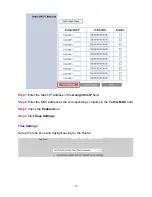
Page 15: ... in the Assign this IP field Step 2 Enter the MAC address of the corresponding computer in the To this MAC field Step 3 Check the Enabled box Step 4 Click Save Settings Time Settings Set up the time zone and daylight saving for the Router ...

Page 16: ... it by a registered DNS name instead of an IP address Before you enable DDNS you need to register an account with one of the DDNS providers listed in the drop down menu To Enable DDNS select the DDNS provider you have registered with and enter the required fields Click Apply to save the setting ...

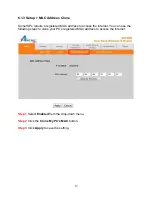
Page 17: ...red MAC address to access the Internet You can use the following steps to clone your PC s registered MAC address to access the Internet Step 1 Select Enabled from the drop down menu Step 2 Click the Clone My PC s MAC button Step 3 Click Apply to save the setting ...

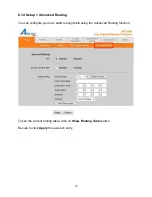
Page 18: ...up Advanced Routing You can configure your own static routing table using the Advanced Routing function To see the current routing table click on Show Routing Table button Be sure to click Apply to save each entry ...

Page 19: ...19 6 2 Wireless 6 2 1 Wireless Basic Wireless Settings Wireless Configuration Manual To configure the Wireless settings click on Manual ...

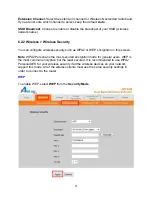
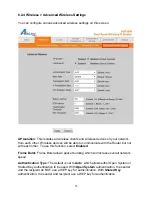
Page 20: ...ports 5GHz frequency band Network Name SSID You can change the router s SSID in this field Once you have changed the SSID your network clients need to re connect themselves using the new SSID Channel Select the desired channel All the network clients need to use the same channel Radio Band For best performance in a network keep the default Auto 20 40MHz Channel Standard Channel If you selected Aut...

Page 21: ... configure wireless security such as WPA2 or WEP encryption on this screen Note WPA2 Personal is the most secured encryption mode for general users WEP is the most common encryption but the least secured It is recommended to use WPA2 Personal AES for your wireless security if all the wireless devices on your network support this mode All of the wireless clients must use the same security settings ...

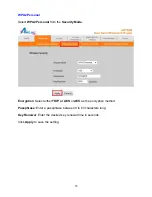
Page 22: ...on enter 10 HEX characters 0 F for each key If you selected 128 bits encryption enter 26 HEX characters 0 F for each key TX Key Select a key to be the active key Click Apply to save the setting WPA Personal Select WPA Personal from the Security Mode Encryption Select either TKIP or AES or AES as the encryption method Passphrase Enter a passphrase between 8 to 63 characters long Key Renewal Enter t...

Page 23: ...om the Security Mode Encryption Select either TKIP or AES or AES as the encryption method Passphrase Enter a passphrase between 8 to 63 characters long Key Renewal Enter the desired key renewal time in seconds Click Apply to save the setting ...

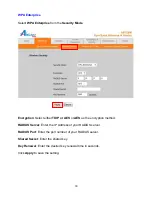
Page 24: ...her TKIP or AES or AES as the encryption method RADIUS Server Enter the IP Address of your RADIUS server RADIUS Port Enter the port number of your RADIUS server Shared Secret Enter the shared key Key Renewal Enter the desired key renewal time in seconds Click Apply to save the setting ...

Page 25: ...ther TKIP or AES or AES as the encryption method RADIUS Server Enter the IP Address of your RADIUS server RADIUS Port Enter the port number of your RADIUS server Shared Secret Enter the shared key Key Renewal Enter the desired key renewal time in seconds Click Apply to save the setting ...

Page 26: ...IP Address of your RADIUS server RADIUS Port Enter the port number of your RADIUS server Shared Secret Enter the shared key Encryption Select a level of WEP encryption 64 bits 10 hex digits or 128 bits 26 hex digits The default is 64 bits 10 hex digits Passphrase Enter a Passphrase to automatically generate WEP keys Then click Generate Key 1 4 If you did not enter a Passphrase enter the WEP key s ...

Page 27: ...tton in the orange square If you choose to use PIN on your client device you need to enter the PIN number generated by the client device into the blank and click Register Connecting to the Router with WPS Push Button Optional Airlink101 Dual Band Wireless N Router supports hardware WiFi Protected Setup WPS push button which allows you to connect your wireless computer with the router safely and ea...

Page 28: ...reless N Adapter connected Step 2 Push and hold the WPS button on the bottom of the Adapter until you see the WPS window pops up on the computer monitor WPS window Step 3 Push the WPS button on the Dual Band Wireless N Router and the blue LED will start blinking Step 4 The Router will now start the handshake with the wireless adapter When you see the window below the connection has been establishe...

Page 29: ...29 ...

Page 30: ...cessing the router by specifying their MAC address and enabling access restriction Select Enabled and choose whether the specified wireless clients will be prevented or permitted to access the wireless network Enter their MAC address in the fields below and click Apply to save the setting ...

Page 31: ...he Router but not with each other To use this function select Enabled Frame Burst Frame Burst allows packet bursting which will increase overall network speed Authentication Type The default is set to Auto which allows either Open System or Shared Key authentication to be used With Open System authentication the sender and the recipient do NOT use a WEP key for authentication With Shared Key authe...

Page 32: ... messages When the Router has buffered broadcast or multicast messages for associated clients it sends the next DTIM with a DTIM Interval value Its clients hear the beacons and awaken to receive the broadcast and multicast messages The default value is 3 Fragmentation Threshold This value specifies the maximum size for a packet before data is fragmented into multiple packets If you experience a hi...

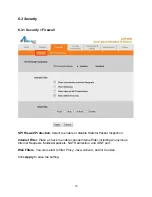
Page 33: ...isable Stateful Packet Inspection Internet Filter Place a check to enable various Internet filter including Anonymous Internet Requests Multicast packets NAT Redirection and IDNT port Web Filters You can select to filter Proxy Java ActiveX and or Cookies Click Apply to save the setting ...

Page 34: ...34 6 3 2 Security VPN Passthrough You can select to enable or disable the pass through of IPSec PPTP and or L2TP Click Apply to save the setting ...

Page 35: ...35 6 4 Access Restrictions 6 4 1 Access Restrictions Internet Access Policy You can setup policies that deny or allow specific clients to access the Internet ...

Page 36: ...t button to specify the network clients Policy only applies to the PCs that are in the list You can specify each client by its MAC Address or IP Address You can also specify a group of clients by entering their IP Address Range Once you have specified all the clients click Save Settings Access Restriction Schedule Select to Deny or Allow the specified clients to access the Internet by Day and Time...

Page 37: ...tions After you selected Allow Internet accessing for Access Restriction you can configure the Internet applications you want to block Select application port you want to block and click button to add it into Blocked List when the specified PCs have Internet access Click button to remove applications from the Blocked List If you have a custom application manually enter its name port range protocol...

Page 38: ...38 Click Apply to save the settings ...

Page 39: ...ost ftp server or online gaming you must open up ports on the router This page allows you to setup single port forwarding for the specified applications Note Before using forwarding you should assign static IP addresses to the designated PCs Application Name Select or enter an Application Name ...

Page 40: ...forward the ports to Make sure that you check the Enabled box to activate the setting then click Apply to save the settings 6 5 2 Applications Gaming Port Range Forwarding If you want to host ftp server or online gaming you must open up ports on the router This page allows you to setup port range forwarding for the specified applications Note Before using forwarding you should assign static IP add...

Page 41: ...Make sure that you check the Enabled box to activate the setting then click Apply to save the settings 6 5 3 Applications Gaming Port Range Triggering Port triggering allows the router to keep track of outgoing data for specific port numbers The router remembers which computer sends out what data so when the requested data returns through the router the data is sent back to the proper computer by ...

Page 42: ...t Enter the ending port number of the Forwarded Range Enabled Select Enabled to enable port triggering for the applicable application Make sure that you check the Enabled box to activate the setting then click Apply to save the settings Click Apply to save the setting 6 5 4 Applications Gaming DMZ DMZ De Militarized Zone is a host without the protection of the router s firewall It allows a compute...

Page 43: ...Address or MAC Address Note Any DMZ host should have a new static IP address assigned to it because its IP address may change when using the DHCP function Click Apply to save the setting 6 5 5 Applications Gaming QoS QoS Quality of Service manages information as it is transmitted and received It ensures better service to those applications with a higher priority ...

Page 44: ...eature your wireless client devices in your network must support Wireless WMM No Acknowledgement If you want to disable the Router s Acknowledgement feature so the Router will not re send data if an error occurs select Enabled Otherwise keep the default Disabled Internet Access Priority Enabled Disabled To use the QoS policies you set select Enabled Otherwise select Disabled ...

Page 45: ... Port or Voice Device Applications Applications Select the appropriate application If you select Add a New Application follow the instructions in the Add a New Application section Priority Select the appropriate priority High Medium Normal or Low Click Add to save your changes Your new entry will appear in the Summary list ...

Page 46: ...Range Enter the port range that the application will be using For example if you want to allocate bandwidth for FTP you can enter 21 21 Select the protocol TCP or UDP or select Both Priority Select the appropriate priority High Medium Normal or Low Click Add to save your changes ...

Page 47: ...47 Online Games Games Select the appropriate game Priority Select the appropriate priority High Medium Normal or Low Click Add to save your changes ...

Page 48: ...dress Enter a Name Enter a name for your network device MAC Address Enter the MAC address of your network device Priority Select the appropriate priority High Medium Normal or Low Click Add to save your changes ...

Page 49: ...49 Ethernet Port Ethernet Select the Ethernet port that you want to configure Priority Select the appropriate priority High Medium Normal or Low Click Add to save your changes ...

Page 50: ...Enter the MAC address of your voice device Priority Select the appropriate priority High Medium Normal or Low Click Add to save your changes Click Apply to save the setting Summary Summary shows the configuration for various application priorities You can Remove or Edit the configuration from this list ...

Page 51: ...e Management screen allows you to change the router s log in password as well as other administrative settings Router Password Set the router s log in password Web Access Select to enable or disable HTTPs and Wireless access for the Web Configuration Utility ...

Page 52: ...settings so that you don t have to manually configure the settings again if you reset the router to factory default UPnP Universal Plug and Play UPnP allows Windows Me and XP to automatically configure the router for various Internet applications such as gaming and videoconferencing 6 6 2 Administration Log You can choose to Enable or Disable logging of your network activity on this screen Click A...

Page 53: ... The Diagnostics screen allows you to perform Ping and Traceroute tests Ping Test Enter the IP or URL Address you wish to ping and click Start to Ping Traceroute Enter the IP or URL Address you wish to trace and click Start to Traceroute ...

Page 54: ...on Factory Defaults The Factory Defaults screen allows you to set all the router s settings to the factory default Click on the Restore Factory Defaults button to restore all the settings to default and click OK to continue ...

Page 55: ...are Upgrade The Firmware Upgrade screen allows you to upgrade the router s firmware You must download and unzip the new firmware first from www airlink101 com Click on Browse to browse to the new firmware and click Start to Upgrade ...

Page 56: ...56 6 7 Status 6 7 1 Status Router The Router screen displays various status of the router including the firmware version Click on the Refresh button to reload the screen ...

Page 57: ...57 6 7 2 Status Local Network The Local Network screen displays various status about your Local Area Network Click on the DHCP Client Table to display a list of all the DHCP clients in your network ...

Page 58: ...58 6 7 3 Status Wireless Network The Wireless Network screen displays various status about your wireless network ...

Page 59: ...anced Features Quality of Service QoS Stateful Packet Inspection SPI DoS VPN Pass through UPnP WiFi Protected Setup PIN Personal Identification Number PBC Push button configuration System Requirement Windows Mac or Linux operating system Installed Ethernet adapter Recommended use with AWLL7025 Power Input 100 240V AC 50 60Hz Output 12V 1A Dimensions 179 x 132 x 28 mm Temperature Operating 0ºC to 4...

Page 60: ...t expressly approved by the party responsible for compliance could void the user s authority to operate this equipment This device complies with Part 15 of the FCC Rules Operation is subject to the following two conditions 1 This device may not cause harmful interference and 2 this device must accept any interference received including interference that may cause undesired operation IMPORTANT NOTE...

Page 61: ...ated or operating in conjunction with any other antenna or transmitter Europe EU Declaration of Conformity This device complies with the essential requirements of the R TTE Directive 1999 5 EC The following test methods have been applied in order to prove presumption of conformity with the essential requirements of the R TTE Directive 1999 5 EC EN60950 1 2006 Safety of Information Technology Equip...

Page 62: ...reas the RF output power may be limited to 10 mW EIRP in the frequency range of 2454 2483 5 MHz For detailed information the end user should contact the national spectrum authority in France 0560 Česky Czech Jméno výrobce tímto prohlašuje že tento typ zařízení je ve shodě se základními požadavky a dalšími příslušnými ustanoveními směrnice 1999 5 ES Dansk Danish Undertegnede fabrikantens navn erklæ...

Page 63: ... tal manifattur jiddikjara li dan il mudel tal prodott jikkonforma mal ħtiġijiet essenzjali u ma provvedimenti oħrajn relevanti li hemm fid Dirrettiva 1999 5 EC Magyar Hungarian Alulírott gyártó neve nyilatkozom hogy a típus megfelel a vonatkozó alapvetõ követelményeknek és az 1999 5 EC irányelv egyéb elõírásainak Polski Polish Niniejszym nazwa producenta oświadcza że nazwa wyrobu jest zgodny z za...

Page 64: ...ess products used radio frequency interference e g cordless telephones and microwaves as well as network overhead lower actual data throughput rate This product is based on IEEE draft 802 11n specification and is not guaranteed to be compatible with future versions of IEEE 802 11n specification Compatibility with draft 802 11n devices from other manufactures is not guaranteed Specifications are su...

Reviews: