background image


Summary of Contents for ARCAV20

Page 1: ......

Page 2: ...ES DU PRODUIT INSTALLATION UTILISATION DE VOTRE APPAREIL ENTRETIEN ET MAINTENANCE GUIDE DE D PANNAGE FICHE TECHNIQUE Veuillez lire attentivement ce manuel avant l installation et la mise en service et...

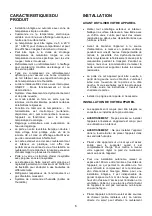
Page 3: ...reil de chauffage Ne pas faire fonctionner l appareil avec un cordon ou une fiche endommag e en cas de dysfonctionnement du produit ou s il est tomb ou endommag de toute fa on Si le cordon d alimentat...

Page 4: ...nstaller l appareil Le non respect de cette pr caution peut entra ner des blessures au dos ou d autres blessures Ne jamais nettoyer les pi ces de l appareil avec des liquides inflammables Ces manation...

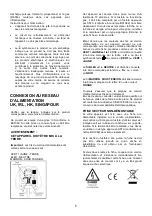
Page 5: ...m me classement Si vous devez remplacer la fiche ou si la fiche est de type erron pour votre prise la retirer et la remplacer par un type appropri liminer la vielle fiche en toute s curit tant donn q...

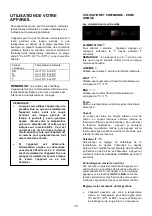
Page 6: ...et gaz d isolation moussant Syst me de commande d humidit bo tier de l humidit INSTALLATION AVANT D UTILISER VOTRE APPAREIL Retirer tout emballage ext rieur et int rieur Nettoyer la surface int rieur...

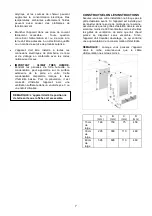
Page 7: ...baisse Pour la pr vention il est conseill d installer l appareil avec une ventilation suffisante dans un endroit sec et ou un endroit climatis CONSTRUIT SELON LES INSTRUCTIONS Assurez vous que votre...

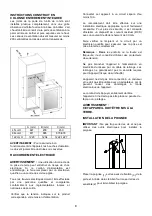
Page 8: ...on Connecter cet appareil un circuit s par d au moins 13A Le raccordement doit tre effectu sur une installation lectrique appropri e qui est facilement accessible Pour plus de s curit il est conseill...

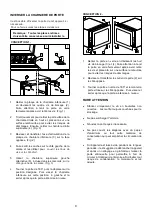
Page 9: ...te position gauche et la serrer apr s que la porte a t mise niveau CONCEPTION 2 1 Retirer la porte en verre en d vissant les huit vis de blocage 3 et 4 Faire attention tenir la porte en verre fermemen...

Page 10: ...ultitouche est s lectionn e Pour ex cuter la fonction multitouche appuyer et maintenir enfonc e la premi re touche puis appuyer sur la touche de repos pendant au moins 5 secondes puis rel cher toutes...

Page 11: ...puyer sur la touche de repos pendant au moins 5 secondes puis rel cher toutes les touches S lecteur F C S lectionner le r glage de l affichage de la temp rature en degr s Fahrenheit ou degr s Celsius...

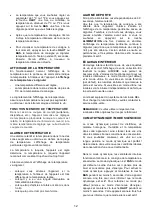
Page 12: ...pendant plus de 60 secondes l alarme retentit Une fois que la temp rature de consigne a t atteinte dans l appareil l alarme s arr te et l affichage de la temp rature pertinente cesse de clignoter Tout...

Page 13: ...r sultat d une mauvaise installation En aucun cas des tuyaux doivent entrer en contact avec un mur d autres meubles ou d autres tuyaux Lorsque l appareil est install dans une cuisine ouverte ou dans d...

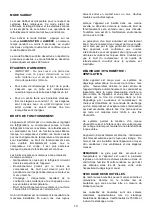
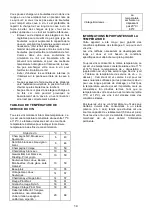
Page 14: ...yle de vin C F Champagne NV Mousseux Spumante 6 43 S millon blanc sec Sauvignon blanc 8 46 Champagne Vintage 10 50 Chardonnay blanc sec 10 50 Gew rztraminer blanc sec Riesling Pinot grigio 10 50 Saute...

Page 15: ...Faire glisser le socle arri re la hauteur souhait e Serrer les deux vis du bas pour verrouiller le socle en position NETTOYAGE DE VOTRE APPAREIL Couper l alimentation d brancher l appareil et supprime...

Page 16: ...la base pour viter tout dommage Scotcher la porte ferm e S assurer que l appareil reste bloqu en position verticale pendant le transport Prot ger galement l ext rieur de l appareil avec une couvertur...

Page 17: ...st pas bien ferm e Le joint de la porte n est pas suffisamment tanche Mettre l appareil dans un endroit plus frais Laisser fonctionner l appareil pendant un certain temps jusqu ce que la temp rature d...

Page 18: ...ote dans l affichage de la temp rature La temp rature d affichage est hors de la plage Seules les temp ratures comprises entre la plage 99 F 9 37 C seront affich es sur l appareil Si la temp rature n...

Page 19: ...DUCT FEATURES INSTALLATION OPERATING YOUR APPLIANCE CARE AND MAINTENANCE TROUBLESHOOTING GUIDE TECHNICAL DATA Please read this manual carefully before installing and starting up and store it in a safe...

Page 20: ...lified persons in order to avoid a hazard The use of attachments not recommended by the manufacturer may be hazardous Place the unit on a dry level surface Do not operate if the housing is removed or...

Page 21: ...is manual It lists causes of minor operating problems that you can correct by yourself DISPOSAL Dispose of your appliance packaging properly Ensure that any plastic wrappings bags etc are disposed of...

Page 22: ...onnected to the terminal which is marked with the letter E or by the earth symbol or coloured GREEN or GREEN YELLOW The BLUE wire is the NEUTRAL and must be connected to the terminal which is marked w...

Page 23: ...interior surface with lukewarm water using a soft cloth The unit may have residual odors at first they will disappear as the unit cools Before connecting the appliance to the power source let it stand...

Page 24: ...n grilles so that warm air can disperse unhindered Otherwise the appliance has to work harder resulting in an increase in electricity consumption NOTE When pushing the appliance into the niche make su...

Page 25: ...and the circuit checked by a qualified electrician to ensure that the socket is grounded correctly Note In locations where there is frequent lightning it is advisable to use surge protectors Do not co...

Page 26: ...assembly on the left designated position and tighten it after the door is leveled DESIGN 2 1 Remove the glass door by unscrewing the eight lock screws 3 and 4 Be careful to hold the glass door firmly...

Page 27: ...elsius to Fahrenheit press and hold the LIGHT key for 5 seconds Key Lock Optional If in 2 minutes or longer without pressing any key the key lock will be activated automatically To remove the lock pre...

Page 28: ...R temperature zone is suitable for storing champagne and white wine at a setting of 5 C to 13 C 41 F to 55 F When the unit is plugged in for the first time the unit will power up automatically to the...

Page 29: ...uipped with a LED light fitting system To change the LED light fitting pls contact the service department NOTE Please use only the original LED light fittings provided by the manufacturer DYNAMIC CLIM...

Page 30: ...y condensation that has collected in the tray Part of the remaining water is collected within the unit for humidity purposes This system enables the creation of the correct humidity level inside your...

Page 31: ...ver the years Some should be consumed at an early stage 2 to 3 years while others have tremendous ageing capability 50 and over All wines have a peak in maturity Do check with your wine merchant to ge...

Page 32: ...the proper steps to protect your contents NOTE Irrespective of the cause if you notice either abnormal temperature or humidity levels inside your unit be reassured that only long and frequent exposur...

Page 33: ...ance in a cooler place Leave the appliance to work for a while until the set temperature has been reached Do not open the door more often than necessary Close door properly Check the door seal and cle...

Page 34: ...mperatures within the range 0 99 F 9 37 C the appliance can display will be shown If the temperature is not within this range the icon will be displayed instead That is normal PRODUCT FICHE Model Iden...

Page 35: ...LLAZIONE COME USARE L APPARECCHIO CURA E MANUTENZIONE LOCALIZZAZIONE GUASTI SPECIFICHE TECNICHE Prima di installare e accendere l apparecchio vi preghiamo di leggere con attenzione questo manuale che...

Page 36: ...aldanti o fornelli Non usare l apparecchio nel caso il cavo o la spina fossero danneggiati in caso di malfunzionamento caduta o danno di qualsiasi tipo Nel caso il cavo risultasse danneggiato dovr ess...

Page 37: ...pulire le parti dell apparecchio I fumi possono provocare un rischio di incendio o esplosione Non riporre o usare benzina o altri liquidi o vapori infiammabili nei pressi di questo o altri apparecchi...

Page 38: ...ting Se la spina deve essere sostituita oppure nel caso la spina non sia adatta alla vostra presa toglierla e sostituirla con una spina di tipo adeguato Smaltire la vecchia spina in maniera sicura Poi...

Page 39: ...ensioni diverse Gas isolante e refrigerante eco compatibili Sistema Controllo Umidit Humidity Box INSTALLAZIONE PRIMA DI USARE L APPARECCHIO Rimuovere tutti gli imballaggi esterni e interni Pulire la...

Page 40: ...rmarsi della condensa Questa condensa sparir non appena diminuir il livello di umidit Per evitare questo inconveniente si consiglia di prevedere un adeguata ventilazione dell apparecchio e di installa...

Page 41: ...essere eseguiti da personale competente e debitamente qualificato in conformit con le norme di sicurezza locali e nazionali Verificare che il voltaggio riportato sull apparecchio corrisponda a quello...

Page 42: ...postare il perno del cardine della piastra inferiore 3 sul lato opposto Fig 2 4 Far uscire i cappucci di protezione sul lato sinistro dell apparecchio e usarli per coprire i fori delle viti sul lato d...

Page 43: ...luogo molto caldo o molto freddo potrebbe far oscillare la temperatura interna La gamma compresa fra 5 C e 20 C 41 F e 68 F potrebbe non essere raggiunta Classe climatica Temperatura ambiente SN N ST...

Page 44: ...uando l apparecchio viene collegato alla presa elettrica per la prima volta raggiunge automaticamente i valori preimpostati La temperatura impostata da fabbrica di 12 C 54 F possibile impostare la tem...

Page 45: ...rante l impostazione Dopo aver impostato la temperatura il display mostra la temperatura attuale interna di quella particolare zona di temperatura Per visualizzare in qualsiasi momento la temperatura...

Page 46: ...ath Questa modalit spegne il display la luce interna e gli allarmi acustici ed impedisce che si riattivino Le normali operazioni di raffreddamento resteranno comunque in funzione Per attivare la modal...

Page 47: ...no tradizionali bottiglie Bordeaux da 750 ml e comprende la conservazione in blocco Le bottiglie di vino possono essere riposte in un unica fila oppure sovrapposte tenendo conto di quanto segue se non...

Page 48: ...E AVVERTENZA Staccare sempre la spina dell apparecchio prima di procedere agli interventi di assistenza o pulizia per evitare il rischio di scosse elettriche o lesioni personali COME RIMUOVERE I RIPIA...

Page 49: ...In caso di interruzione di corrente prolungata sar necessario adottare alcuni accorgimenti per proteggere il contenuto della cantinetta NOTA Indipendentemente dalla causa anche nel caso di livelli an...

Page 50: ...guarnizione dello sportello non ha una buona tenuta Collocare l apparecchio in un posto pi fresco Lasciare in funzione l apparecchio per un po fino a quando viene raggiunta la temperatura impostata A...

Page 51: ...stata L icona accesa e lampeggia sul display della temperatura La temperatura sul display fuori range possibile visualizzare solo temperature comprese nel range 0 99 F 9 37 C Se la temperatura non rie...

Page 52: ...52...

Reviews: