AirNav RadarBox Manual
18
Copyright 2010 by AirNav Systems
4- First task: you will center the map at your home location, zoom in and save it as your default map.
To center the map at any location let's use the "Locate" feature. It easily centers the map on any
airport, city or navigation facility all over the world.
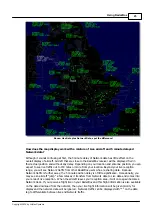
Imagine you are located near London Heathrow Airport. Enter "EGLL" in the locate box. This box it
at the top of the main screen as on the screen shot below. After this click the Locate button. The
map will now be panned so that London appears at the center.
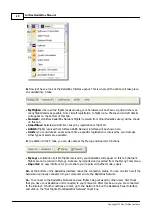
You can also enter your exact location using the menu option File > Preferences > Home Station Data
and entering your position directly in the Latitude and Longitude Boxes. Note that lat/lon should be
entered in DECIMAL DEGREES in the form 51.0504 -2.554
In this example, the position is N51.0505 W2.554 as a positive lat represents North, and the negative
lon represents West. Please note that if you have a position in Degrees and minutes, for example N50
25.5 W001 45.6, this is NOT the same as 50.255 -1.456. Either use Google Earth with the position
option set to decimal degrees to find your location, or do a Google search for an online lat/lon
conversion program.
5- Now Zoom in until more detailed view of the London area is shown. You can do this by clicking
the zoom in button on the map toolbar. The easiest way to pan/zoom your maps is by using your
mouse buttons. Left click anywhere in the map and 'drag' the map to the desired location.
Summary of Contents for RadarBox
Page 1: ...Copyright 2010 by AirNav Systems AirNav RadarBox Manual...
Page 64: ...AirNav RadarBox Manual 64 Copyright 2010 by AirNav Systems Examples of custom color settings...
Page 65: ...Menus Windows and Toolbars 65 Copyright 2010 by AirNav Systems...
Page 66: ...AirNav RadarBox Manual 66 Copyright 2010 by AirNav Systems 4 3 Menus 4 3 1 File File Menu...
Page 107: ......

