

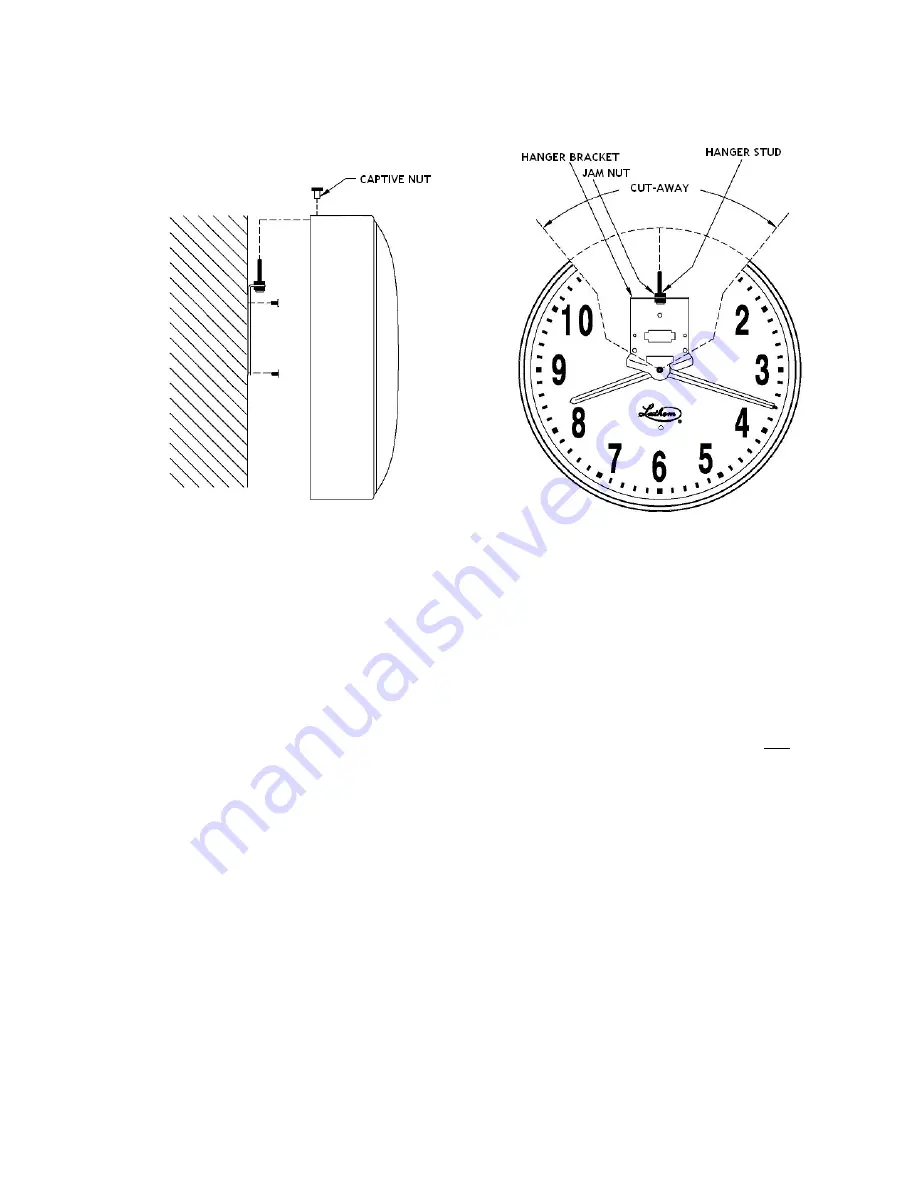
Hanging the clock
Secure hanger bracket as shown below and adjust the hanger stud using the jam nuts to
desired height. Place the clock on the hanger stud and secure the captive nut.
Normal Operation
In normal operation the clock listens for a synchronization signal 12 times per day (on even
hours at the 58
th
minute between 50
th
and 59
th
second). The LED will not flash during normal
operation.
Verifying Reception of Last Signal
Press the A button to verify that the clock received the last transmission signal from the ATX
Series master. The LED on the front will flash Green to indicate that the last transmission
was received successfully. If the LED flashes Red, then the last transmission was not
received. This may indicate the Wall Clock is located outside the transmission area.
Start Reception
Press the B button to manually set the clock to “listen” mode. The green LED on the front of
the clock will flash every 2 seconds. When a signal is received from an ATX series master,
the LED will flash every second. The second hand will stop at 12:00 and the minute and hour
hands will rapidly advance to the correct time. (If no signal is received, then verify that your
ATX Series master is transmitting or move the clock to a different, closer location)
Manual Time Setting
Press the B button for 5 seconds until the second hand stops. Press the A button to advance
the minute hand one minute. Hold the A button to rapidly advance the minute and hour
hands. Press the B button when the hands reach the correct time. The clock will start
normal timekeeping operation.
Copyright © 2009 Lathem Time Corporation. All rights reserved. Information subject to change without notice.
Document No: USG0089
Lathem and AirTime are registered trademarks of Lathem Time Corporation.
Revised: 8-19-2011


