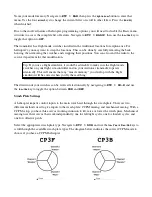
The purpose of this guide is to assist new helicopter pilots to setup their radio. Many basics will be
covered, as well as explanations of certain choices and how one aspect affects another. Experienced
pilots may want to skim through this guide. It first covers the preliminary transmitter programming
steps, then swash plate, tail rotor, and throttle / pitch / revolutionmixing curves. Finally, it briefly covers
the available compensation mixers, and optional use of the 7
th
and 8
th
channels. (Not applicable to
RD6000 owners.)
While some helicopter setup theory is
covered, the instructions from the
manufacturer of your particular helicopter
override any suggestions offered here. In the
case of doubt, please contact your helicopter
manufacturer or Airtronics customer
service.
If you are setting up an electric helicopter,
ensure that your motor is disconnected from
the speed control while making any
adjustments. Do not have your engine
running while making adjustments if you
have a glow or gasoline model.
Preliminary Transmitter Setup
Power on your transmitter. It will not operate however, until it is placed into the Normal (“N”) flight
mode, with the throttle stick at the lowest position. If those conditions are not met, you will see an
ID
UP!
or
THHi!
warning message and hear beeping. The two switches at the far upper left and right
sides of your transmitter control the flight modes. Both must be positioned toward you to enter the
Normal flight mode.
Select a model memory to use for your helicopter. Navigate to
ETC > MSL
, then press the
Inc+/Yes
button to enter that menu. Now use the
Inc+/Yes
or
Dec-/No
buttons to scroll through your model
memories. After selecting the desired model memory, press the
End
key to confirm.
Ensure that your model memory is set to “heli” mode. The upper left corner of your screen will say
either “heli”
or
“aero.”
If it lists “aero”, switch to helicopter mode by navigating to
ETC > TYP
, press
the
right arrow
key, then the
Inc+/Yes
key to confirm the change. Finally press the
End
key to return to the
previous menu.


