20
ES
EN
FR
IT
PT
EN
The system enables changing the icon and edit the name of an existing generic element:
•
Change Icon.
To change the generic element’s icon, press and hold the icon until the edit icon arrows are viewable,
navigate to right or left using the arrows and select the desired icon.
•
Edit name.
To change the generic element’s name, press and hold the name of the generic element until the name
box is visible and modify it (up to 15 characters).
SCENES
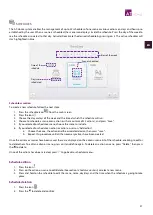
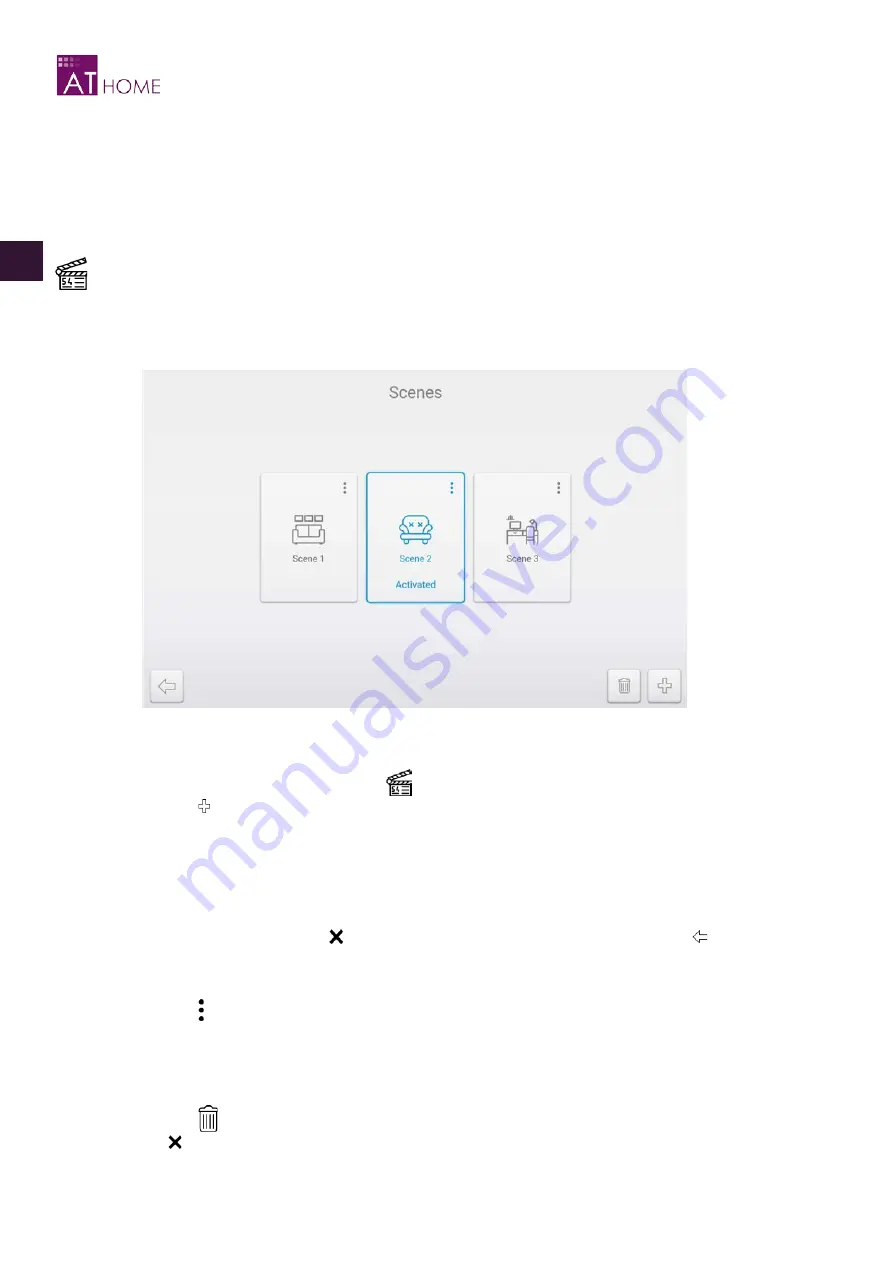
The AT-Home system enables the management of a set of grouped actions for it simultaneous implementation; this set of
actions is called
scene
. This system enables to create up to 32 scenes with a maximum of 32 actions per scene.
Activate the desired scene by pressing on it. The scene highlights in blue when activated.
Scenes creation
To create a new scene, follow the next steps:
1.
Access the scene menu by pressing the icon
from the Main Screen.
2.
Press the icon .
3.
Fill the “Name” field (up to 15 characters), choose an icon for the scene and press save.
4.
Choose the zone, the associated device and the action, then press “save”.
5.
Repeat this procedure until all the necessary actions have been created.
Once the actions have been saved, these are displayed on the actions list of the scene, enabling to edit or to delete them. To
create an action, press on “Add action”. To edit an action, press on it and define it again (See previous section). To delete an
action, press “Delete action”, then press the to delete. Once all the actions have been created, press to go back to scenes
menus.
Scenes edition
1.
Press the icon .
2.
Press on the action to edit/delete (See section
).
3.
To edit the icon and name of the scene, press and hold on the scene until the edition screen appears and modify or
maintain the name and icon.
Scenes deletion
1.
Press the icon
.
2.
Press the to delete and confirm.


