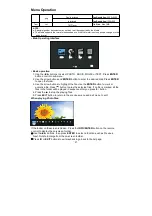
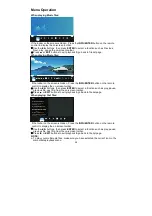
background image

Basic Operation

Choosing a TV channel

CH

/

on the remote control.

Press CH

/

to increase or decrease the channel number.

• Using 0-9 digital buttons.

You can select the channel number by pressing 0 to 9.

Additionally, when TV is in some mode, the TV will work in TV mode and play the

corresponding channel if any number button is pressed.

• Example

To select - channel (e.g. Channel 5): Press 5.

To select -- channel (e.g. Channel 20): Press 2 and 0 in a short time.

Volume Adjustment

Press the

VOL+/-

on the remote control to adjust the volume.

If you want to switch the sound OFF, press the

.

You can release mute by pressing the

or increase the volume.

Changing the Input Source

You can select the input source by pressing the

SOURCE

button on the remote control.

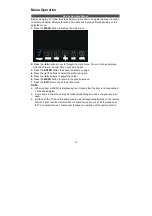
Press the▲/▼buttons to cycle through the input source, and press the

ENTER

button

to confirm your choice.

• Using the

14

Summary of Contents for AW-LED40X6FL

Page 1: ...OPERATION MANUAL Please read this manual carefully before operation AW LED40X6FL...

Page 2: ......

Page 3: ...nced radio TV technician for help CAUTION Do not attempt to modify this product in any way without written authorization from supplier Unauthorized modification could void the user s authority to oper...

Page 4: ...by the manufacturer or those with the same characteristics and performance as the original parts Use of unauthorized parts can result in fire electric shock and or other danger 16 Safety checks Upon c...

Page 5: ...by the manufacturer or those with the same characteristics and performance as the original parts Use of unauthorized parts can result in fire electric shock and or other danger 16 Safety checks Upon c...

Page 6: ...et is not overhanging the edge of the supporting furniture Not placing the television set on tall furniture for example cupboards or bookcases without anchoring both the furniture and the television s...

Page 7: ...radiators heat registers stoves or other apparatus including amplifiers that produce heat 6 Clean only with a dry cloth Unplug this product from the wall outlet before cleaning Do not use liquid clean...

Page 8: ...normally or has been dropped 12 When a cart is used use caution when moving the cart apparatus combination to avoid injury from tip over Sudden stops excessive force and uneven floor surfaces can caus...

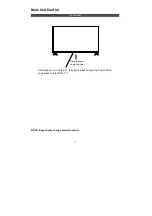
Page 9: ...Main Unit Control Front Panel NOTE Keypad may change model to model Remote sensor Power Indicator 7 Short press to turn on the TV then short press to open the Source Menu Long press to turn off the TV...

Page 10: ...Panel NOTE Input Output connectivity options may change from model to model 1 3 4 Antenna input 5 USB port 6 Earphones headphones jack AV input 2 HDMI ports HDMI1supports ARC function 8 1 2 3 4 5 6 U...

Page 11: ...enna player Digital Audio Output port USB Connect a USB Storage device and multimedia file playback NOTE The range of power input for the TV is 100 240V 50 60Hz Do not connect the TV power input port...

Page 12: ...erating distance of the remote control will be greatly reduced and you will need to replace the batteries Notes on Using Batteries The use of the wrong type of batteries may cause chemical leakage and...

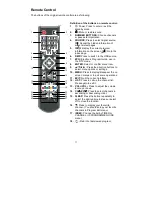
Page 13: ...to display disappear the on screen menus or to quit some operations EXIT Quit the current interface LIST Press to call up the channel list Press again to exit it VOL VOL Press to adjust the volume lev...

Page 14: ...elease 22 Adjust displayable aspect ratio Change size of teletext screen in display mode 23 SUBTITLE Press to select alternate subtitle language during view playback of a DTV program Press to turn on...

Page 15: ...Press buttons to select the language to be used for menus and message Select your country Press the buttons to select the country you are living in and then press the Select your time zone Press the b...

Page 16: ...ssed Example To select channel e g Channel 5 Press 5 To select channel e g Channel 20 Press 2 and 0 in a short time Volume Adjustment Press the VOL on the remote control to adjust the volume If you wa...

Page 17: ...buttons to select the preferred option 5 Press the buttons to adjust the value 6 Press the MENU button to return to the previous menu 7 Press the EXIT button to exit the entire menu NOTE When an item...

Page 18: ...rch When a channel is found the searching process will stop the channel will be saved with current channel number If the program is not your expected one please press the button to continue the search...

Page 19: ...y Select the Video Standard Current CH Select the current channel Search Press the button to search down from the current frequency and press the button to search up Fine Tune Adjust the frequency of...

Page 20: ...djust the hue of the picture valid only for NTSC signals Color Temperature Select the colour temperature that you feel comfortable Aspect Ratio You can select the picture size which best corresponds t...

Page 21: ...The surround sound can be enabled or disabled according to the needs to experience unique audio effects SPDIF Mode You can select a desired SPDIF Output mode AD Switch In DTV mode this is only availab...

Page 22: ...r Off Time Zone Select your time zone When the Auto Sync is set On the Time Zone can be adjusted On Screen Menu remains display after your last operation Lock System The feature can prevent unauthoriz...

Page 23: ...le for digital channels if multiple subtitle languages are broadcasted Hearing Impaired When hearing Impaired is On the TV screen will give some Off the information will be hidden Country Display the...

Page 24: ...hard disk into USB slot on the left hand side of the TV set NOTE USB disk should have capacity at least 512MB USB device must support USB 2 0 high speed specification Turn TV into DTV mode by pressing...

Page 25: ...ect the channel you want then press button to start recording Press button to display hide the recording menu It will keep recording until stop button is pressed or the memory is full A menu will come...

Page 26: ...to highlight USB then press ENTER Use the button to select MOVIE then press ENTER Use the arrow buttons and ENTER button to enter the desired disk Use the arrow buttons and ENTER button to open the fo...

Page 27: ...volume is lower than the default volume the max volume is the priority Export to USB You can export all current channel information including channel number channel name frequency etc into the U disk...

Page 28: ...MPEG1 2 MPEG4 H 264 HEVC MPEG1 2 Layer3 AAC HEAAC mkv MPEG1 2 MPEG4 H 264 VC1 HEVC MPEG1 2 Layer1 MPEG1 2 Layer2 MPEG1 2 Layer3 AAC HEAAC flv H 264 VC1 MPEG1 2 Layer3 AAC HEAAC asf MPEG1 2 MPEG4 H 26...

Page 29: ...R to open the folder 3 Use the arrow buttons to highlight the file Use the ENTER button to mark or unmark a file Press button to play the selected files If no file is marked all the files in the folde...

Page 30: ...ect a function such as play pause previous file next file from the on screen toolbar Press or EXIT buttons to exit playback go back to file list page NOTE To play your multimedia files make sure you h...

Page 31: ...st by Timer or Channel Press the EPG or EXIT button to exit Press LIST button to display the Channel List Press the buttons to select the channel and press ENTER to watch it Press CH button to page up...

Page 32: ...can double the size of the text to make it easier to read 1 Press the button to enlarge the top half of the page 2 Press the button again to enlarge the bottom half of the page 3 Press the button onc...

Page 33: ...lower quality Use the qualified signal cord No picture no sound and indicator light is green blue Volume is in the minimum value or TV is in mute mode Adjust the value of volume The signal cable is n...

Page 34: ...our TV dormant for a long time such as a vacation it s a good idea to unplug the power cord to protect against possible damage from lightning or power surges Maintenance Disposal of old electrical app...

Page 35: ...AW LED40X6FL TV LED PENCAHAYAAN BELAKANG MANUAL OPERASI Sila baca manual ini dengan teliti sebelum operasi...

Page 36: ...ipada litar yang kepadanya penerima disambung d Rujuk kepada wakil penjual atau juruteknik radio TV yang berpengalaman untuk mendapatkan bantuan PERINGATAN Jangan cuba mengubah suai produk ini dengan...

Page 37: ...asa 4 Ventilasi Apabila anda memasang TV anda kekalkan jarak sekurang kurangnya 4 inci di antara TV dan objek lain dinding sisi kabinet dll untuk memastikan ventilasi yang betul Kegagalan untuk mengek...

Page 38: ...barang ganti yang mempunyai ciri dan prestasi yang sama seperti barang asal Penggunaan bahagian tanpa kebenaran boleh mengakibatkan kebakaran kejutan elektrik dan atau bahaya lain 16 Semakan keselama...

Page 39: ...at Memastikan peti televisyen tidak mengunjur ke luar tepi perabot sokongan Tidak meletakkan peti televisyen pada perabot tinggi contohnya almari atau almari buku tanpa memasang perabot dan peti telev...

Page 40: ...asuk amplifier yang menghasilkan haba 6 Bersihkan hanya dengan kain yang kering Cabutkan talam produk ini dari alur keluar dinding sebelum membersihkannya Jangan gunakan pembersih cecair atau pembersi...

Page 41: ...u sepitan terutamanya pada palam bekas mudah dan tempat di mana ia keluar dari alat 13 Bagi perlindungan tambahan untuk produk ini semasa ribut petir atau apabila ia ditinggalkan tanpa jagaan dan tida...

Page 42: ...Utama Panel Depan Sensor jauh Penunjuk kuasa NOTA Pad kekunci boleh menukar model kepada model 7 tekan seketika untuk menghidupkan TV kemudian tekan seketika untuk membuka Menu Sumber Tekan lama untuk...

Page 43: ...DMI 2 Input Antena 3 Input AV 4 Jack fon telinga fon kepala 5 Port USB 6 Jack KELUARAN AUDIO DIGITAL NOTA Pilihan konektiviti Input Output mungkin berubah dari model ke model 1 2 3 4 5 6 1 menyokong f...

Page 44: ...yambung ke peranti AV yang mempunyai bicu video komposit contohnyaVCR atau pemain DVD Menyambungnya ke fon kepala anda atau peralatan audio yang lain USB Menyambung ke suatu peranti storan USB dan pem...

Page 45: ...enis bateri yang salah mungkin menyebabkan kebocoran bahan kimia dan atau letupan Sila mengambil perhatian terhadap perkara di bawah Selalu memastikan bateri tersebut dimasukkan dengan terminal dan me...

Page 46: ...pilihan menu atau tetapan 10 MENU Tekan untuk menunjukkan menghilangkan menu skrin atau untuk keluar dari beberapa operasi 11 EXIT Keluar dari antara muka semasa 12 LIST Tekan untuk memanggil senarai...

Page 47: ...od USB PVR Tahan halaman teleteks pada skrin tekan sekali lagi untuk melepaskannya 22 Melaraskan nisbah aspek paparan Menukar saiz halaman teleteks di mod paparan 23 S Tekan untuk memilih Bahasa sari...

Page 48: ...teru anda akan dapat melaraskan nilai tersebut selepas anda telah menetapkannya Tip Pastikan sambungan antena telah dibuat Tetapkan bahasa yang dikehendaki oleh anda Tekan butang untuk memilih bahasa...

Page 49: ...ang 0 9 Anda dapat memilih nombor saluran dengan tekan 0 hingga 9 Tambahannya semasa TV berada di sesetengah mod TV tersebut akan berfungsi dalam mod TV dan memainkan saluran yang sepadannya jika seba...

Page 50: ...ntuk kembali ke menu sebelumnya 7 Tekan butang EXIT untuk keluar dari menu keseluruhan NOTA Jika benda dalam MENU dipaparkan dalam warna kelabu ini menunjukkan benda tersebut adalah tiada atau tidak d...

Page 51: ...ijumpai akan disimpan dan unit tersebut akan meneruskan pencarian untuk TV DTV dan Radio Jika anda memilih butang MENU di pencarian TV semasa gambar cadangan ditunjukkan Penalaan Saluran akan melangka...

Page 52: ...Rangkaian antara Automatik atau manual Semasa Rangkaian berada dalam keadaan Manual anda boleh menetapkan ID Rangkaian dengan menggunakan butang nombor Jika anda berpuas hati dengan tetapan anda sila...

Page 53: ...ng anda rasa selesa Nisbah aspek Anda boleh memilih saiz gambar yang sepadan dengan kehendak penontonan NR Kurangkan kebisingan skrin tanpa menjejaskan kualiti video Kontras Dinamik Melaras kontras ke...

Page 54: ...ik untuk setiap program Sekeliling Bunyi sekeliling boleh diaktifkan atau dipadamkan berdasarkan keperluan untuk menikmati kesan audio yang unik Mod SPDIF Anda boleh memilih mod Output SPDIF yang dike...

Page 55: ...Pemadaman Kuasa Disebabkan Tiada Isyarat Zon masa Pilih zon masa anda Semasa Penyegerakkan Automatik ditetapkan kepada Buka zon masa boleh dilaraskan OSD Timeout Pilih masa dalam saat 15s 30s 60s pad...

Page 56: ...askan Buka atau Padam fungsi Penjimatan Tenaga Ingatkan Kesihatan Buka atau Padam fungsi Pengingatan Kesihatan HDMI_CEC Tekan butang untuk memilih HDM_I CEC tekan ENTER untuk masuk ke sub menu HDMI_CE...

Page 57: ...a menggunakan fungsi PVR Penyediaan Masukkan pemacu USB atau cakera keras USB ke dalam slot USB yang berada di sebelah kanan set TV NOTA Arahan Operasi Fungsi PVR Cakera USB mesti mempunyai kapasiti s...

Page 58: ...ditetapkan dan merakam program TV secara automatik pada hari masa dan tempoh masa yang dipilih oleh anda Rakaman Serta merta Pilih saluran yang anda kehendaki seterusnya tekan butang untuk memulakan r...

Page 59: ...h memainkan program terakam dalam mod USB Tekan butang SOURCE untuk memaparkan menu sumber input Tekan butang untuk menyorot USB seterusnya menekan ENTER Guna butang untuk memilih FILEM seterusnya tek...

Page 60: ...asal bunyi maksima akan menjadi keutamaan Eksport ke USB Anda boleh memindah semua informasi saluran merangkumi nombor saluran nama saluran frekuensi dan sebagainya ke dalam cakera U sebagai penyimpa...

Page 61: ...4 mov MPEG1 2 MPEG4 H 263 H 264 HEVC MPEG1 2 Lapisan3 AAC HEAAC mkv MPEG1 2 MPEG4 H 263 H 264 VC1 HEVC MPEG1 2 Lapisan1 MPEG1 2 Lapisan2 MPEG1 2 Lapisan3 AAC HEAAC flv H 264 VC1 MPEG1 2 Lapisan3 AAC H...

Page 62: ...enyorot fail tersebut Guna butang MASUK untuk menandai atau membuang tanda sesuatu fail Tekan butang untuk memainkan fail terpilih Jika tiada fail yang ditandai semua fail akan dimainkan dengan berdas...

Page 63: ...parkan bar alat pada skrin Guna butang kemudian tekan ENTER untuk memilih fungsi seperti Sebelumnya Seterusnya Main Jeda di bar alat pada skrin Tekan butang atau EXIT untuk keluar dari main semula bal...

Page 64: ...butang biru untuk menempah program TIMER Saluran Tekan butang Index untuk memilih bahagian atasan benda dan tekan butang untuk menukar senarai dengan berdasarkan Masa atau Saluran Tekan butang EPG at...

Page 65: ...menggandakan teks saiz untuk memudahkan pembacaan 1 Tekan butang untuk membesarkan bahagian separuh atas halaman 2 Tekan butang sekali lagi untuk membesarkan bahagian separuh bawah halaman 3 Tekan bu...

Page 66: ...h bergred rendah atau kord isyarat adalah bergred rendah Gunakan kord isyarat yang layak Tiada gambar tiada bunyi dan lampoon penunjuk adalah hijau biru Bunyi adalah berada pada nilai minima atau TV a...

Page 67: ...n jangan menggunakan kain basah Ketidakhadiran berlarutan Jika anda berjangka untuk meninggalkan TV anda dalam keadaan dorman untuk jangka masa yang panjang contohnya untuk percutian adalah lebih baik...

Page 68: ......
Reviews: