background image

Summary of Contents for CX-NV8000

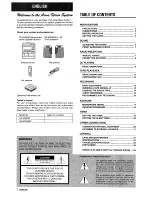
Page 1: ...86 NF5 903 219 962607 DKY U For Assistance And Information C ll Toll Free I 800 BUY AIWA United States and Puerto Rico...

Page 2: ...ct your Aiwa dealer in case of difficulty Model No Serial No Lot No CX NV8000 SX ANV8000 PREPARATIONS PRECAUTIONS 2 CONNECTIONS 3 BEFORE OPERATION 5 SETTING THE CLOCK 5 SOUND ADJUSTING THE SOUND 6 FRO...

Page 3: ...not easily insert into the outlet please call a qualified service technician to service or replace the outlet To avoid defeating the safety feature of the polarized plug do not force it into a power...

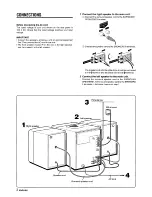
Page 4: ...er 7 Connect the right speaker to the main unit Connect the surround speaker cord to the SURROUND SPEAKERS R terminal lllll I d Q Connect the speaker cord to the SPEAKERS R terminals The speaker cord...

Page 5: ...not bring the FM antenna near metal objects or curtain rails Do not bring the AM antenna near other optional equipment the stereo system itself the AC cord or speaker cords since noise will be picked...

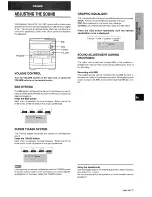
Page 6: ...ton while pressing the TAPE button To turn back on repeat the above After use Press the POWER button to turn off the power The display changes to the clock 1 3 5 2 4 When the AC cord is connected for...

Page 7: ...T BASS SYSTEM The T BASS system enhances the realism of low frequency sound Press the T BASS button Each time it is pressed the level changes Select one of the three levels or the off position to suit...

Page 8: ..._ 1 2 REPEATI MONO TUNER Press the TUNER BAND button repeatedly to select the desired band m If the power is turned off the previously tuned station will be played Direct Play Function Press the 144 D...

Page 9: ...select a band Press the numeric buttons to select a preset number Example To select preset number 25 press the 10 10 and 5 buttons To select preset number 10 press the 1Oand Obuttons Selecting a pres...

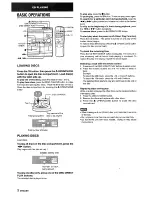
Page 10: ...Press the CD button The power is turned on and play of the loaded disc s begins To replace discs before play press the OPEN CLOSE button to open the disc compartment To check the remaining time Press...

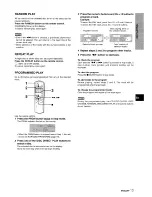
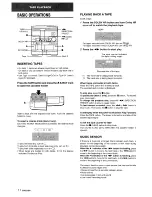
Page 11: ...page 18 Press one of the DISC DIRECT PLAY buttons to select a disc The selected disc is indicated in red on the display Go to the next step when the tray stops rotating 3 4 5 Press the numeric button...

Page 12: ...rse When tapes are loaded in both decks Press the TAPE button first to select a deck The selected deck number is displayed To stop play press the button To pause play deck 2 only press the II button T...

Page 13: ...tte tape after recording with a screwdriver or other pointed tool ide A e e Q a b Tab for side A To record on the tape again cover the tab openings with adhesive tape etc On Type II tapes take care no...

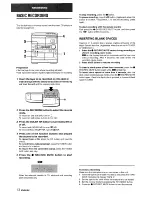
Page 14: ...the REV MODE button to select the reverse mode To record on one side only turn on To record on both sides turn on or Z Press the DOLBY NR button to turn Dolby NR on or off To record with DOLBY NR tur...

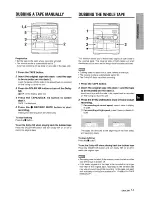
Page 15: ...ly as soon as the longer tape has been reversed m Dubbing does not start from a point halfway in the tape The reverse mode is automatically set to Z The Dolby NR does not affect recording 1 2 3 Press...

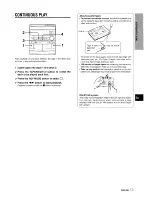
Page 16: ...ayed through for 10 seconds and recording starts When recording on the front side A ends recording on the back side B starts To stop recording Press the W button Recording and CD play stop simultaneou...

Page 17: ...or the rest of the tracks for side A A track whose playing time is longer than the remaining time cannot be programmed Remaining time of side A I Total number Programmed of prograrnmed tracks tracks P...

Page 18: ...than the accompaniment Auto Vocal Fader The singer s voice becomes softer only while there is audio input through a microphone Multiplex The sound on the left or right channel is heard from both spea...

Page 19: ...s the EDIT CHECK button repeatedly Each time it i pressed the disc number and track number are displayed in the reserved order To stop play Press the button Press the button to start again To skip a t...

Page 20: ...n to a CD load the disc to be played first on tray 1 To listen to a tape insert the tape into deck 1 or 2 To listen to the radio tune in to a station Press the POWER button to turn the unit off after...

Page 21: ...ssary connecting cords Consult your local Aiwa dealer for optional equipment VIDEO AUX JACKS This unit can input analog sound signals through these jacks m Use a cable with RCA phono plugs to connect...

Page 22: ...thinner as these could damage the finish of the unit To clean the heads and tape paths After every 10 hours of use clean the heads and tape paths with a head cleaning cassette or cotton swab moistened...

Page 23: ...rs Impedance Output sound pressure level Dimensions W x H x D Weight General Power requirements Power consumption Dimensions of main unit W XHXD Weight of main unit 4 way bass reflex with surround spe...

Page 24: ...ording head dirty page 21 Erasure is not possible c Is the erasure head dirty page 21 is a metal tape being used High frequency sound is not emitted Is a tape recorded without Dolby NR played back wit...

Page 25: ...ker become even harder to hear increasing the impression of imbalance For these reasons the listening area which provides even sound balance and the optimal stereo effect is limited to the narrow area...

Page 26: ...CONEXIONES 3 ANTES DE LA OPERACION 5 PUESTA EN HORA DEL RELOJ 5 SONIDO AJUSTE DEL SONIDO 6 SISTEMA DELANTERO DE SONIDO AMBIENTAL 7 RECEPCION DE LA RADIO SINTONIZACION MANUAL 7 PREAJUSTE DE EMISORAS 8...

Page 27: ...corriente Ilame a un electricista cualificado para que modifique o reemplace la toma de corriente Para evitar anular la caracterfstica de seguridad de la clavija polarizada no la inserte a la fuerza...

Page 28: ...z izquierdo 7 Conecte el altavoz derecho a la unidad principal Conecte elcable de altavoz de sonido ambiental al terminal SURROUND SPEAKER R Conecte el cable del altavoz a Ios terminals SPEAKERS R z E...

Page 29: ...s conexiones mal hechas podr an causar un cortocircuito en Ios terminals SPEAKERS No deje objetos que generen magnetism cerca de Ios altavoces No ponga la antena de FM cerca de objetos metalicos o rie...

Page 30: ...boton mientras pulsa el boton TAPE Para volver a encenderla repita el procedimiento seguido para apagarla Despues de la utilization Pulse el boton POWER para desconectar la alimentacion La visualizati...

Page 31: ...za el realismo del sonido de baja frecuencia Pulse e boton T BASS Cada vez que 10pulse el nivel cambiara Seleccione uno de Ios tres niveles o la posici6n de apagado 10 que usted prefiera L II 1111 111...

Page 32: ...ANUAL 1 2 _ _ _ REPEATI MONO TUNER Pulse repetidamente el boton TUNER BAND para seleccionar la banda deseada FM AM r 1 Si la alimentacion esta desconectada se recibira la emisora previamente sintoniza...

Page 33: ...UMERO DE E dq rw r w w 1 PREAJUSTE Utilice el control remoto para seleccionar directamente el ntirnero de preajuste 7 Pulse el bo16n TUNER BAND para selecciorwr una banda 2 Pulse Ios botones numericos...

Page 34: ...alimentacion se conectara y la reproduction del de Ios disco s introducido s empezara Para reemplazar discos antes de la reproducci6n pulse el boton OpEN CLOSE para abrir el compartimiento de IOS disc...

Page 35: ...MAS DE KARAOKE pagina 18 Pulse uno de Ios botones DISC DIRECT PLAY para seleccionar un disco El disco seleccionado se indica en rojo en el visualizador Vava al oaso siauiente cuando la bandeia deie de...

Page 36: ...ton TAPE para seleccionar una platina El numero de la platina seleccionada se visualizara Para detener la reproduction pulse el boton Para hater una pausa en la reproduction platina 2 solamente pulse...

Page 37: ...e plastico del casete despues de grabar Cara A e 9 I LJ Ranura de 9 deteccion de Lengiieta cinta tipo II para la cai ia A d Para volver a grabar en una cinta tape Ias aberturas con cinta adhesiva etc...

Page 38: ...a pausa en la grabacion pulse el boton Il Puede aplicarse cuando la fuente de sonido sea TUNER o VIDEO AUX Para reanudar la grabacion pulse de nuevo el boton Para iniciar la grabacion con el control r...

Page 39: ...de invertirse la cinta mas Iarga rmi zf La copia no empieza desde un punto ubicado en medio de la cinta El modo de inversion se pone automaticamente en El ajuste Dolby NR no afecta a la grabacion 1 2...

Page 40: ...y la grabacion empezara Cuando termine de grabarse la cara delantera cara A empezara la grabacion de la cara trasera cara B Para detener la grabacion Pulse el boton La grabacion y la reproduction del...

Page 41: ...yo tiempo de reproduction sea su perior al tiempo restante no podr ser programada Tiempo restante de la car i A Ntimero total de Canciones canciones proglrama das programadas 7 Pulse el bot6n ED1l CHE...

Page 42: ...LEX Esta unidad puede utilizar discos o cintas como fuentes de Karaoke Pulse repetidamente el boton VOCAL FADEWMULTIPLEX para seleccionar la funcion de desvanecimiento de voz o de multiplex Utilice la...

Page 43: ...control remoto 1 Pulse el boton PRGM una vez 2 Pulse uno de k botones DISC DIRECT PLAY para seleccionar un disco y Ios botones num6ricos para seleccionar una cancion 3 4 5 Pulse el bot6n KARAOKE ENTE...

Page 44: ...mer Iugar en la bandeja 1 Para escuchar una cinta introduzca la cinta en la platina 1 0 en la 2 Para escuchar la radio sintonice una emisora Pulse el boton POWER para apagar la unidad despues de haber...

Page 45: ...esarios e Consulte con su concesionario AIWA en cuanto al equipo optional TOMAS VIDHYAUX Esta unidad puede introducer sehales de sonido analogico a traves de estas tomas Utilice un cable con clavijas...

Page 46: ...asa la cinta Despues de cada 10 horasde funcionamiento IimpieIas cabezas y Ios puntos por donde pasa la cinta con un casete de Iimpieza de cabezas o un palillo con algodon humedecido con Iiquido de Ii...

Page 47: ...del reproductor de discos compactos Laser Laser de semiconductor k 780 nm Convertidor D A 1 bit doble Relation sehal a ruido 83 dB 1 kHz O dB Distortion armonica 0 05 1kHz O dB Fluctuack5n y tremolo N...

Page 48: ...No se emite sonido de alta frecuencia Est reproduciendose una cinta grabada sin Dolby NR con el sistema Dolby NR activado pagina 11 Esta sucia la cabeza de grabacion reproduction pagina 21 SECCION DE...

Page 49: ...esi6n de un desequilibrio del sonido Por estas razones el area de escucha que proporci ona una sonido equilibrado y un efecto est eo 6ptimo se limits al Area estrecha mostrada en la fi gura 2 Para res...

Page 50: ...E DU SON 6 SYSTEME SURROUND AVANT 7 RECEPTION RADIO ACCORD MANUEL 7 MEMORISATION DE STATIONS 8 LECTURE DE DISQUES COMPACTS OPERATIONS DE BASE l 9 LECTURE DE CASSETTES OPERATIONS DE BASE 11 LECTURE CON...

Page 51: ...ouveau Si l on ne peut toujours pas inserer la fiche clans la prise s adresser a un electrician qualifie pour faire reparer ou changer la prise Afin de ne pas annuler la securit de la fiche polarisee...

Page 52: ...t la marque R au dos est I enceinte droite et celle portant la marque L est I enceinte gauche 2 Connecter Ie cordon de haut parleur surround ala borne SURROUND SPEAKERS R Connecter Ie cordon d enceint...

Page 53: ...mettre I antenne FM pres d objets metalliques ou de tringles a rideaux Ne pas mettre l antenne AM pres d un appareil optionnel de la chalne stereo proprement dite du cordon secteur ou des cordons d e...

Page 54: ...nt sur la touche TAPE Pour rallumer I eclairage repeter cette operation Apres I utilkation Appuyer sur la touche POWER pour couper I alimentation L affichage passe a I horloge REGLAGE DE L HORLOGE 1 3...

Page 55: ...e repos comme on prefere Le son aux basses frequencies risque d i tre deforme quand Ie systeme T BASS est utilise pour un disque ou une cassette dent Ie son aux basses frequencies est accentue d origi...

Page 56: ...UBAND a plusieurs reprises pour selectionner la gamme souhaitee FM AM si l alitYIetItatiOn eSt COU e la station ecoutee en dernier sera regue fonction de lecture directe Appuyer sur la touche l DOWN o...

Page 57: ...e pour selectionner Ie numero de prereglage directement 1 Appuyer sur la touche TUNE IWBAND poIur selectionner une gamme 2 A I aide des touches numeriques selecticmrwr un numero de prer6glage Exemple...

Page 58: ...s reprises Pour enlever des disques appuyer sur la touche A OPEN CLOSE Pour demarrer la lecture quand I alimentation est toupee fonction de lecture directe Appuyer sur la touche CD L appareil est mis...

Page 59: ...Appuyer sur une des touches DISC DIRECT PLAY pour s61ectionner un disque Le disque selectionne est indique en rouge sur I affichage Passer a I etape suivante quand Ie plateau arr e de tourner 3 4 5 A...

Page 60: ...ssettes en place clans k dew platines Appuyer d abord sur la touche TAPE pour selectionner une platine Le numero de la platine selectionnee est affiche Pour arr ter la lecture appuyer sur la touche 9...

Page 61: ...remenit Pour enregistrer de nouveau sur une cassette recouvrir Ies cavites des ergots avec du ruban adhesif ou auitre Sur Ies cassettes de type II faire attention a ne pas recouvrir la rainure de dete...

Page 62: ...tXer I enregistrement appuyer sur la touche 9 Pour mettre I enregistrement en pause appuyer sur la touche Il Applicable quand la source est TUNER ou VIDEO AUX Pour reprendre I enregistrement appuyer d...

Page 63: ...ssette la plIus Iongue a ete inversee La duplication ne demarre pas a un point situe au milieu d une face c Le mode d inversion est automatiquement regle sur 1 Le reducteur de bruit Dolby n affecte pa...

Page 64: ...usqu au debut de la face avant I amorce est Iue pendant dix secondes puis I enregistrement demarre Une fois que I enregistrement sur la face avant face A est termine I enregistrement sur la face arrie...

Page 65: ...plage dent la duree de lecture est superieure au temlps restant ne peut pas 6tre programmed Temps restant de la face A I Nombre total de Plag s plages programm6es programmers 7 8 Appuyer sur la touch...

Page 66: ...ultiplex pour des disques ou cassettes multi audio A chaque pression sur la touche VOCAL FADER MULTIPLEX une de ces fonctions est selectionnee de maniere cyclique 1 Vocal Fader La partie vocale devien...

Page 67: ...bre de plages reservees restantes Disque en tours de lecture Le numero de la Numero de disque de Numero de plage de la derniere reservation la derniere reservation Pour ajouter une reservation pendant...

Page 68: ...ttre en place clans la platine 1 Ou 2 Pour ecouter la radio I accorder sur une station Apres avoir regle Ie volume et la tonalite appuyer sur la touche POWER pour mettre I appareil hors tension reste...

Page 69: ...ls disponibles consulter Ie distributeur Aiwa local PRISES VIDEO AUX Cet appareil peut recevoir des signaux sonores analogiques par ces prises Utiliser un cable a fiches phono RCA pour connecter un ap...

Page 70: ...iluant Nettoyage des t tes et des chemins de bande Toutes Ies dix heures d utilisation nettoyer Ies ti5tes et leS chemins de bande avec une cassette de nettoyage ou un coton tige imbibe d un Iiquide d...

Page 71: ...e disques compacts Laser Laser a semi conducteurs h 780 nm Conversion fWA 1 bit double Rapport signal bruit 83 dB 1 kHz O dB Distortion harmonique 0 05 1 kHz OdB Pleurage et scintillement En de a du s...

Page 72: ...isee II n y a pas de sons aigus Une cassette enregistree saris reducteur de bruit Dolby n est elle pas Iue avec Ie systeme reducteur de bruit Dolby en service page 11 La tete d enregistrement de lectu...

Page 73: ...a zone d ecoute qui donne un quilibre sonore normal et l effet ster60 optimal est limitee A la partie 6troite montr6e sur la figure 2 Pour r6soudre ce probleme Aiwa crke des haut parleurs unidirection...

Page 74: ......

Page 75: ......

Page 76: ...te the receiving antenna Increase the separation between the equipment and re ceiver Connect the equipment into an outlet on circuit different from that to which the receiver is connected Consult the...

Reviews: