background image

en

  12

13

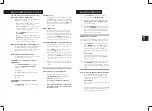
A-B FUNCTION

During CD/MP3 DISC playback, you can 
press 

AB

 button on remote to start from 

the point A 

(time point you pressed)

, and 

ended point B when you press 

AB

 button 

again and music will play repeatedly 
from A to B.


INTRO FUNCTION

This feature allows you to play the 10 
first seconds of each track on the disk. 
Load the disc and wait until the display 
shows the total playing time and number 
of tracks. Press 

INTRO 

button on the 

remote control to activate the function, 
press again to cancel the function.

PROGRAM: CREATING YOUR OWN PLAYLIST

You can play up to 9 tracks on a CD in order.

1.

Insert a CD and wait for to be read.

2.

Press 

PROG

 button on the remote 

control in 

STOP

 status.

3.

Press    /    on the unit or on the remote 

control to select the track you want to 
program. Press 

PLAY

 button on remote 

or on front panel of the unit to confirm 
your selection.

4.

Press      on the unit or on the remote 

control to play the programmed music 
files.

You can play in your Micro System your 
audio CD/ CD-R/ CD-RW/ MP3. 

(Please do not try to play CD-ROM, 

CD-I, VCD or DVD.)

1.

Press the button      on the top of the 

  product to open the disc tray.

2.

Insert the 

CD

 with the printing side 

 facing up and close gently the disc  
 tray  by pressing      again.

3.

Press 

SOURCE

 button to select the 

CD MODE

.

4.

Press      to start the 

CD

 playback; for 

AUDIO CD

, playback starts automatically.

5.

Press     stop button on unit or on  

   remote control to stop playback.

SEARCHING FOR A SECTION WITHIN A CD

During playback, press and hold    /    on 
the remote control to find a specific 
passage within the track and release it at 
the point you want to listen to.


SELECT ANOTHER TRACK OR FILE

Press    or    button on the remote control 
to select a particular track.


LISTENING TO YOUR TRACKS (FILES) 
REPEATEDLY

Press 

REPEAT BUTTON

 repeatedly to 

activate the 

REPEAT FUNCTION

 in 

following order:


1.


REPEAT 1

2.


REPEAT ALBUM 

(*MP3 MODE ONLY)


3.


REPEAT ALL 

4. 


OFF

LISTENING TO YOUR TRACKS (FILES) 
RANDOMLY

Press 

RANDOM

 button to play tracks in 

a random order.

ABOUT MP3 DISC COMPATIBILITY 

With this unit is limited as follows:


Sampling Frequency:


32-48 (MP3)

Bit rate:


32-320kbps (MP3)


Do not use special letters such as:

 / :*?< > etc

Even if the total number of files on the 
disc has more than 1000, it will only be 
shown up to 999.

1.


Press 

SOURCE

 button on the remote 

control to select 

TUNER MODE

.

2.


Tune to the desired radio station by using      
 

/     /    /    or


CH-/ CH+/ FF-/ FF+


for a Manual tuning.

3.


For 

AUTO TUNING

, press     button on 

the unit or 

SEARCH

 button on the remote 

control to enter in automatic searching 
radio station mode to enter in automatic 
searching radio station mode.

PRESET RADIO STATIONS:

You can store up to 

40

 of your favorite stations 

in the tuner memory for easy recall at any time.

1.


Press 

SOURCE

 button on the remote to 

select 

TUNER

, and press 

GO TO

 button, 

the LCD will display   

 _ _ _: _ _

  digital 

input mode, please input FM frequency 
of the radio station that what you want to 
listen.

For example:

106.20, after input station frequency by 
using the number buttons, press 

PLAY


button to confirm.


2.


Once the desired radio station is tuned, 
press 

MEMORY

 button on the remote 

control, LCD will display 

CH _ _

 input the 

preset number you want to store the radio 
station.

HOW TO RECALL PRESETS RADIO STATIONS

Press 

GO TO

 button on the remote 

control, LCD will display 

CH_ _

, and 

press the preset number of the radio 
station to recall it.


For example:


Press 1 to play the radio station you preset 
in position 1.


If the preset number is above 10, press 

+10


button on remote control and number key 
to input second digit preset number.

BASIC OPERATION CD / MP3

RADIO OPERATION

Summary of Contents for MSBTU-300

Page 1: ...user manual manual de usuario mode d emploi bedienungsanleitung manualle dell utente manual do usu rio with bluetooth 2 19 38 55 56 73 74 91 92 109 20 37...

Page 2: ...the laser beam SAFETY PRECAUTIONS 1 If the cord is damaged have it repaired by the manufacturer its service or a similarly qualified person in order to avoid any hazard 2 The power supply must be repl...

Page 3: ...ords at the power plug and jack plug socket 11 NON USE PERIODS The power cord of the product should be unplugged from the outlet when left unused for long periods of time 12 LIGHTNING For added protec...

Page 4: ...evice shall remain readily operable This system includes a stereo headphones socket on the front panel of the main unit You may connect a set of headphones not included to this socket for private list...

Page 5: ...ed near other appliances which generate infrared rays or if other remote control devices using infrared rays are used near the appliance it may operate incorrectly DESCRIPTION OF UNIT AND CONTROLS DES...

Page 6: ...tically by pressing the VOL or VOL buttons SOURCE BUTTON Press the SOURCE button repeatedly to switch among CD TUNER LINE IN BT modes To select the USB mode please press CD USB button on the remote co...

Page 7: ...articular track LISTENING TO YOUR TRACKS FILES REPEATEDLY Press REPEAT BUTTON repeatedly to activate the REPEAT FUNCTION in following order 1 REPEAT 1 2 REPEAT ALBUM MP3 MODE ONLY 3 REPEAT ALL 4 OFF L...

Page 8: ...ognized Using NTFS file system is not supported Only FAT 16 32 file system is supported This unit is not supported when the total number of files is 1000 or more External HDD locked devices or hard ty...

Page 9: ...adhesive tape stickers etc to the disc label 3 Clean the discs periodically with a soft lint free dry cloth Never use detergents or abrasive cleaners to clean the disc If necessary use a CD cleaning...

Page 10: ...n Standby mode consumption MSBTU 300 AC 110 240 V 50 60 Hz 0 7A 30 W 0 5 W TECHNICAL SPECIFICATION END OF LIFE DISPOSAL RADIO SECTION Frequency ranges CD PLAYER Frequency response Audio S N Audio outp...

Page 11: ...to correcto para usar el rayo l ser 1 Si el cable del cargador est da ado debe ser reparado por el fabricante su servicio t cnico o una persona con cualificaci n similar para evitar riesgos 2 El alime...

Page 12: ...ANDO NO UTILICE LA UNIDAD El cable de alimentaci n del aparato debe desconectarse de la toma de corriente cuando no se use durante periodos de tiempo prolongados 12 RAYOS Para una mayor protecci n de...

Page 13: ...ces de la unidad principal se apagan autom ticamente cuando se conectan auriculares a la toma AUX Aseg rese de que el conector de los auriculares se introduzca por completo en la toma de auriculares S...

Page 14: ...n luz infrarroja cerca del aparato puede funcionar incorrectamente DESCRIPCI N DE LA UNIDAD Y CONTROLES DESCRIPCI N DEL MANDO A DISTANCIA ON OFF ENCENDER Y APAGAR BOTONES NUMERALES 1 0 10 SOURCE CD US...

Page 15: ...UMEN en el panel delantero o pulse los botones VOL VOL en el mando a distancia para ajustar el nivel de volumen La bater a debe introducirse correctamente para evitar da ar el mando a distancia Saque...

Page 16: ...en el punto que desee escuchar SELECCIONAR UNA PISTA O ARCHIVO Pulse el bot n o en el mando a distancia para seleccionar una pista espec fica ESCUCHAR REPETIDAMENTE LAS PISTAS ARCHIVOS Pulse el bot n...

Page 17: ...do su dispositivo debe conectarse al MSBTU 300 fig 1 fig 2 1 Pulse el bot n SOURCE para pasar al modo BT BLUETOOTH MODE fig 1 2 En modo BT los indicadores LED rojo y azul parpadear n alternativamente...

Page 18: ...cinta adhesiva pegatinas etc al CD 3 Limpie peri dicamente los CD s con una gamuza suave sin pelusa y seca No use nunca detergentes ni limpiadores abrasivos para limpiar el CD En caso necesario use u...

Page 19: ...0 Hz 0 7A 30 W 0 5 W ESPECIFICACIONES T CNICAS ELIMINACI N AL FINAL DE LA VIDA TIL DEL PRODUCTO SECCI N DE RADIO Gama de frecuencia REPRODUCTOR DE CD Respuesta de frecuencia S R audio Salida de audio...

Page 20: ...son service ou une personne de qualification similaire pour viter tout risque 2 L alimentation doit tre remplac e par une nouvelle en cas de dysfonctionnement car cette alimentation n est pas r parabl...

Page 21: ...en accordant une attention particuli re aux cordons au niveau des fiches des prises et l endroit o ils sortent du produit 11 P RIODE DE NON UTILISATION D branchez cet appareil durant les orages ou s...

Page 22: ...s de l unit principale s teignent automatiquement lorsque des couteurs sont connect s la prise AUX Assurez vous que la prise casque est compl tement ins r e dans la prise casque Si le connecteur n est...

Page 23: ...utilisant des rayons infrarouges sont utilis es pr s de l appareil l appareil peut mal fonctionner DESCRIPTION DE L APPAREIL ET COMMANDES DESCRIPTION DE LA TELECOMANDE ON OFF MISE EN VEILLE TOUCHES N...
Page 24: ...MUTE pour annuler la fonction de sourdine et r tablir le son La fonction de sourdines automatiquement en appuyant sur la touche VOL ou VOL BOUTON SOURCE Appuyez sur la touche SOURCE plusieurs reprise...

Page 25: ...ne fois que vous avez identifi le passage musical d sir rel chez la touche la lecture red marre partir de ce point SELECTION DE PLAGE En cours de lecture appuyez sur le bouton ou pour acc der une plag...

Page 26: ...Avant de d brancher le p riph rique USB changez la source en appuyant sur le bouton SOURCE P RIPH RIQUE USB COMPATIBLE Lecteur MP3 Lecteurs Flash type mp3 USB Flash drive P riph riques prenant en char...

Page 27: ...ACTS 1 Assurez vous de ne pas toucher la surface du disque Tenez le par les bords Ne laissez jamais vos empreintes de doigts sur le c t non imprim du disque 2 Ne pas coller d tiquette sur les deux fac...

Page 28: ...mation en mode veille MSBTU 300 AC 110 240 V 50 60 Hz 0 7A 30 W 0 5 W SP CIFICATIONS TECHNIQUESS LIMINATION EN FIN DE VIE SECTION RADIO Bande de fr quences SECTION CD R sponse en fr quence S R audio S...

Page 29: ...es vom Hersteller seinem Service oder einer hnlich qualifizierten Person reparieren um Gefahren zu vermeiden 2 Das Netzteil muss im Fehlerfall durch ein neues ersetzt werden da dieses Netz teil nicht...

Page 30: ...Stellen wo es das Produkt verl sst 11 NICHT BENUTZUNGS PERIODE Der Netzstecker des Produkts soll aus der Netzsteck dose gezogen werden wenn das Produkt f r lange Periode nicht benutzt ist 12 BLITZ F r...

Page 31: ...r von Hauptger t sind automatisch abgeschaltet wenn Kopfh rer an den H rer Anschluss angeschlossen sind Stellen Sie sicher dass der Stecker Ihres Kopfh rers vollst ndig in den H rer Anschluss eingeste...

Page 32: ...iente Ger te die Infrarot Strahl benutzen in der N he vom Ger t verwendet sind kann sie unrichtig arbeiten BESCHREIBUNG VON GERAET UND BEDIENELEMENTEN BESCHREIBUNG VON FERNBEDIENUNG ON OFF EIN AUS TAS...

Page 33: ...unktion kann auch durch das Dr cken von VOL oder VOL Tasten automatisch abgebrochen werden SOURCE Equelle taste Dr cken Sie die SOURCE Taste wiederholt um unter CD TUNER LINE IN BT Um den USB Modus au...

Page 34: ...cken Sie die SOURCE Taste auf Fernbedienung um TUNER auszuw hlen und dr cken Sie die GOTO Taste das LCD wird _ _ _ _ _ anzeigen geben Sie bitte die FM Frequenz von dem Radiosender ein den Sie h ren m...

Page 35: ...t BEDIENUNG VON ZUSAETZLICHEM EINGANG USB BEDIENUNG 7 Bevor Sie das USB Ger t abtrennen ndern Sie die Quelle indem Sie die SOURCE Taste dr cken KOMPATIBLE USB GER TE Mp3 Player Flash Typ Mp3 Player US...

Page 36: ...einigen Sie regelm ssig die CDs mit einem weichen trockenen Tuch Verwenden Sie nie Rei nigungsmittel oder Schleif Reiniger f r Reinigung von Disk Wenn n tig verwenden Sie eine CD Reinigungs Ausr stung...

Page 37: ...ge Batterien oder Akku hat en tsorgen Sie bitte dies separate gem ss lokalen Anforderungen Bei richtiger Entsorgung dieses Produkts stellen Sie sicher dass der Abfall sich erforderlicher Behandlung Wi...

Page 38: ...l raggio laser 1 Se il cavo del caricabatterie danneggiato deve essere riparato dal produttore dal suo servizio o da una persona qualificata per evitare rischi 2 L alimentatore deve essere sostituito...

Page 39: ...endo gli oggetti e il punto in cui il dispositivo esce 11 PERIODI NON UTILIZZATI Il cavo di alimentazione dell apparecchio deve essere scollegato dalla presa di corrente quando non viene utilizzato pe...

Page 40: ...nit principale si spengono automaticamente quando le cuffie sono collegate alla presa AUX Assicurarsi che il jack delle cuffie sia completamente inserito nel jack delle cuffie Se il connettore non ins...

Page 41: ...o da otros aparatos che genera luz a infrarossi o se usan otros mandos ha distanziato con luz infrarosso cerca del aparato puede funcionar in modo errato ON OFF ACCESO E SPENTO TASTI DIGITALI 1 0 10 S...

Page 42: ...N sul pannello anteriore o premere i tasti VOL VOL sul telecomando per regolare il livello del volume La batteria deve essere inserita correttamente per evitare di danneggiare il telecomando distanza...

Page 43: ...ciarla nel punto che si desidera ascoltare SELEZIONA UNA TRACCIA O UN FILE Premere il tasto o sul telecomando per selezionare una traccia specifica ASCOLTA RIPETUTAMENTE I BRANI File Premere ripetutam...

Page 44: ...ositivo audio esterno FUNZIONAMENTO DELL INGRESSO AUSILIARIO FUNZIONAMENTO USB DISPOSITIVI USB COMPATIBILI Lettore MP3 Lettore MP3 di tipo Flash Unit flash USB Dispositivi che supportano USB 2 0 o USB...

Page 45: ...o di lanugine Non usare mai detergenti o detergenti abrasivi per pulire il disco Se necessario utilizzare un kit di pulizia del CD Se un disco ha salti o bloccato in una sezione potrebbe essere sporco...

Page 46: ...by MSBTU 300 AC 110 240 V 50 60 Hz 0 7A 30 W 0 5 W SPECIFICHE TECNICHE ELIMINAZIONE FINE DELLA VITA UTILE DEL PRODOTTO SEZIONE RADIO Gamma di frequenza LETTORE CD Risposta in frequenza Audio S R Uscit...

Page 47: ...ificado ele deve ser reparado pelo fabricante seu servi o ou uma pessoa com qualifica es semelhantes para evitar riscos 2 A fonte de alimenta o deve ser substitu da por outra em caso de falha uma vez...

Page 48: ...que o dispositivo sai 11 PER ODOS N O UTILIZADOS O cabo de alimenta o do aparelho deve ser desconectado da tomada el trica quando n o estiver em uso por longos per odos de tempo 12 REL MPAGO Para maio...

Page 49: ...do s o conectados ao conector AUX Certifique se de que a tomada do fone de ouvido esteja totalmente inserida na entrada do fone de ouvido Se o conector n o for inserido completamente o som pode ser in...

Page 50: ...os com luz infravermelha perto do dispositivo poder ocorrer um mau funcionamento DESCRI O DA UNIDADE E CONTROLES DESCRI O DEL MANDO A DISTANCIA ON OFF LIGAR DESLIGAR CHAVES DIGITAIS 1 0 10 SOURCE CD U...

Page 51: ...Prima o bot o SOURCE repetidamente para alternar entre o modo CD TUNER LINE IN BT Para selecionar o modo USB pressione o bot o CD USB no controle remoto para alternar para o modo USB Voc tamb m pode...

Page 52: ...lecionar uma faixa espec fica REPETIDAMENTE OUVIR AS FAIXAS ARQUIVOS Pressione o bot o REPEAT repetidamente para ativar a fun o REPEAT na seguinte ordem 1 REPETIR 1 2 REPETIR O LBUM APENAS MODO MP3 3...

Page 53: ...ivo USB caltere a fonte pressionando o bot o SOURCE DISPOSITIVOS USB COMPAT VEIS Leitor de MP3 Leitor de MP3 tipo Flash Unidade flash USB Dispositivos que suportam USB 2 0 ou USB 1 1 A fun o USB pode...

Page 54: ...mpe periodicamente os discos com uma camur a seca e sem fiapos Nunca use detergentes ou produtos de limpeza abrasivos para limpar o disco Se necess rio use um kit de limpeza de CD Se um disco tiver sa...

Page 55: ...0 60 Hz 0 7A 30 W 0 5 W ESPECIFICA ES T CNICAS ELIMINA O DO FIM DA VIDA TIL DOS PRODUTOS R DIO DE SEC O Faixa de freq ncia LEITOR DE CD Resposta de freq ncia udio S R Sa da de udio udio anal gico Sa d...

Page 56: ...AIWA CO LTD TOKYO JAPAN www eu aiwa com Printed in P R C...

Reviews: