background image

Summary of Contents for NSX-MA845

Page 1: ...For assistance and information call tollfree 1 800 BUY AIWA United States and Puerto Rico i ...

Page 2: ... in clearance from the rear and the top of the unit and 5 cm 2 in from each side Do not place the unit on a bed rug or similar surface that may blockthe ventilation openings Do not installthe unit ina bookcase cabinet orairtight rack where ventilation may be impeded 5 Objects and liquid entry Take care that objects or liquids do not get inside the unit through the ventilation openings 6 Carts and ...

Page 3: ... CODE ELECTRODE SYSTEM NEC ART 250 pART H Clean the unit only as recommended in the Operating Instructions Damaae Reauirino Service Have the units serviced by a qualified service technician if The AC power cord or plug has been damaged Foreign objects or liquid have gotten inside the unit The unit has been exposed to rain or water The unit does not seem to operate normally The unit exhibits a mark...

Page 4: ...right speaker to the main unit Connect the speaker cord withthe plugto the SPEAKERS HIGH FREQ R terminal Connect the speaker cord with the white stripe to the SPEAKERS LOW FREQ SUBWOOFER R O terminal and the black cord to the terminal 2 3 Sound signals from 5 1CH SUB WOOFER INPUT jack are outputted from the built in subweofer in the front speakers Connect the left speaker to the main unit Connect ...

Page 5: ...on the antennas FM feeder antenna Extend this antenna horizontallyin a T shape and fix its ends to the wall AM antenna Positionto find the best possible reception To stand the AM antenna on a surface Fix the claw to the slot Do not leave objects generating magnetism such as credit cards near the speakers as these objects may be damaged Do not bring the FM antenna near metal objects or curtain rail...

Page 6: ... its weioht Inserting batteries Detach the battery cover on the rear of the remote control and insert two R6 size AA batteries R6 AA When to replace the batteries The maximum operational distance between the remote control and the sensor on the main unit should be approximately 5 meters 16 feet When this distance decreases replace the batteries with new ones Using the remote control The instructio...

Page 7: ...is turned on CLOCK il z o SETTING POWER ECONOMIZING MODE Setting this unit to power economizing mode reduces power consumption as follows When the power is turned off air the display lights turn off However if the clock is not set the game Demo page 8 will begin when the power is turned off If CD Tape or Rhythm play function page 9 does not play for 10 minutes or if there is no audio input from an...

Page 8: ...o play the game Demo Press DEMO whether the unit is turned on or off and whether the clock has been set or not With the power switched off the game is silent With the power switched on it is livened up with audio referred to as game sound in the following 1 Press 11_ Three numberson the displaystart to run 2 Press once The number on the left side stops 3 Press twice to stop the remaining two numbe...

Page 9: ...elect the desired one to add to the playback of any music sources thus allowing you to create your original sounds The mix created with the BEAT and BBE functions can be recorded on tape ifyou want to Also the mix is available at LINE OUT The BEAT function is not available when making a tape copy between two tape decks using SYNC DUB To select a rhythm pattern 1 Press BEAT ON OFF to switch the fun...

Page 10: ...omaticafly adjuststhe tempo of the current rhythm pattern so it coincides with the tempo of the music Depending on the music the AUTO mode may not work correctly with songs whose tempo is fuzzy or is varying for example 2 3 _ 0 0 0 c r2_ _ J 2 4 1 You can let the music start playing before performing step 1 or later at the desired moment 1 Press BEAT ON OFF to switch the function on Youwill hearth...

Page 11: ...ic and create your original sounds Your sounds created with SPICE A B can be recorded on tape if O you want to To select sounds w 3 2 The AUTO SPICE function is not available at the same time as the FILL iN function The FILL IN function is not available when making a tape copy between two tape decks using SYNC DUB To use the FILL IN function BEAT ON OFF i i I r_ T 1 r F T _fi O 3 0 FILL IN 1 Press...

Page 12: ... 5 Press SPICE A You ll hear the sound currently stored in A its name appearing in the display Each time you press A the sound is produced If you want to change the sound of A turn MULTI JOG until you find the desired sound If a time out occurs after completing step 2 and before performingstep 3 pressSPICEA again In a similar way check the sound of B and change it if you want to To adjust the leve...

Page 13: ...APHIC EQUALIZER disappears SE n ING A NEW EQUALIZATION CURVE MANUALLY t tJ s l 1 3 2 4 The equalization curve can be customized to suit your preference 1 Press GEQ followed by ENTER within 4 seconds The display will be switched to read GEQ LOW 2 Within 8 seconds turn MULTI JOG to adjust the level of the lowest frequency 3 Press ENTER to let GEQ HIGH show The highest level frequency indicator flash...

Page 14: ...C is turned on The DSP Digital Signal Processor SURROUND sonically changes the acoustic characteristics of any listening rooms allowing you to enjoy the real sound presence of different environments This unit has been programmed with 5 different SURROUND modes SELECTING A PROGRAMMED DSP SURROUND MODE SURROUND fl MULTI JOG Five modes of DSP SURROUND offer the sound presence you d experience in disc...

Page 15: ...e When the AM tuning interval is changed all preset stations are cleared The preset stations have to be set again 1 2 oo oo oo o o TUNER o 0 BAND 30 _ 0 9 10 The unit can store a total of 32 preset stations When a station is stored a preset number is assigned to the station Use the preset number to tune in to a preset station directly 1 PressTUNER BAND to select a band and press DOWN or _ UP to se...

Page 16: ...nly select _ To play from front side to reverse side once only select _ To play both sides repeatedly select _ When tapes are leaded in both decks _ on the display indicates Continuous Play To select a playing deck When tapes are loaded in both decks press TAPE DECK 1 2 first to select a deck The selected deck number is displayed To stop play press I To pause play deck 2 only press II To resume pl...

Page 17: ...e plastic tabs on the cassette tape after recording with a screwdriver or other pointedtool I Ye ecllo n Pe __mab for s de A t L sot J To record on the tape again cover the tab openings with adhesive tape etc On Type 11 tapes take care not to cover the Type 11tape detection slot 120 minute or longer tapes are extremely thin and easily deformed or damaged They are not recommended Take up any slack ...

Page 18: ...pressed the power is also turned on and the disc compartment is opened To check the remaining time During play press CD EDIT CHECK The amount of time remaining until all tracks finish playing is displayed To restore the playing time display repeat the above Selecting a track with the remote control 1 Press DISC DIRECT PLAY and within 3 seconds press 1 2 or 3 to select a disc 2 Press numbered butto...

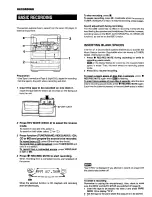
Page 19: ... not function correctly BLANK SKIP PLAY is automatically canceled when performing AI EDIT RECORDING page 22 PROGRAMMED EDIT RECORDING page 23 or recording during PROGRAMMED PLAY page 19 or RANDOM PLAY page 19 Up to 30 tracks can be programmed from any of the inserted discs QQQ 2 3 II Use the remote control 2 1 Press PRGM twice while in stop mode PRGM is displayed PRGM When PRGM is pressed once in ...

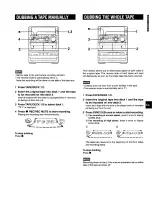
Page 20: ...use mode 2 Press II to resume recording TO insert a blank sDace of less than 4 seconds press REC REC MUTE again while I ff J31 is flashing To insert blank saaces of more than 4 seconds after the deck enters recording pause mode press REC REC MUTE again Each timethe button is pressed a 4 second blankspace isadded 2 Press REV MODE DECK 2 to select the reverse mode Torecordononesideonly selectT Torec...

Page 21: ...he original tape The reverse side of both tapes will start simultaneously as soon as the longer tape has been reversed Dubbing does not start from a point halfway in the tape The reverse mode is automatically set to T_ 1 2 3 Press TAP E DECK 1 2 Insert the original tape into deck 1 and the tape to be recorded on Into deck 2 Inserteachtape withthe side to be played backorrecorded onfacingoutfromthe...

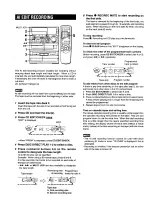
Page 22: ...onds and recording starts When recordingon the front side A ends recording on the back side B starts To stop recording Press I Recording and CD play stop simultaneously To clear the edit program Press CLEAR twice so that EDIT disappears on the display To check the order of the programmed track numbers Before recording press CD EDIT CHECK to select side A or B and press 1 1or _ repeatedly Programme...

Page 23: ...6 Repeat step 5 for the rest of the tracks for side A A track whose playingtime is longer than the remaining time cannot be programmed 7 Press CD EDIT CHECK to select side B and program the tracks for side B After confirming B on the display repeat step 5 Tape side B reverse side _ I _ f 1 i t d 3_ t 8 Press the REC REC MUTE button to start recording The tape is rewound to the beginning of the fro...

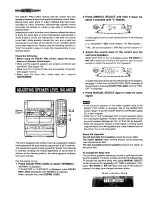
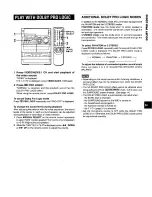
Page 24: ... SELECT and hold it down for about 4 seconds until L flashes A noise signal is sent to each channel in turn in the following sequence _ L Left speaker_ CEN Center speaker_ R Right speaker_ J S L Left surround speaker S R Right surround speaker_ J 3 Adjust the sound level of the center and the surround speakers While CEN S R or S I is displayed press 1 1DOWN or UP to adjust the volume of the center...

Page 25: ...LBY PRO LOGIC mode is displayed cyclically as follows _ NORMAL _ PHANTOM _ 3 STEREO 7 cancel To adjust the balance of connected speaker sound levels Carry out steps 2 to 4 of ADJUSTING SPEAKER LEVEL BALANCE Depending on the sound source and or listening conditions a surround effect may not be obtained even when the DOLBY PRO LOGIC The full DOLBY PRO LOGIC effect cannot be obtained when using softw...

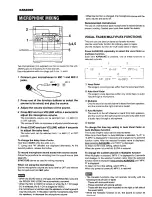
Page 26: ...r for details VOCAL FADER MULTIPLEX FUNCTIONS This unit can use discs or tapes as Karaoke sources Use the vocal fader function for ordinary discs or tapes Use the multiplex function for multi audio discs or tapes Press KARAOKE repeatedly to select the vocal fader or multiplex function Each time KARAOKE is pressed one of these functions is selected cyclically _ i i l t r it 5 r L I _ _ I E_ Vocal F...

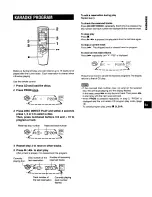
Page 27: ...track again To skip a current track Press IH_ The skipped track is cleared from the program To clear all the reservations Press IH_ repeatedly until K P00 is displayed Press itonce more to cancel the Karaoke programs The display returns to that of CD play If the reserved track number does not exist on the selected disc the unit stops playing and the display flashes In this case press I 11 to skip ...

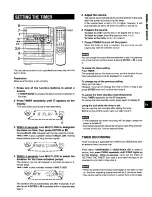
Page 28: ... cannot be displayed during recording To switch to the 24 hour standard Press the CLOCK and then press within 4 seconds Repeat the same procedure to restore the 12 hour standard If the clock display flashes This is caused by a power interruption The current time needs to be reset If power is interrupted for more than approximately 24 hours all settings stored in memory after purchase need to be re...

Page 29: ...urce You can change the source that wasselected in step 1 by pressing one of the function buttons before pressing ENTER or II in step 3 To check the timer setting Press TIMER The selected source the timer on time and the durationfor the timer activated period will be displayedfor 4 seconds To change any of the previous setting Carry out from step 1 However if you do not change the timer on time in...

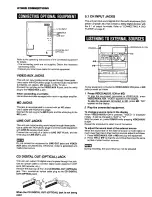
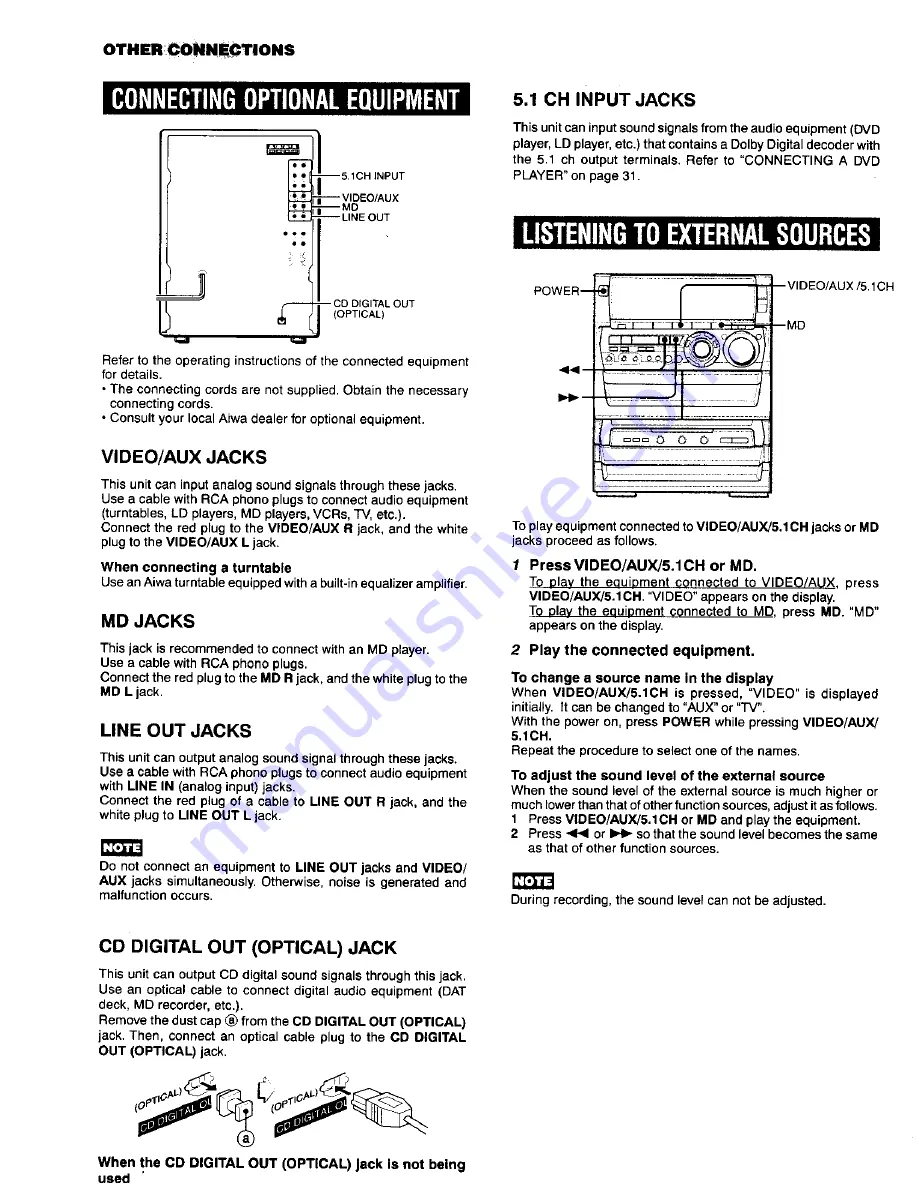
Page 30: ...gh this jack Use an optical cable to connect digital audio equipment DAT deck MD recorder etc Remove the dust cap _ from the CD DIGITAL OUT OPTICAL jack Then connect an optical cable plug to the CD DIGITAL OUT OPTICAL jack When the CD DIGITAL OUT OPTICAL Jack Is not being used 5 1 CH INPUT JACKS This unitcan inputsound signalsfrom the audio equipment DVD player LD player etc that contains a Dolby ...

Page 31: ...hen a DVD player is connected to the 5 1CH INPUT jacks of this unit you can listento DOLBY DIGITAL SURROUND sound which enables you to enjoy theater quality sound inyour home 1 Press VIDEO AUX 5 1CH repeatedly until 5 1 ch IN is displayed 2 Start playing DOLBY DIGITAL SURROUND sound on the DVD player The DOLBY PRO LOGIC BBE and the SURROUND are automaticallycanceled when the 5 1 CH is selected Mak...

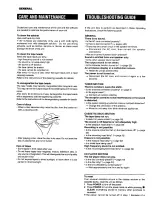
Page 32: ...cord connected properly Is there a bad connection 4 pages 4 5 There may be a short circuit in the speaker terminals Disconnect the AC cord then correct the speaker connections Was an incorrect function button pressed Sound is emitted frOm one speaker only Is the other speaker disconnected The output sound is not stereo Is the Karaoke function turned on page 26 An erroneous display or a malfunction...

Page 33: ... on 1 5W Speaker system SX WNA888 Cabinet type 3 way built in subwoofer magnetic shielded type Speakers Subwoofer 160 mm 6 3 8in cone type Full range 120 mm 4 3 4in cone type Super tweeter 20 mm _3 _6 in ceramic type Impedance 6 ohms 6 ohms Output sound pressure level 87 dB W m Dimensions W x H x D 240 345 x 300 mm 9 1 2 x 13 5 8 x 11 7 8in Weight 5 5 kg 12 Ibs 2 oz Specifications and external app...

Reviews: