
8
En
ENGLISH
8
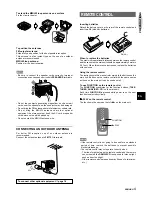
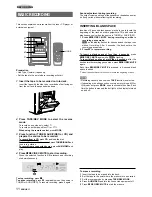
RADIO RECEPTION
BASIC OPERATIONS
s
a
f
,
g
CD
z
OPEN/CLOSE
CD
CD BLANK
SKIP
0-9, +10
DISPLAY
REPEAT
MODE
d
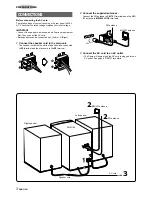
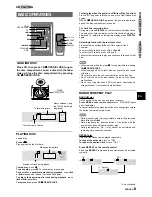
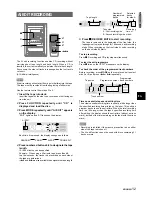
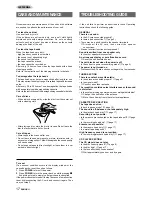
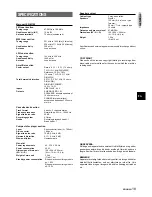
LOADING DISC
Press CD, then press CD
z
z
z
z
z
OPEN/CLOSE to open
the disc compartment. Load a disc with the label
side up. Close the disc compartment by pressing
CD
z
z
z
z
z
OPEN/CLOSE.
z
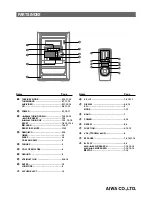
Music calender (only
the first 20 tracks are
Total playing time
displayed)
Total number of tracks
To start play when the power is off (Direct Play Function)
Press CD. The power is turned on and play of the loaded disc
begins.
When CD
z
z
z
z
z
OPEN/CLOSE is pressed, the power is also turned
on and the disc compartment is opened.
To check the remaining time
During play, press DISPLAY on the remote control three times.
The amount of time remaining until all tracks finish playing is
displayed. To restore the playing time display, press DISPLAY
again.
Selecting a track with the remote control
Press numbered buttons 0-9 and +10 to select a track.
Example:
To select the 25th track, press +10, +10 and 5.
To select the 10th track, press +10 and 0.
The selected track starts to play and continues to the end of that
disc.
• When removing the disc, press
s
to stop play before pressing
CD
z
z
z
z
z
OPEN/CLOSE.
• When loading an 8-cm (3-inch) disc, put it onto the inner circle
of the tray.
• Do not place more than one compact disc on the disc tray.
• Do not tilt the unit with disc loaded. Doing so may cause
malfunctions.
• Do not use irregular shape CDs (example: heart-shaped,
octagonal ones). It may result in malfunctions.
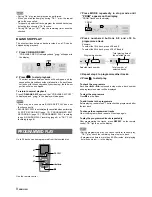
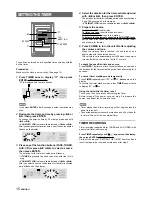
RANDOM/REPEAT PLAY
RANDOM play
All the tracks on the disc can be played randomly.
Press MODE on the remote control once, “RANDOM” lights
up on the display.
To cancel random play, press the button once during play or press
the button four times in stop mode.
• During random play, it is not possible to skip to the previously
played track with
f
.
• During random play, direct selection of the tracks with the
numbered buttons will cancel random play.
• During random play, “
"
1” play cannot be performed and
remaining time cannot be checked.
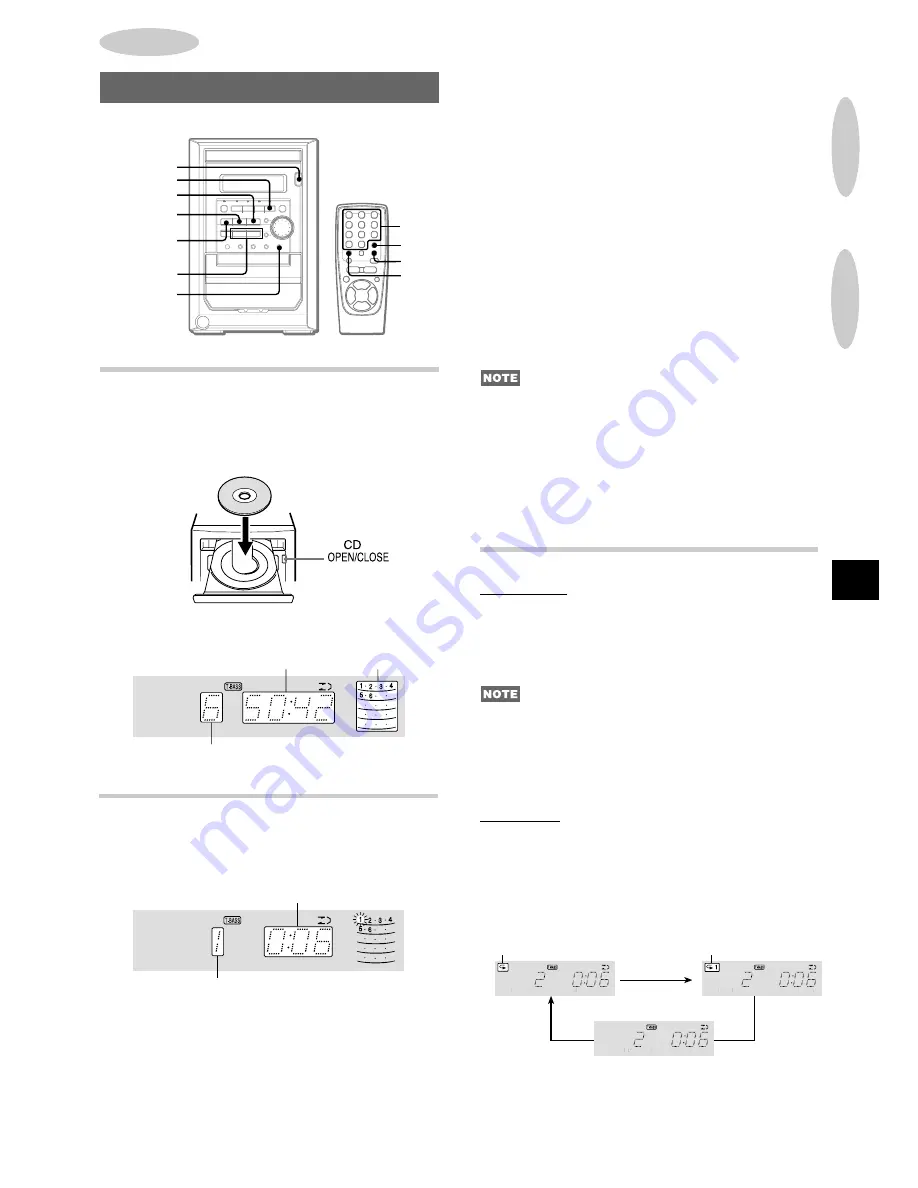
REPEAT play
One or all the tracks can be played repeatedly.
To repeat the entire disc, turn on “
"
”.
To repeat the desired track, turn on “
"
1”.
Press REPEAT on the remote control.
Each time REPEAT is pressed, the operations can be selected
cyclically.
a
b
"
"
1
c
To be continued
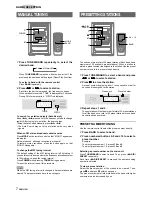
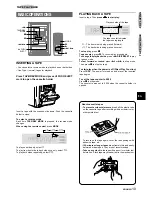
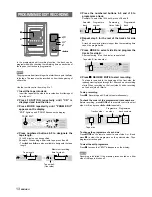
CD PLAYING
CD PLAYING
PLAYING DISC
Load a disc.
Press
d
d
d
d
d
.
Play begins with the first track.
Elapsed playing time
Number of track being played
To stop play, press
s
.
To pause play, press
a
. To resume play, press again.
To search for a particular point during playback, keep
f
or
g
pressed and release it at the desired point.
To skip to the beginning of a track during playback, press
f
or
g
repeatedly.
To remove disc, press CD
z
z
z
z
z
OPEN/CLOSE.
(Cancel)


