28
Uploading and
Installing the
Software to the
FS1
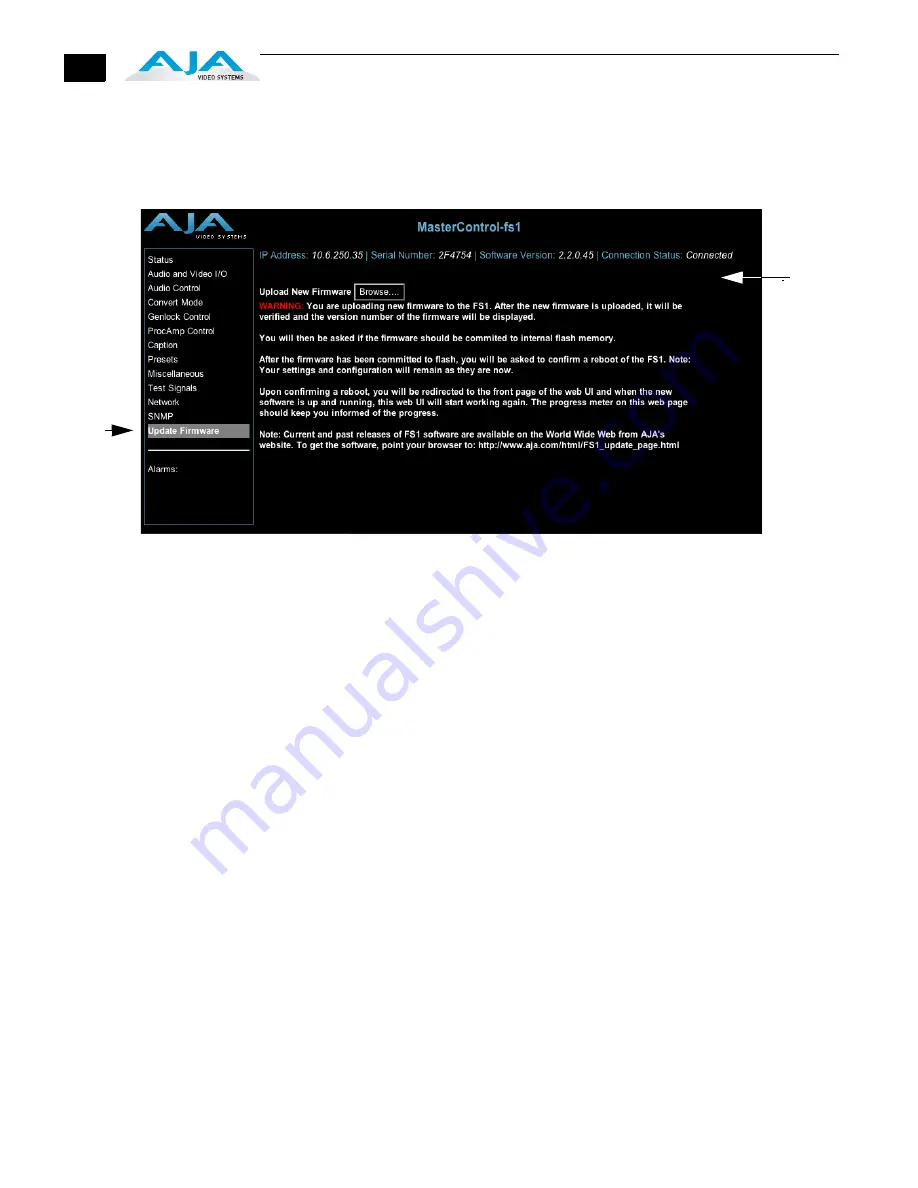
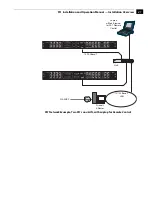
Uploading and installing the software update requires a PC or Mac that can “see” the
FS1 via its ethernet connection. Follow this procedure to install the software:
1.
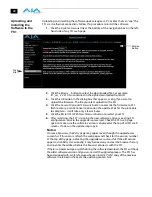
Click the
Update Firmware
link at the bottom of the navigation box on the left-
hand side of any FS1 web page.
2.
Click the
Browse...
button to select the downloaded file. For example:
fs1_ver_2.2.0.10.bin
contained in the zipfile downloaded from AJA.
3.
Click the
OK
button in the dialog box that appears, asking if you want to
upload the firmware. The file you select uploads to the FS1.
4.
Click the
Commit Uploaded Firmware
button to commit the firmware to FS1
flash memory, or click Cancel to abandon the update. Wait for the procedure
to complete—it will take only a few minutes.
5.
Click the
Restart FS1 With New Firmware
button to restart your FS1.
6.
After restarting, the FS1 is running the new software and your existing FS1
configuration prior to the upgrade is preserved. Check the FS1 web page
again to make sure the software version is displayed at the top of all FS1 web
screens. If not, run the update steps again.
Notes:
On some browsers, the
Retry
page may appear even though the upgrade was
successful. If this occurs, refresh the web page and check for the version number
at the top of the page, indicating the upgrade was successful. If the old version
appears, click
Retry
. Occasionally, it may be necessary to clear the browser history
and re-enter the address before the browser connects with the FS1.
If there is a power outage or glitch during the software download, the FS1 will boot
the older software version and you can restart the upgrade process. The FS1 has
been designed with a safety feature where an internal “safe” copy of the previous
software is retained in the event the updating process fails.
Browse
Button
Click
First


