background image

Caution: 

There is a danger of explosion if batteries are replaced incorrectly. 

Replace batteries with the same type and same brand only. 

If the unit will not be used for a long period of the time, slide the

 FUNCTION

 switch to 

OFF


position and remove all batteries from the main unit. 


POWER CONNECTION & OPERATION   


Connecting AC Power 

The unit is designed to operate from mains supply of AC 230V~50Hz. Connect the small end of AC cord to 

the socket at the back of the main unit and insert the plug of AC cord into standard AC wall outlet. 

When the unit is intended for being unused for a long period of the time. Please slide the

 FUNCTION


switch to 

OFF

 position to turn off the unit and unplug the power cord from the AC wall outlet. 


Battery Operation  


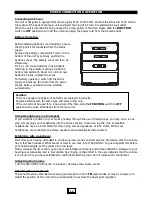
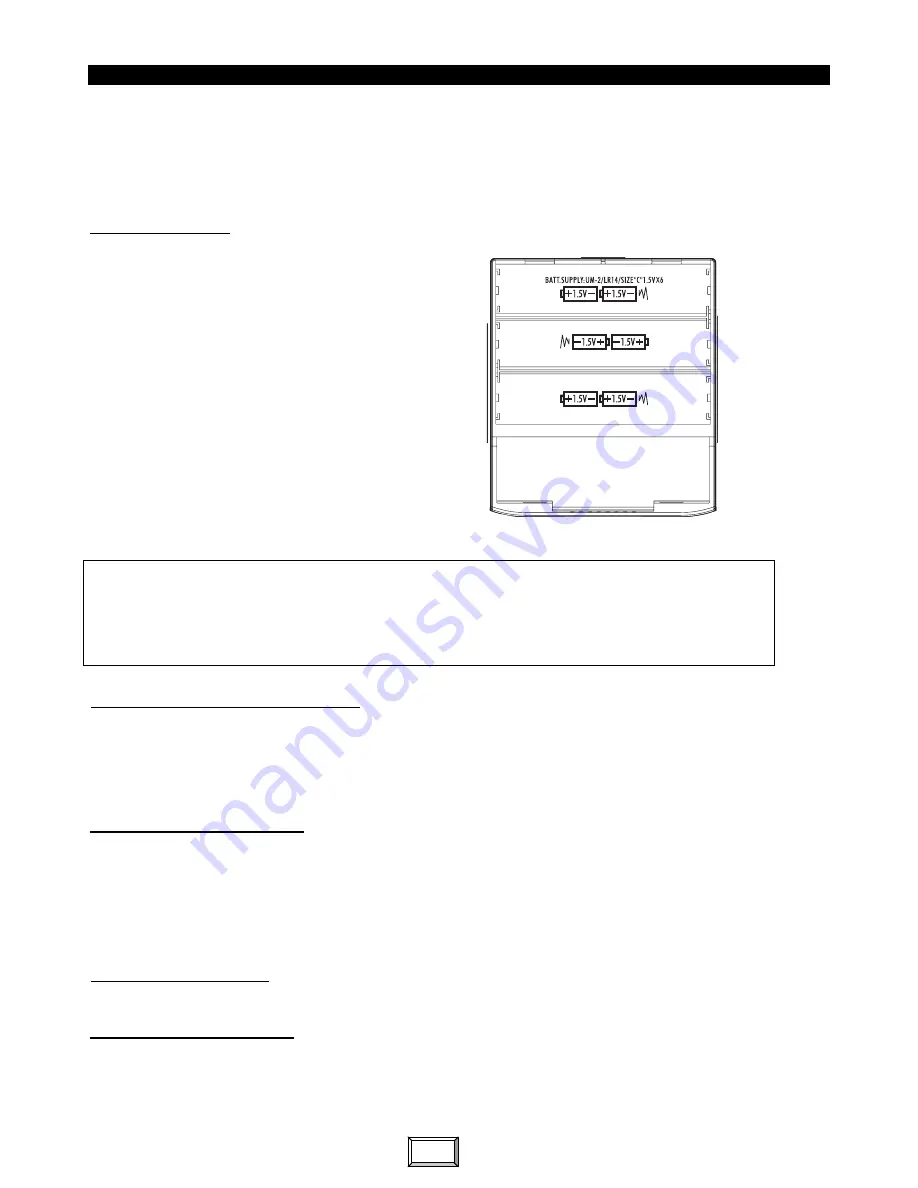
Before installing batteries (not included), ensure 

that the unit is disconnected from the mains 

supply. 

Remove the battery compartment cover on the 

bottom of the unit by carefully pushing the 

batteries cover. The battery cover can then be 

lifted away. 

Fit 6 x 1 .5V C-size batteries (not included), 

referring to the polarity markings inside the 

battery compartment. Never mix old and new 

batteries. Finally, replace the cover. 

For battery operation, switch off the mains 

supply and remove the cable from the power 

socket, battery operation will be selected 

automatically. 


Using Headphones (not included)


If you would like to listen to your music privately through the use of headphones, you may do so in one 

step. Simply plug your headphones into the phones socket, located on top the unit. Compatible 
headphones have a 3.5mm diameter stereo plug and an impedance of 8-32 Ohms. When your 
headphones are connected, the stereo speakers are automatically disconnected.


Establish a safe sound level 

Over time your hearing will adapt to continuous loud sounds and will give the impression that the volume 

has in fact been reduced. What seems normal to you may in fact be harmful. To guard against this before 

your hearing adapts, set the volume to a low level. 

Slowly increase the level until you can hear comfortably and clearly and without distortion. Damage to your 

hearing is accumulative and is irreversible. Any ringing or discomfort in the ears indicates that the volume 

is too loud. Once you have established a comfortable listening level, do not increase the sound level.  


Adjusting the Volume


Turn the VOLUME Control knob to increase / decrease the volume sound.


Adjusting the rod antenna  

The aerial should be extended to ensure good reception in both 

FM 

radio modes. It may be necessary to 

adjust the position of the unit and /or aerial position to achieve the best signal reception.  


12 

Summary of Contents for AB-50

Page 1: ...L MANUAL DE INSTRUCCIONES AB 50 Lire attentivement la notice avant d utiliser l appareil Before operating this product please read user manual completely Lea atentamente el manual del usuario antes de...

Page 2: ...LASER Cet appareil utilise un rayon laser il ne doit tre r par que par un personnel d entretien qualifi DANGER RAYON LASER INVISIBLE LORSQUE L OUVERTURE OU L ENCLENCHEMENT EST D FECTUEUX VITEZ L EXPOS...

Page 3: ...sur la position OFF et retirez toutes les piles de l unit principale Utilisation d un casque non fourni Vous pourrez couter votre musique en priv gr ce l utilisation d couteurs Il suffit de brancher...

Page 4: ...s disques dans leur tui lorsque vous ne les utilisez pas 6 Une exposition prolong e au soleil des temp ratures lev es et l humidit ou la poussi re risquent d endommager le disque 7 Il est interdit d c...

Page 5: ...SELECTEUR DE GAMMES D ONDES FM ST FM AM 15 SELECTEUR DE FONCTIONS 16 BOUTON VOLUME 17 ANTENNE FM 18 CORDON D ALIMENTATION 19 COMPARTIMENT PILES 20 INDICATEUR LECTURE ALEATOIRE 21 INDICATEUR MP3 22 IND...

Page 6: ...ercle placez le commutateur de FONCTION sur la position CD s affiche pendant quelques secondes et le nombre total de pistes s affiche sur l cran LCD 4 Appuyez une fois sur le bouton PLAY PAUSE pour me...

Page 7: ...i re dans la piste en cours de lecture Lorsque les touches SKIP sont rel ch es la vitesse normale de lecture reprend imm diatement 6 Pour interrompre temporairement la lecture appuyez sur la touche PL...

Page 8: ...les indicateurs REP REP ALL RANDOM ALBUM disparaissent Remarque La fonction REPEAT ALBUM n est disponible uniquement en mode MP3 FONCTION PROGRAMMATION L appareil peut programmer jusqu 20 pistes maxim...

Page 9: ...e lectrostatique le produit peut pr senter des dysfonctionnements Eteignez l appareil d branchez la prise secteur et rebranchez le apr s quelques secondes Mauvaise r ception de la radio Le signal radi...

Page 10: ...105 POIDS NU 1 215 kg SECTION RADIO Gammes d ondes FM ST FM AM Gammes de fr quence AM 520 1620 KHz FM 87 5 108 MHz SECTION CD Syst me de lecture Compact disque audio digital Lecteur compatible MP3 Pl...

Page 11: ...etraitement de ce produit Ainsi lors de la fin de vie de cet appareil celui ci ne doit pas tre jet avec les d chets municipaux non tri s Les appareils lectriques et lectroniques doivent tre trait s s...

Page 12: ...all not be exposed to dripping or splashing and that no objects filled with liquids such as vases shall be placed on the apparatus 5 Do not place the product in closed bookcases or racks without prope...

Page 13: ...supply and remove the cable from the power socket battery operation will be selected automatically Using Headphones not included If you would like to listen to your music privately through the use of...

Page 14: ...y not play properly 5 Discs should be stored in their cases after each use to avoid damage 6 Do not expose discs to direct sunlight high humidity high temperatures or dust etc Prolonged exposure or ex...

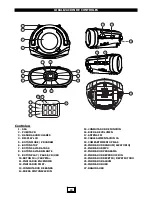
Page 15: ...11 POWER INDICATOR 12 FM ST INDICATOR 13 TUNING KNOB 14 BAND SWITCH 15 FUNCTION SWITCH 16 VOLUME KNOB 17 FM ANTENNA 18 AC POWER CORD 19 BATTERY COMPARTMENT 20 RANDOM INDICATOR 21 MP3 INDICATOR 22 PRO...

Page 16: ...the CD door Insert disc into the disc compartment with the title side upwards 3 Close the CD door select the FUNCTION switch to CD position is displayed for few seconds and total number of tracks will...

Page 17: ...e a specific passage 5 During USB playback press the PLAY PAUSE button to pause USB playback and press again to resume 6 During playback press the 10 FOLDER button to skip up by 10 tracks if destinati...

Page 18: ...shows on LCD display The unit will play all tracks inside the desired folder album repeatedly 2 To cancel the setting press the MODE button continuously until the REP REP ALL RANDOM ALBUM indicators d...

Page 19: ...ence caused by the vicinity of electrical equipment like TVs video recorders computer thermostats fluorescent lamps TL engines etc Aim the aerial for best reception Fully extend the telescopic antenna...

Page 20: ...t the end of its lifetime this product shall not be disposed with other non recycled waste Used electrical and electronic equipment must be treated separately and in accordance with legislation that r...

Page 21: ...tintos de los especificados aqu pueden provocar exposici n a radiaci n peligrosa SEGURIDAD L SER este producto emplea un l ser s lo personal cualificado deber a intentar repararlo PELIGRO Invisible Ra...

Page 22: ...ilas para evitar da os Uso de Auriculares no incluidos Si le gustara escuchar m sica de forma privada usando unos auriculares deber a hacer el siguiente paso Simplemente conecte los altavoces en la co...

Page 23: ...cos deben guardarse en sus cajas despu s de cada uso para evitar da os 6 No exponga los discos a la luz directa del sol humedad alta altas temperaturas o polvo etc La prolongada exposici n o a tempera...

Page 24: ...FM ST 13 CONMUTADOR DE BANDA 14 RUEDA SINTONIZACI N 15 CONMUTADOR DE FUNCI N 16 RUEDA DE VOLUMEN 17 ANTENA FM 18 CABLE ALIMENTACI N CA 19 COMPARTIMIENTO PILAS 20 INDICADOR RANDOM ALEATORIO 21 INDICAD...

Page 25: ...uerta del Cd Inserte el disco en el compartimiento con el lado del t tulo hacia arriba 3 Cierre la puerta del CD seleccione el conmutador FUNCTION a la posici n CD se muestra unos segundos y el n mero...

Page 26: ...ot n PLAY PAUSE para pausar la reproducci n del USB y presione de nuevo para regresar 6 Durante la reproducci n presione el bot n 10 FOLDER CARPETA para saltar hacia delante 10 pistas si la pista de d...

Page 27: ...el indicador RANDOM La unidad reproducir todas las pistas del disco aleatoriamente 2 Para cancelar el ajuste presione el bot n MODE continuadamente para hasta que el indicador REP REP ALL RANDOM ALBUM...

Page 28: ...por la proximidad de equipos el ctricos como TVs video grabadores ordenadores termostatos l mparas fluorescentes m quinas etc Colocar la antena para la mejor recepci n Extienda completamente la anten...

Page 29: ...de ese producto Por lo tanto en el final de su vida til este producto no puede ser depositado junto con otros desechos no reciclables Los equipos el ctricos o electr nicos usados tienen que ser tratad...

Page 30: ...www akai france com AB 50...

Reviews: